Stamina Dragonknight Solo Build - ESO Guide
Stamina Dragonknight (StamDK) Solo Build for ESO, carried by ![]() Soul of Flame, a reworked Deep Breath that restores resources based on your missing resources. It's completely broken and lets you use armor potions and Medium armor with absolutely no sustain issues. On top of that,
Soul of Flame, a reworked Deep Breath that restores resources based on your missing resources. It's completely broken and lets you use armor potions and Medium armor with absolutely no sustain issues. On top of that, ![]() Magma Fist lets the build squeeze out more damage in a full offensive setup than the Magicka Dragonknight.
Magma Fist lets the build squeeze out more damage in a full offensive setup than the Magicka Dragonknight.
Both Stamina and Magicka Dragonknight use ![]() Soul of Flame, but Magicka Dragonknight has an easier time keeping it up since the skill costs Magicka, which makes it better for the most difficult content, but Stamina Dragonknight does more damage and is still one of the strongest solo builds in ESO Update 49.
Soul of Flame, but Magicka Dragonknight has an easier time keeping it up since the skill costs Magicka, which makes it better for the most difficult content, but Stamina Dragonknight does more damage and is still one of the strongest solo builds in ESO Update 49.
Capable of soloing every Veteran dungeon that doesn't have a mechanic requiring multiple people, including Veteran Hard Mode Unhallowed Grave and Veteran Earthen Root Enclave. Parses 74.8k in the most offensive setup, and only drops to 68.7k in a defensive setup that hits the 33k armor cap.
Skill Setups
Base Setup
A base setup that will work for most situations and which should be your starting point when making situational setups
| Front Bar | Back Bar |
|---|---|
| Slot 1: Magma Fist | Slot 1: Shatterspike Mantle |
| Slot 2: Molten Whip | Slot 2: Ulfsild's Contingency |
| Slot 3: Disintegrating Dragonfire | Slot 3: Elemental Susceptibility |
| Slot 4: Soul of Flame | Slot 4: Elemental Blockade |
| Slot 5: Incinerate | Slot 5: Igneous Weapons |
| Ultimate: Take Flight | Ultimate: Standard of Might |
 Magma Fist - a spammable which applies a stack of Heat Shock for 7 seconds which increases enemies' damage taken by 66, stacking up to 3 times. If your enemy was already at maximum stacks of Heat Shock it'll instead cause next cast of Magma Fist to do 66% more damage, up to once every 6 seconds
 Molten Whip - a spammable which in this build we'll use only as a spender. It grants you a stack of Seething Fury whenever you use another Dragonknight ability. Seething Fury lasts 10 seconds, increases your damage done by 5% and increases damage of your next
  Molten Whip by 33% per stack, stacking up to 3 times. The damage done buff does not disappear when you use the empowered whip.
 Disintegrating Dragonfire - deals direct damage in a cone in front of you and applies a 10 second DoT to all enemies hit and debuffs them with Major Breach, reducing their armor by 5948. This is your AoE spammable.
 Soul of Flame - interrupts enemies around you, restores 15% missing Stamina and Magicka every 2 seconds over 4 seconds (ticks 3 times) and deals damage in an AoE at the end
 Incinerate - an ability which releases a fiery wave around you on cast and then every 5 seconds for 15 seconds. It has increased base chance to proc Burning status effect. Having it slotted passively grants you Major Savagery and Prophecy.
 Take Flight - a cheap ultimate which deals damage, stuns enemies and grants you a 20% Damage Done against Monsters buff for 15 seconds
 Shatterspike Mantle - your source of Major Resolve which also applies a 20 second DoT to enemies around you and grants you a buff which adds 100 damage to all of your damage ticks
 Ulfsild's Contingency (
 Flame,
  Lingering Torment,
  Resolve) - a 22 second DoT which will also grant you Minor Resolve, increasing your armor by 2974.
 Elemental Susceptibility - an extremely loaded ability that does a multitude of things. It's completely free to cast so it'll help you sustain. It applies Major Breach, which reduces enemies' armor by 5948 which is a massive damage increase. It also applies Burning, Chilled and Concussed status effects at the beginning and then every 7.5 seconds. All of these Status Effects deal decent damage, but Concussed will also apply Minor Vulnerability for 4 seconds, increasing enemies' damage taken by 5%. Chilled will also apply Minor Maim for 4 seconds, reducing enemies' damage done by 5% and it will also apply Minor Brittle for 4 seconds if you were on your Ice Staff bar while the Chilled effect procced, and Ice Staff will be part of the Instanced gear setup. Minor Brittle increase Critical Damage taken by 10%. The Chilled proc will also synergise with our
  Elemental Blockade
 Elemental Blockade - this ability will constantly apply your
  Weapon Damage enchantment. If it's the Ice version, it will also constantly apply Minor Breach to enemies who are Chilled, and they'll be Chilled thanks to
  Elemental Susceptibility
 Igneous Weapons - a 60 second buff which grants you Major Brutality and Sorcery and causes your Light Attacks to deal additional damage up to once every 2 seconds.
 Standard of Might - an ultimate which calls down a standard which increases your Weapon and Spell Damage by 600, increases your damage done by 15% and reduces your damage taken by 25%. It's always a DPS decrease compared to
  Take Flight, but it can be used to survive difficult mechanics thanks to the 25% damage reduction
![]() Ulfsild's Contingency is the first skill that has to go if you need to slot something situational, unless the situational skill specifically says it's replacing something else. If it's a difficult fight where you need all the mitigation you can get, then the skill that has to go is
Ulfsild's Contingency is the first skill that has to go if you need to slot something situational, unless the situational skill specifically says it's replacing something else. If it's a difficult fight where you need all the mitigation you can get, then the skill that has to go is ![]() Disintegrating Dragonfire, or even
Disintegrating Dragonfire, or even ![]() Magma Fist if you need a lot of AoE damage for that fight.
Magma Fist if you need a lot of AoE damage for that fight.
 Resolving Vigor - use it for fights where there's a lot of damage happening in a short burst.
 Searing Claw - a replacement for
  Ulfsild's Contingency which does more damage but doesn't provide the armor buff
 Silver Leash - a chain ability which you can use to stack enemies
 Chains of Devastation - a gap closer which can be useful in fights where you have to move around a lot
 Soul Burst (
 Pull,
Pull,  Class Mastery,
  Breach) - an 8 meter AoE pull with a 2 second delay
 Ulfsild's Contingency (
 Flame,
  Gladiator's Tenacity,
  Resolve) - trades the DoT for mitigation, use in fights where you need more damage mitigation.
 Revealing Flare - passively grants Major Protection, reducing your damage taken by 10%.
 Quick Cloak - provides Major Evasion, reducing AoE damage taken by 20%.
 Burning Embers - heals you on cast and every time the DoT ticks. Use if you need more healing.
 Protect the Brood - useful in fights with lots of projectile damage, also provides Minor Protection for 20 seconds.
 Fleetstep Wings - use in fights where you need to remove snares.
 Precognition - an ultimate that breaks you out of some otherwise unavoidable stuns.
 Corrosive Armor - limits any damage you take to 6% of your max HP for 10 seconds.
 Volcanic Ward - a decent damage shield which also reduce the next instance of damage you take by 10% and heals you after the shield ends. It has a similar use case to
  Resolving Vigor, but it costs Magicka instead of Stamina, and damage shields will perform better than healing in some fights, where you need to prepare for a bigger hit
Priority List
This is just a list of priorities. Simply recast abilities when they run out and follow this list of priorities when there are multiple things to refresh.
- 1.
 Magma Fist if you're at 3 stacks and there's less than 2 seconds remaining
 - 2.
 Elemental Susceptibility
 - 3.
 Igneous Weapons
 - 4.
 Elemental Blockade
 - 5.
 Molten Whip if it's at 3 stacks
 - 6.
 Take Flight
 - 6.
 Incinerate
 - 7.
 Shatterspike Mantle
 - 8.
 Disintegrating Dragonfire
 - 9.
 Ulfsild's Contingency
 - 10.
 Magma Fist if it's not at 3 stacks
 - 11.
 Soul of Flame
 - 12.
 Magma Fist
Pre-buff
These abilities can be pre-cast before entering combat.
Final Setups
A few examples of final setups you could end up with after applying the situational skills to the base setup
A setup for trash packs
| Front Bar | Back Bar |
|---|---|
| Slot 1: Magma Fist | Slot 1: Shatterspike Mantle |
| Slot 2: Molten Whip | Slot 2: Incinerate |
| Slot 3: Disintegrating Dragonfire | Slot 3: Soul Burst |
| Slot 4: Soul of Flame | Slot 4: Elemental Blockade |
| Slot 5: Silver Leash | Slot 5: Igneous Weapons |
| Ultimate: Take Flight | Ultimate: Standard of Might |
What Changes
 Silver Leash replaces
  Ulfsild's Contingency and swaps places with
  Incinerate
 Soul Burst replaces
  Elemental Susceptibility
A setup which trades survivability for more damage
| Front Bar | Back Bar |
|---|---|
| Slot 1: Magma Fist | Slot 1: Shatterspike Mantle |
| Slot 2: Molten Whip | Slot 2: Incinerate |
| Slot 3: Disintegrating Dragonfire | Slot 3: Elemental Susceptibility |
| Slot 4: Soul of Flame | Slot 4: Elemental Blockade |
| Slot 5: Searing Claw | Slot 5: Igneous Weapons |
| Ultimate: Take Flight | Ultimate: Standard of Might |
What Changes
 Searing Claw replaces
  Ulfsild's Contingency and swaps places with
  Incinerate
A setup which trades damage for more survivability. Use it against harder boss fights or if you simply want a tankier build and don't mind fights taking longer
| Front Bar | Back Bar |
|---|---|
| Slot 1: Magma Fist | Slot 1: Shatterspike Mantle |
| Slot 2: Molten Whip | Slot 2: Ulfsild's Contingency |
| Slot 3: Revealing Flare | Slot 3: Elemental Susceptibility |
| Slot 4: Soul of Flame | Slot 4: Elemental Blockade |
| Slot 5: Incinerate | Slot 5: Igneous Weapons |
| Ultimate: Take Flight | Ultimate: Standard of Might |
What Changes
 Revealing Flare replaces
  Disintegrating Dragonfire
Passives
The only passive you specifically have to skip is ![]() Tri Focus, but it's only important when using an Ice Staff
Tri Focus, but it's only important when using an Ice Staff
Some trees are only needed when using situational skills, for example Psijic Order provides nothing without ![]() Precognition
Precognition
![]() Class - Ardent Flame
Class - Ardent Flame
![]() Combustion - High Priority
Combustion - High Priority
![]() Traumatic Burns - High Priority
Traumatic Burns - High Priority
![]() Fan the Flames - High Priority
Fan the Flames - High Priority
![]() A Soul Ablaze - High Priority
A Soul Ablaze - High Priority
![]() Class - Draconic Power
Class - Draconic Power
![]() Burnished Scales - High Priority
Burnished Scales - High Priority
![]() World in Ruin - High Priority
World in Ruin - High Priority
![]() Elder Dragon - High Priority
Elder Dragon - High Priority
![]() The Storm Voice - High Priority
The Storm Voice - High Priority
![]() Class - Earthen Heart
Class - Earthen Heart
![]() Heart of Stone - High Priority
Heart of Stone - High Priority
![]() Landslide - High Priority
Landslide - High Priority
![]() Blessing at the Peak - High Priority
Blessing at the Peak - High Priority
![]() Mountain Giant - High Priority
Mountain Giant - High Priority
![]() Weapon - Dual Wield
Weapon - Dual Wield
![]() Slaughter - High Priority
Slaughter - High Priority
![]() Dual Wield Expert - High Priority
Dual Wield Expert - High Priority
![]() Controlled Fury - High Priority
Controlled Fury - High Priority
![]() Ruffian - Medium Priority
Ruffian - Medium Priority
![]() Twin Blade and Blunt - High Priority
Twin Blade and Blunt - High Priority
![]() Weapon - Destruction Staff
Weapon - Destruction Staff
![]() Tri Focus - Do Not Unlock (only when using Ice Staff)
Tri Focus - Do Not Unlock (only when using Ice Staff)
![]() Penetrating Magic - Low Priority
Penetrating Magic - Low Priority
![]() Elemental Force - Medium Priority
Elemental Force - Medium Priority
![]() Ancient Knowledge - Medium Priority
Ancient Knowledge - Medium Priority
![]() Destruction Expert - Low Priority
Destruction Expert - Low Priority
![]() Armor - Light Armor
Armor - Light Armor
![]() Grace - Low Priority
Grace - Low Priority
![]() Evocation - High Priority
Evocation - High Priority
![]() Spell Warding - High Priority
Spell Warding - High Priority
![]() Prodigy - High Priority
Prodigy - High Priority
![]() Concentration - High Priority
Concentration - High Priority
![]() Armor - Medium Armor
Armor - Medium Armor
![]() Dexterity - High Priority
Dexterity - High Priority
![]() Wind Walker - High Priority
Wind Walker - High Priority
![]() Improved Sneak - Not needed
Improved Sneak - Not needed
![]() Agility - High Priority
Agility - High Priority
![]() Athletics - High Priority
Athletics - High Priority
![]() Guild - Fighters Guild
Guild - Fighters Guild
![]() Intimidating Presence - Medium Priority
Intimidating Presence - Medium Priority
![]() Slayer - Medium Priority
Slayer - Medium Priority
![]() Banish the Wicked - Medium Priority
Banish the Wicked - Medium Priority
![]() Skilled Tracker - Low Priority
Skilled Tracker - Low Priority
![]() Bounty Hunter - Not needed
Bounty Hunter - Not needed
![]() Guild - Mages Guild
Guild - Mages Guild
![]() Persuasive Will - Not needed
Persuasive Will - Not needed
![]() Mage Adept - High Priority
Mage Adept - High Priority
![]() Everlasting Magic - High Priority
Everlasting Magic - High Priority
![]() Magicka Controller - Low Priority
Magicka Controller - Low Priority
![]() Might of the Guild - Low Priority
Might of the Guild - Low Priority
![]() Guild - Psijic Order
Guild - Psijic Order
![]() Clairvoyance - Low Priority
Clairvoyance - Low Priority
![]() Spell Orb - Not needed
Spell Orb - Not needed
![]() Concentrated Barrier - Low Priority
Concentrated Barrier - Low Priority
![]() Deliberation - Not needed
Deliberation - Not needed
![]() Alliance War - Support
Alliance War - Support
![]() Magicka Aid - Medium Priority
Magicka Aid - Medium Priority
![]() Combat Medic - Not needed
Combat Medic - Not needed
![]() Battle Resurrection - Not needed
Battle Resurrection - Not needed
![]() Race - Your Race
Race - Your Race
Get all of your racials, no matter which race you are
![]() Craft - Alchemy
Craft - Alchemy
![]() Solvent Proficiency - Not needed
Solvent Proficiency - Not needed
![]() Keen Eye: Reagents - Not needed
Keen Eye: Reagents - Not needed
![]() Medicinal Use - High Priority
Medicinal Use - High Priority
![]() Chemistry - Not needed
Chemistry - Not needed
![]() Laboratory Use - Not needed
Laboratory Use - Not needed
![]() Snakeblood - Not needed
Snakeblood - Not needed
Gear
Base Setup
A base setup that is meant for Overland content and will work for most situations. It should be your starting point when making situational setups
Switching gear for trash packs isn't worth it unless you're using gear-swap addons
| Gear Slot | Set | Weight/Type | Trait | Enchantment |
|---|---|---|---|---|
 Head Head |
Medium | |||
 Shoulders Shoulders |
Medium | |||
 Chest Chest |
Medium | |||
 Hands Hands |
Medium | |||
 Belt Belt |
Light | |||
 Legs Legs |
Medium | |||
 Boots Boots |
Medium | |||
 Necklace Necklace |
Jewelry | |||
 Ring Ring |
Jewelry | |||
 Ring Ring |
Jewelry | |||
 Frontbar Main Hand Frontbar Main Hand |
Dagger | |||
 Frontbar Off Hand Frontbar Off Hand |
Dagger | |||
 Backbar Main Hand Backbar Main Hand |
Inferno Staff |
Gear that can be stronger than the setup from the table in specific situations or when specific circumstances are present
 Sul-Xan's Torment - the best set for trash packs and for bosses that regularly spawn smaller adds
Gear that is easier to obtain and can be used while you work towards the best gear
Crafted
All of these are tradable and can be bought from other players
Only listing a single alternative because one of the sets from Base Setup, ![]() Order's Wrath, is also a crafted set
Order's Wrath, is also a crafted set
No Overland, Dungeon or Trial gear is listed as the Crafted options are superior.
Additional tips
- If your Magicka sustain is good enough you can replace
 Absorb Magicka enchant with
  Poison. It should be good enough if you decide to use Heroism potions instead of Armor potions, use Light Armor instead of Medium Armor or if you're getting additional Magicka sustain from your racials
Final Setups
A few examples of final setups you could end up with after applying situational rules to the base setup
This is the crafted gear setup you can start with
| Gear Slot | Set | Weight/Type | Trait | Enchantment |
|---|---|---|---|---|
 Head Head |
Medium | |||
 Shoulders Shoulders |
Medium | |||
 Chest Chest |
Medium | |||
 Hands Hands |
Medium | |||
 Belt Belt |
Light | |||
 Legs Legs |
Medium | |||
 Boots Boots |
Medium | |||
 Necklace Necklace |
Jewelry | |||
 Ring Ring |
Jewelry | |||
 Ring Ring |
Jewelry | |||
 Frontbar Main Hand Frontbar Main Hand |
Dagger | |||
 Frontbar Off Hand Frontbar Off Hand |
Dagger | |||
 Backbar Main Hand Backbar Main Hand |
Inferno Staff |
The setup in the table uses only crafted gear, but if you already own parts of the Regular setup like ![]() Ring of the Pale Order you can start using them immediately
Ring of the Pale Order you can start using them immediately
This is a setup you should use in Instanced content (Arenas and Dungeons). Enemies in instanced content have 18,200 armor, while Overland enemies have only 9,100, so this setup will need much more penetration.
Medium Armor ends up dealing less damage than Light Armor in Instanced content since Light Armor provides penetration through ![]() Concentration, but the difference is small (2%) and Medium Armor provides more armor, improves Stamina sustain, reduces Dodge Roll cost and doesn't increase your block cost the way Light Armor does through its
Concentration, but the difference is small (2%) and Medium Armor provides more armor, improves Stamina sustain, reduces Dodge Roll cost and doesn't increase your block cost the way Light Armor does through its ![]() penalties.
penalties.
| Gear Slot | Set | Weight/Type | Trait | Enchantment |
|---|---|---|---|---|
 Head Head |
Light | |||
 Shoulders Shoulders |
Medium | |||
 Chest Chest |
Medium | |||
 Hands Hands |
Medium | |||
 Belt Belt |
Medium | |||
 Legs Legs |
Medium | |||
 Boots Boots |
Medium | |||
 Necklace Necklace |
Jewelry | |||
 Ring Ring |
Jewelry | |||
 Ring Ring |
Jewelry | |||
 Frontbar Main Hand Frontbar Main Hand |
Dagger | |||
 Frontbar Off Hand Frontbar Off Hand |
Dagger | |||
 Backbar Main Hand Backbar Main Hand |
Ice Staff |
Explanation
 Ansuul's Torment replaces
  Order's Wrath, because in Instanced content you can benefit from the Minor Slayer buff, which makes it better
- Inferno Staff is replaced with Ice Staff, because Ice
 Elemental Blockade will improve uptime of the Minor Breach debuff
Additional Info
This is a setup you should use in Instanced content (Arenas and Dungeons). Enemies in instanced content have 18,200 armor, while Overland enemies have only 9,100, so this setup will need much more penetration.
Light Armor allows you to continue using  The Thief Mundus even in Instanced content, thanks to
 ![]() Concentration passive. It ends up dealing more damage than the Medium Armor Instanced setup, but it has worse survivability.
Concentration passive. It ends up dealing more damage than the Medium Armor Instanced setup, but it has worse survivability.
| Gear Slot | Set | Weight/Type | Trait | Enchantment |
|---|---|---|---|---|
 Head Head |
Light | |||
 Shoulders Shoulders |
Light | |||
 Chest Chest |
Medium | |||
 Hands Hands |
Light | |||
 Belt Belt |
Light | |||
 Legs Legs |
Light | |||
 Boots Boots |
Light | |||
 Necklace Necklace |
Jewelry | |||
 Ring Ring |
Jewelry | |||
 Ring Ring |
Jewelry | |||
 Frontbar Main Hand Frontbar Main Hand |
Dagger | |||
 Frontbar Off Hand Frontbar Off Hand |
Dagger | |||
 Backbar Main Hand Backbar Main Hand |
Ice Staff |
Explanation
 Whorl of the Depths replaces
  Order's Wrath, because in Instanced content you can benefit from the Minor Slayer buff, which makes it better
- 1-piece
 Slimecraw is replaced with 1-piece
  Valkyn Skoria
 - Inferno Staff is replaced with Ice Staff, because Ice
 Elemental Blockade will improve uptime of the Minor Breach debuff
 - Weight composition goes from 6 Medium 1 Light to 1 Medium 6 Light, so we can benefit a lot more from the
 Concentration passive
Additional Info
- Changing Dagger to a Mace is the exact same trade-off as changing
 Slimecraw to
  Valkyn Skoria, due to the
  Twin Blade and Blunt passive, so using
  Slimecraw with 1 Mace would give the same result. Use whichever approach is more convenient for you depending on the gear you own.
Champion Points
Race
For solo PvE you need both damage and survivability, so every race brings something to the table, but these two stand out as the best options for damage and survivability respectively
Mundus
Attributes
For most content you should put all 64 points into Stamina. For difficult content you should devote as many attribute points as necessary to Health - for some content you’ll be able to get away with 32 Health 32 Stamina, for the extremely difficult stuff you’ll need 64 Health.
Food
Your sustain is completely trivialized by ![]() Soul of Flame, so you don't need any recoveries from your food.
Soul of Flame, so you don't need any recoveries from your food.
Potions
Your sustain is completely trivialized by ![]() Soul of Flame,
so you don't need any recovery from your potions.
Use Armor Potions as your default.
Soul of Flame,
so you don't need any recovery from your potions.
Use Armor Potions as your default.
Most of the time you should use Armor potions. They'll provide you with 5280 armor and you don't need sustain from your potions thanks to ![]() Soul of Flame.
Soul of Flame.
Heroism potions can provide 100% uptime on Minor Heroism, so they're the best option if going for pure damage, but it's a small DPS gain and a decent nerf to your survivability. On top of that, they're extremely expensive.
Parses
All parses are recorded on the 6 million Target Dummy
Patch: Update 49
Using Full Damage Skill Setup, Light Armor, Bi-Stat Food and Heroism Potions
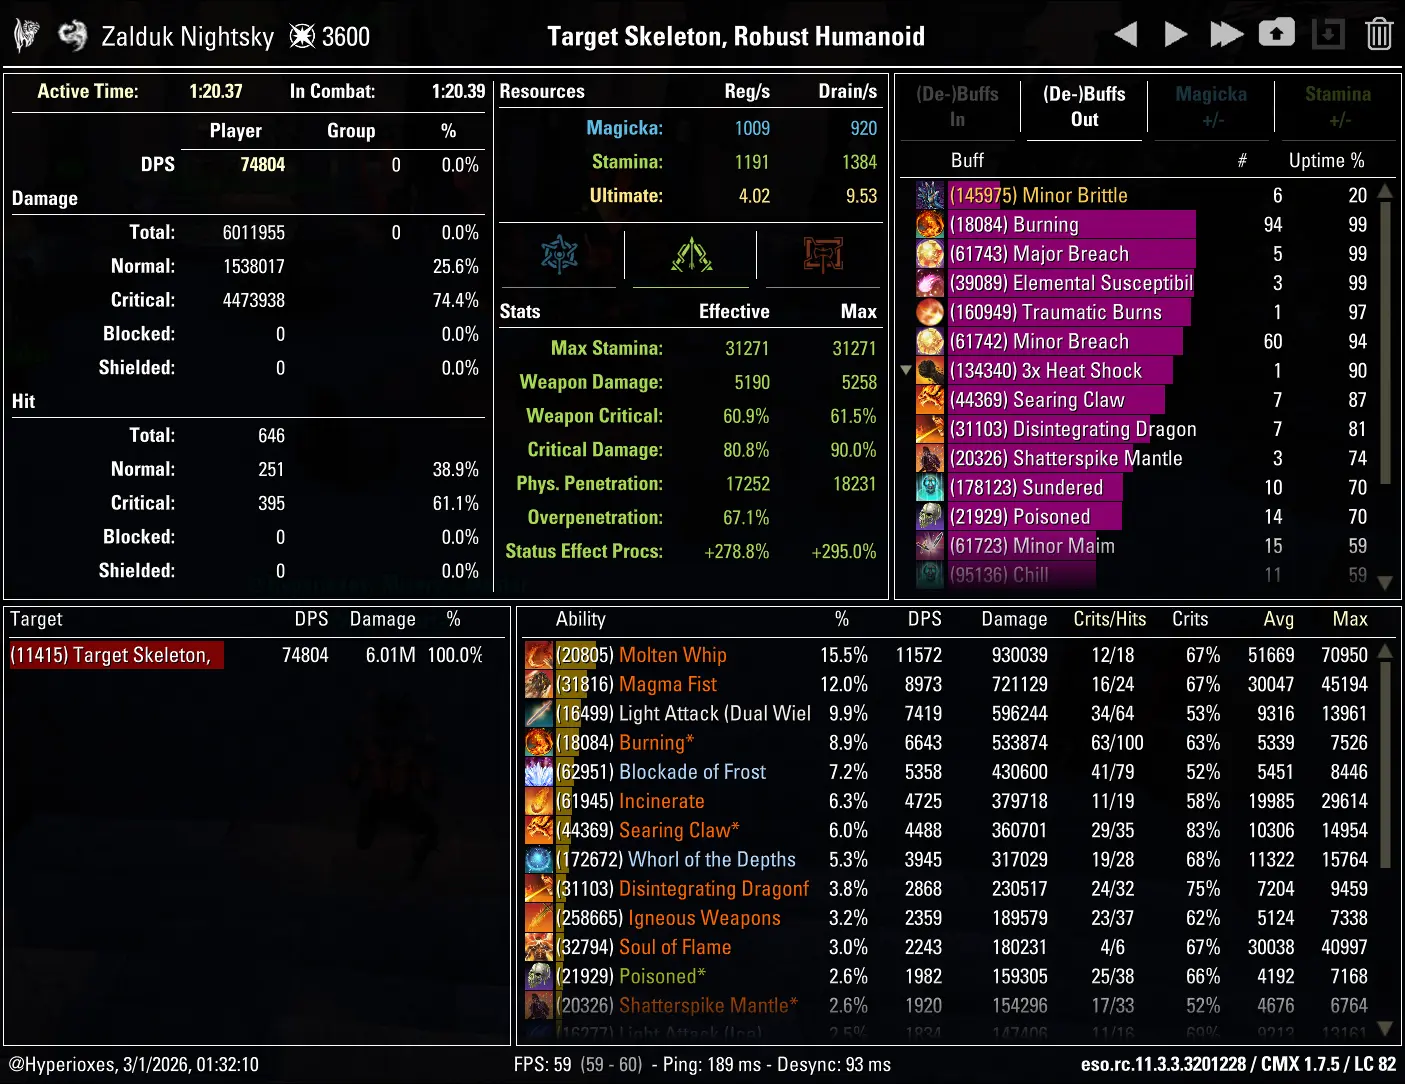
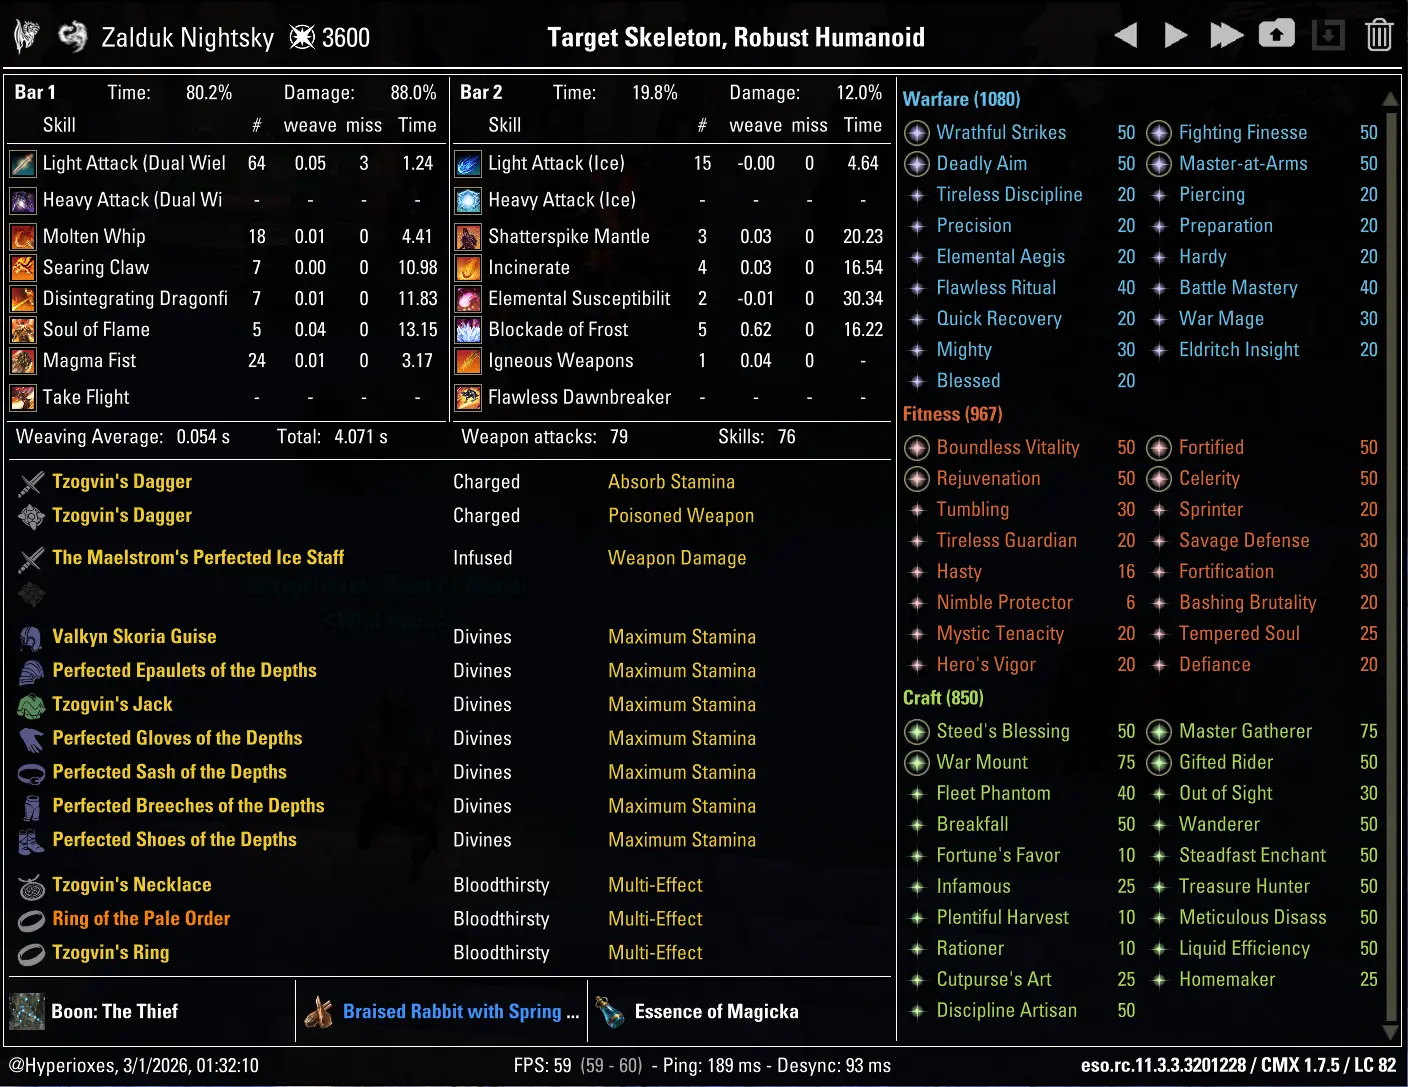
Patch: Update 49
Using Regular skill setup, Medium Armor, Bewitched Sugar Skulls Food and Armor Potions. This setup is armor capped if you're a Nord
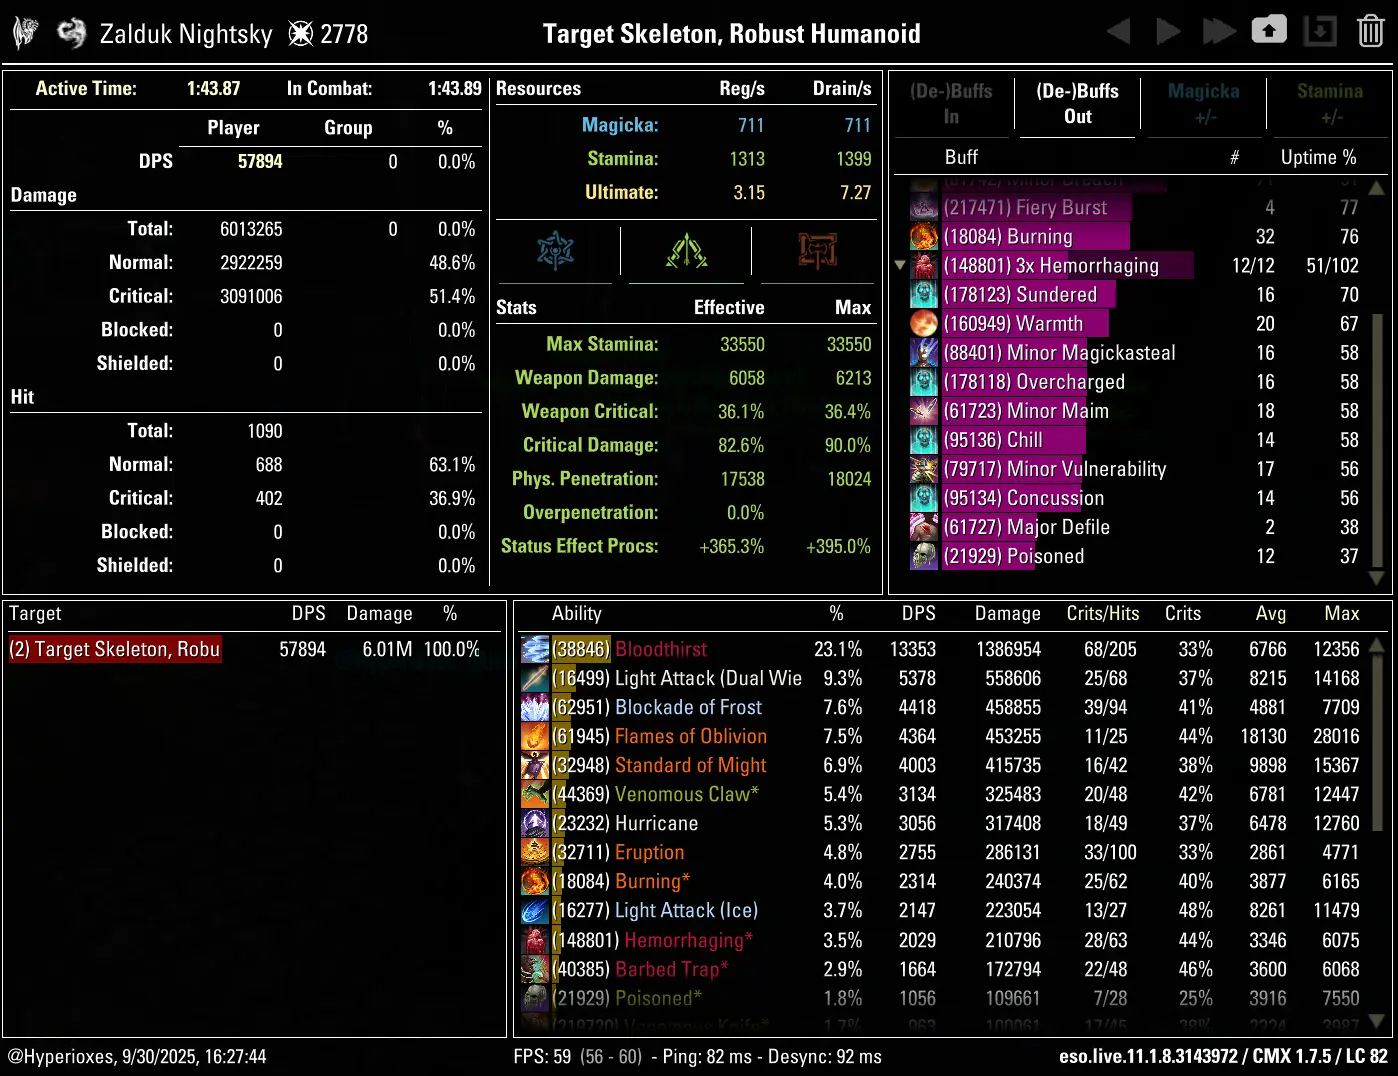
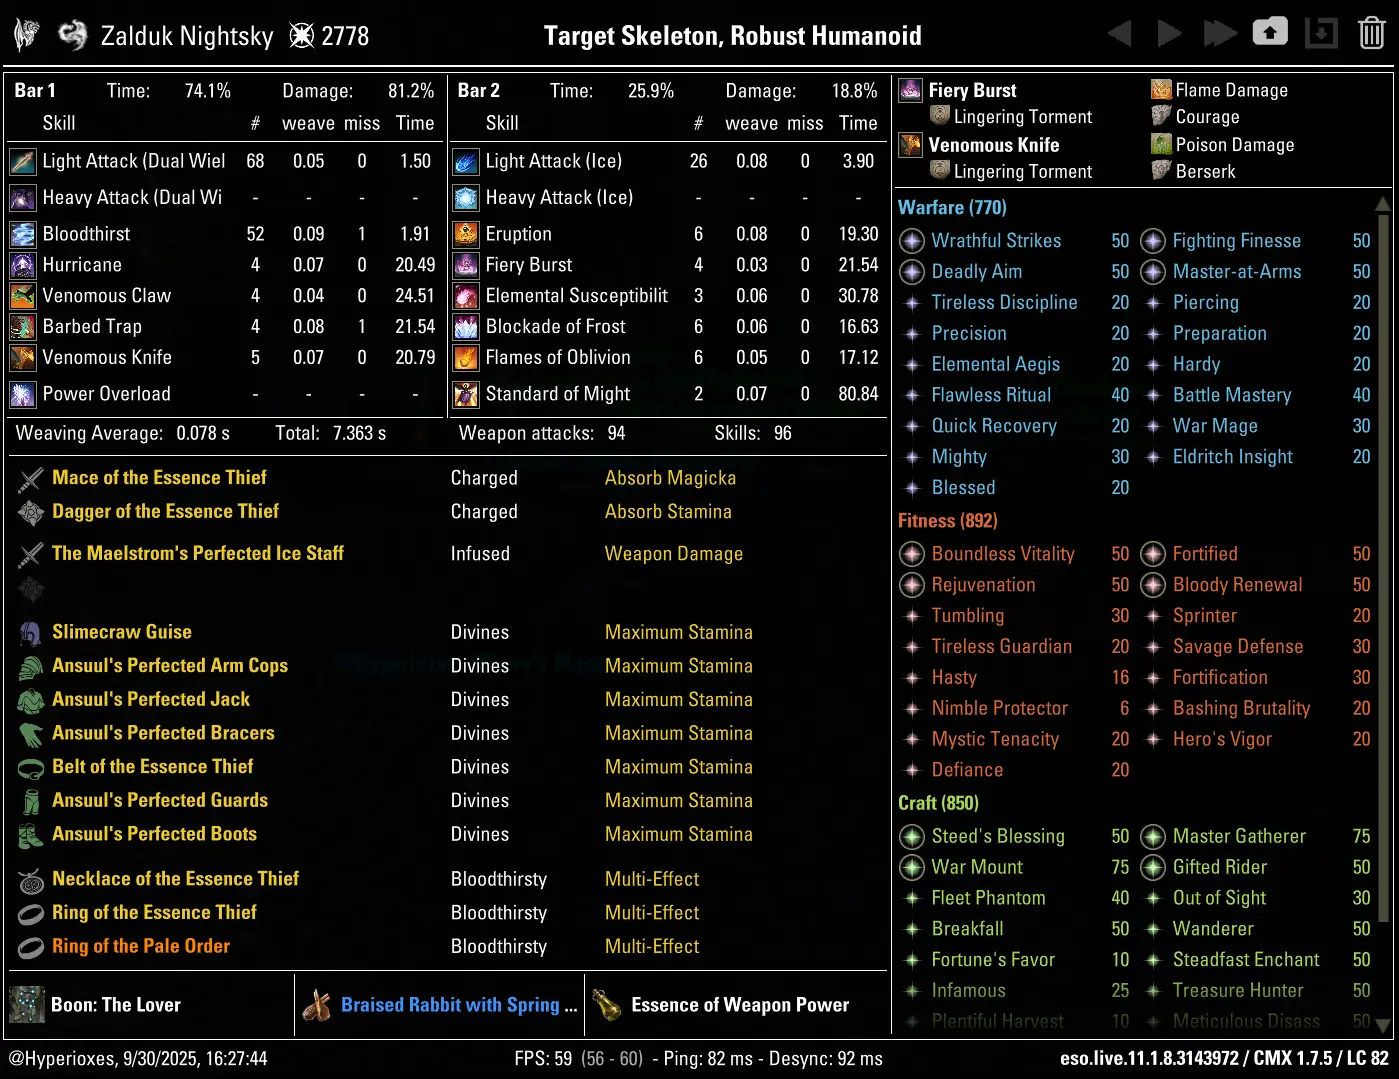
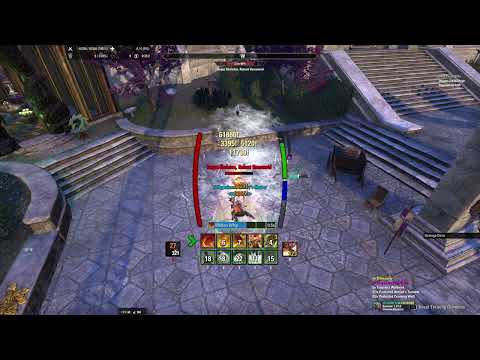
Gameplay
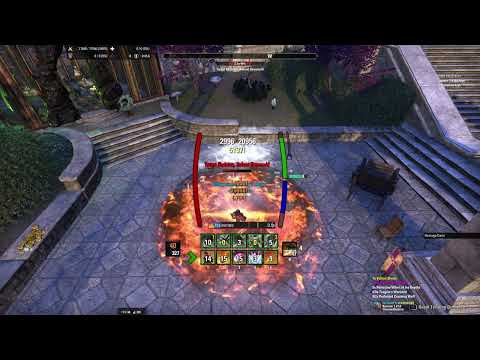
Showcasing the build across veteran dungeons, world bosses, and open world content.
Fashion
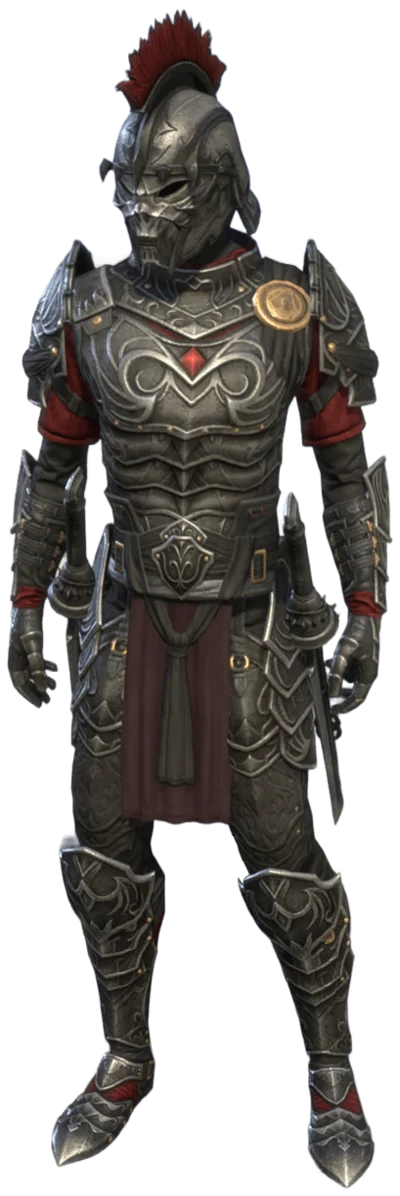
| Slot | Style | Dyes |
|---|---|---|
| Head |
Thalmor Black
Thalmor Black
|
|
| Shoulders |
Thalmor Black
Thalmor Black
|
|
| Chest |
Thalmor Black
Thalmor Black
Thalmor Black
|
|
| Hands |
Thalmor Black
Thalmor Black
|
|
| Belt |
Thalmor Black
|
|
| Legs |
Thalmor Black
Thalmor Black
Thalmor Black
|
|
| Feet |
Thalmor Black
Thalmor Black
|
|
| Frontbar Main Hand |
Thalmor Black
Thalmor Black
Thalmor Black
|
|
| Frontbar Off Hand |
Thalmor Black
Thalmor Black
Thalmor Black
|
|
| Backbar Main Hand |
Thalmor Black
Thalmor Black
Fire Drake's Flame
|
|

| Slot | Collectible |
|---|---|
| Personality |
FAQ
Yes, Dragonknight is one of the strongest solo classes in ESO Update 49. ![]() Soul of Flame makes sustain a non-issue, letting you run Medium armor and armor potions while still having resources to spare. StamDK does more damage in easier fights, while MagDK is better for the most difficult content.
Soul of Flame makes sustain a non-issue, letting you run Medium armor and armor potions while still having resources to spare. StamDK does more damage in easier fights, while MagDK is better for the most difficult content.
Khajiit is the best race for damage thanks to 12% bonus Critical Damage from ![]() Feline Ambush, which won't be wasted in solo content. Nord is the best race for survivability, providing around 5-7% damage mitigation through
Feline Ambush, which won't be wasted in solo content. Nord is the best race for survivability, providing around 5-7% damage mitigation through ![]() Rugged.
Rugged.
Yes, you can replace the Dual Wield Daggers with other weapons. Inferno Staff, Lightning Staff, Greatsword and Bow will cause the smallest DPS loss (≈2%), and then support-oriented weapons (Ice Staff, One Handed and Shield) will cause a bigger DPS loss (≈7%). This build doesn't use any Dual Wield skills on the frontbar, so you won't need to change any skills when switching. Replacing the backbar weapon is a lot more troublesome, because ![]() Elemental Susceptibility is an extremely powerful skill for solo.
Elemental Susceptibility is an extremely powerful skill for solo.
No, you don't need a different setup. Use the base skills and one of the Instanced gear setups from this guide for both Maelstrom Arena and Vateshran Hollows.
THANKS FOR READING

If you've enjoyed this guide and want to support me, you can do so through Patreon. Your support will help me produce more guides.
