


Subclass Tank Build - ESO Guide
The Subclass Tank build pulls skill lines from multiple classes to cover everything a tank needs. The default setup runs Winter's Embrace, Siphoning and Grave Lord, but the build has a ton of combinations depending on what the content requires.
Subclassing is much stronger than playing pure class for tanking because tanking is all about supporting your group, and subclassing lets you pick the best abilities for that from each skill line. You can simultaneously provide Major Resolve through Warden's Expansive Frost Cloak, keep up Major Vulnerability through Necromancer's Glacial Colossus, and trivialize sustain through Nightblade's Siphoning Attacks - something no single class can do on its own.
The build covers Dungeons and Trials in one guide. Each final setup has Regular, Trash (Dungeon), Trash (Trial) and Tanky sub-setups. Veteran Hard Mode Dungeon and Veteran Trial proof footage is in the gameplay section.
Subclassing
Base Class
You can use this build with any base class.
(Almost) Always Use These Two


These are beginner-friendly setups that always use Siphoning because Siphoning Attacks trivializes sustain, and always use Winter's Embrace because of Expansive Frost Cloak which grants your entire team Major Resolve (roughly 12% damage reduction), an extremely strong heal in Polar Wind, and passives which increase armor and block mitigation.
Ultimately, as long as you know what you're doing, you can make a valid build out of any combination of Skill Lines listed here. You can replace Siphoning if you don't need the sustain - either because the fight is easy enough or because you're a better player. You can even replace Winter's Embrace if the other Tank in your Trial is already using Expansive Frost Cloak, or if somehow your entire team already provides Major Resolve for themselves through other means.
Dragonknight exception
Dragonknight is an exception. Ardent Flame has Soul of Flame which trivializes sustain just like Siphoning Attacks, so it replaces Siphoning instead.
Remaining Skill Lines to Choose From
One of the best skill lines for tanking because of Glacial Colossus, which applies Major Vulnerability. With some additional Ultimate generation you can keep up 100% uptime on Major Vulnerability with just that, which allows you to replace the Major Vulnerability item set - Archdruid Devyric, with an Ultimate generation set like Baron Zaudrus, which in turn boosts your other Ultimate sets like Saxhleel's Champion and War Machine even further.
Notable Skills
Notable Passives
None
Good defensive Skill Line if you need more survivability, especially against DoTs. It also allows you to drain corpses for Ultimate through Necrotic Potency, which is especially good in fights with lots of adds.
Notable Skills
Notable Passives
A Skill Line with lots of situationally good but niche abilities. Renewing Animation allows your team to recover from anything as long as you survive, it's extremely good for PUGs and training runs (if you're the "teacher"). Expunge and Modify/Hexproof is a purge that costs only Health and Spirit Guardian provides a unique 10% damage mitigation buff.
Notable Skills
Notable Passives
Provides block mitigation, a lot of healing (especially if you can afford to stand still) and a purge ability for yourself and your team through Extended Ritual.
Notable Skills
Notable Passives
Lots of good skills but most of its power is spread between different abilities which you won't have space to slot. Runeguard is an extremely good defensive skill. The skill line also provides your entire group with Minor Evasion (10% less AoE damage taken) which can be pretty important in some fights.
Notable Skills
Notable Passives
Provides both an extremely good sustain tool (Soul of Flame) and a good support Ultimate (Standard of Might). In this guide we pair Ardent Flame with Grave Lord instead of Siphoning (because Soul of Flame solves sustain just like Siphoning Attacks) so we use Glacial Colossus instead, but Standard of Might is still good, especially for survivability.
Notable Skills
Notable Passives
Most of the buffs it provides (Igneous Weapons and Magma Fist) are now extremely good DPS abilities, so it's much more efficient to have a DD use them. Still, it has access to Magma Shell which lets you bypass many mechanics.
Notable Skills
Notable Passives
A pretty good Ultimate (Summon Charged Atronach) which grants your group Major Berserk, an extremely strong damage shield (Hardened Ward) and a block mitigation ability (Bound Aegis) which will put most builds at the block mitigation cap.
Notable Skills
Notable Passives
A decent skill line for 1 Tank 3 DD dungeon runs when your Damage Dealers need some additional healing.
Notable Skills
Notable Passives
Final Combinations
Example of a setup for each base class. These prioritize survivability and ease of play, so each of them has at least one skill line that trivializes sustain


Skill Setups
Base Setup
A base setup that uses only Winter's Embrace and Siphoning skill lines and which should be your starting point to which you'll later add skills from your 3rd skill line
Switching skills for trash packs isn't worth it unless you're using gear-swap addons, but switching skills for more difficult fights is something you should always do
| Front Bar | Back Bar |
|---|---|
| Slot 1: Shield Throw | Slot 1: Expansive Frost Cloak |
| Slot 2: Trample | Slot 2: Wield Soul |
| Slot 3: Siphoning Attacks | Slot 3: Elemental Susceptibility |
| Slot 4: Ulfsild's Contingency | Slot 4: Elemental Blockade |
| Slot 5: Polar Wind | Slot 5: Soul Burst |
| Ultimate: Temporal Guard | Ultimate: Reviving Barrier |
A setup for trash packs in Dungeons
| Front Bar | Back Bar |
|---|---|
| Slot 1: Inner Rage | Slot 1: Expansive Frost Cloak |
| Slot 2: Razor Caltrops | Slot 2: Wield Soul |
| Slot 3: Siphoning Attacks | Slot 3: Pulsar |
| Slot 4: Power Slam | Slot 4: Elemental Blockade |
| Slot 5: Polar Wind | Slot 5: Ulfsild's Contingency |
| Ultimate: Temporal Guard | Ultimate: Reviving Barrier |
A setup for trash packs in Trials
| Front Bar | Back Bar |
|---|---|
| Slot 1: Shield Throw | Slot 1: Expansive Frost Cloak |
| Slot 2: Razor Caltrops | Slot 2: Wield Soul |
| Slot 3: Siphoning Attacks | Slot 3: Pulsar |
| Slot 4: Ulfsild's Contingency | Slot 4: Elemental Blockade |
| Slot 5: Polar Wind | Slot 5: Charging Maneuver |
| Ultimate: Temporal Guard | Ultimate: Reviving Barrier |
A setup which focuses on your own survivability
| Front Bar | Back Bar |
|---|---|
| Slot 1: Shield Throw | Slot 1: Expansive Frost Cloak |
| Slot 2: Revealing Flare | Slot 2: Wield Soul |
| Slot 3: Siphoning Attacks | Slot 3: Elemental Susceptibility |
| Slot 4: Ulfsild's Contingency | Slot 4: Elemental Blockade |
| Slot 5: Polar Wind | Slot 5: Soul Burst |
| Ultimate: Temporal Guard | Ultimate: Reviving Barrier |
Why no Inner Rage in the Regular setup?
The synergy from Inner Rage taunt is extremely strong but because of the way it works it always turns out extremely weak in Group Finder runs. The way it works is, instead of granting the synergy to 11 people and disappearing once 3 people use it, it first selects 3 people and only those 3 people have the option to use the synergy at all. And if one of those 3 people don't use it, it will never pass onto the remaining players, no matter how many times you recast your Inner Rage. Which is why, 3 clueless players not pressing their synergy in a Group Finder run are enough to completely "clog" your Inner Rage. Which is why I decided to go with Shield Throw taunt as a default option.
Final Setups
A few examples of final setups you could end up with
Grave Lord Skill Setups
Default setup
| Front Bar | Back Bar |
|---|---|
| Slot 1: Shield Throw | Slot 1: Expansive Frost Cloak |
| Slot 2: Trample | Slot 2: Wield Soul |
| Slot 3: Siphoning Attacks | Slot 3: Elemental Susceptibility |
| Slot 4: Ulfsild's Contingency | Slot 4: Elemental Blockade |
| Slot 5: Polar Wind | Slot 5: Soul Burst |
| Ultimate: Temporal Guard | Ultimate: Glacial Colossus |
A setup for trash packs in Dungeons
| Front Bar | Back Bar |
|---|---|
| Slot 1: Inner Rage | Slot 1: Expansive Frost Cloak |
| Slot 2: Unnerving Boneyard | Slot 2: Wield Soul |
| Slot 3: Siphoning Attacks | Slot 3: Pulsar |
| Slot 4: Power Slam | Slot 4: Elemental Blockade |
| Slot 5: Polar Wind | Slot 5: Ulfsild's Contingency |
| Ultimate: Temporal Guard | Ultimate: Glacial Colossus |
A setup for trash packs in Trials
| Front Bar | Back Bar |
|---|---|
| Slot 1: Shield Throw | Slot 1: Expansive Frost Cloak |
| Slot 2: Unnerving Boneyard | Slot 2: Wield Soul |
| Slot 3: Siphoning Attacks | Slot 3: Pulsar |
| Slot 4: Ulfsild's Contingency | Slot 4: Elemental Blockade |
| Slot 5: Polar Wind | Slot 5: Charging Maneuver |
| Ultimate: Temporal Guard | Ultimate: Glacial Colossus |
A setup which focuses on your own survivability
| Front Bar | Back Bar |
|---|---|
| Slot 1: Shield Throw | Slot 1: Expansive Frost Cloak |
| Slot 2: Revealing Flare | Slot 2: Wield Soul |
| Slot 3: Siphoning Attacks | Slot 3: Elemental Susceptibility |
| Slot 4: Ulfsild's Contingency | Slot 4: Elemental Blockade |
| Slot 5: Polar Wind | Slot 5: Soul Burst |
| Ultimate: Temporal Guard | Ultimate: Glacial Colossus |
Daedric Summoning Skill Setups
Default setup
| Front Bar | Back Bar |
|---|---|
| Slot 1: Shield Throw | Slot 1: Expansive Frost Cloak |
| Slot 2: Trample | Slot 2: Wield Soul |
| Slot 3: Siphoning Attacks | Slot 3: Elemental Susceptibility |
| Slot 4: Ulfsild's Contingency | Slot 4: Elemental Blockade |
| Slot 5: Polar Wind | Slot 5: Soul Burst |
| Ultimate: Temporal Guard | Ultimate: Summon Charged Atronach |
A setup for trash packs in Dungeons
| Front Bar | Back Bar |
|---|---|
| Slot 1: Inner Rage | Slot 1: Expansive Frost Cloak |
| Slot 2: Razor Caltrops | Slot 2: Wield Soul |
| Slot 3: Siphoning Attacks | Slot 3: Pulsar |
| Slot 4: Power Slam | Slot 4: Elemental Blockade |
| Slot 5: Polar Wind | Slot 5: Ulfsild's Contingency |
| Ultimate: Temporal Guard | Ultimate: Summon Charged Atronach |
A setup for trash packs in Trials
| Front Bar | Back Bar |
|---|---|
| Slot 1: Shield Throw | Slot 1: Expansive Frost Cloak |
| Slot 2: Razor Caltrops | Slot 2: Wield Soul |
| Slot 3: Siphoning Attacks | Slot 3: Pulsar |
| Slot 4: Ulfsild's Contingency | Slot 4: Elemental Blockade |
| Slot 5: Polar Wind | Slot 5: Charging Maneuver |
| Ultimate: Temporal Guard | Ultimate: Summon Charged Atronach |
A setup which focuses on your own survivability
| Front Bar | Back Bar |
|---|---|
| Slot 1: Shield Throw | Slot 1: Expansive Frost Cloak |
| Slot 2: Revealing Flare | Slot 2: Wield Soul |
| Slot 3: Siphoning Attacks | Slot 3: Elemental Susceptibility |
| Slot 4: Hardened Ward | Slot 4: Elemental Blockade |
| Slot 5: Polar Wind | Slot 5: Ulfsild's Contingency |
| Ultimate: Temporal Guard | Ultimate: Summon Charged Atronach |
Restoring Light Skill Setups
Default setup
| Front Bar | Back Bar |
|---|---|
| Slot 1: Shield Throw | Slot 1: Expansive Frost Cloak |
| Slot 2: Trample | Slot 2: Wield Soul |
| Slot 3: Siphoning Attacks | Slot 3: Elemental Susceptibility |
| Slot 4: Ulfsild's Contingency | Slot 4: Elemental Blockade |
| Slot 5: Polar Wind | Slot 5: Extended Ritual |
| Ultimate: Temporal Guard | Ultimate: Reviving Barrier |
A setup for trash packs in Dungeons
| Front Bar | Back Bar |
|---|---|
| Slot 1: Inner Rage | Slot 1: Expansive Frost Cloak |
| Slot 2: Razor Caltrops | Slot 2: Wield Soul |
| Slot 3: Siphoning Attacks | Slot 3: Pulsar |
| Slot 4: Power Slam | Slot 4: Elemental Blockade |
| Slot 5: Polar Wind | Slot 5: Ulfsild's Contingency |
| Ultimate: Temporal Guard | Ultimate: Reviving Barrier |
A setup for trash packs in Trials
| Front Bar | Back Bar |
|---|---|
| Slot 1: Shield Throw | Slot 1: Expansive Frost Cloak |
| Slot 2: Razor Caltrops | Slot 2: Wield Soul |
| Slot 3: Siphoning Attacks | Slot 3: Pulsar |
| Slot 4: Ulfsild's Contingency | Slot 4: Elemental Blockade |
| Slot 5: Polar Wind | Slot 5: Charging Maneuver |
| Ultimate: Temporal Guard | Ultimate: Reviving Barrier |
A setup which focuses on your own survivability
| Front Bar | Back Bar |
|---|---|
| Slot 1: Shield Throw | Slot 1: Expansive Frost Cloak |
| Slot 2: Revealing Flare | Slot 2: Wield Soul |
| Slot 3: Siphoning Attacks | Slot 3: Elemental Susceptibility |
| Slot 4: Ulfsild's Contingency | Slot 4: Elemental Blockade |
| Slot 5: Polar Wind | Slot 5: Extended Ritual |
| Ultimate: Temporal Guard | Ultimate: Reviving Barrier |
Soldier of Apocrypha Skill Setups
Default setup
| Front Bar | Back Bar |
|---|---|
| Slot 1: Shield Throw | Slot 1: Expansive Frost Cloak |
| Slot 2: Trample | Slot 2: Wield Soul |
| Slot 3: Siphoning Attacks | Slot 3: Elemental Susceptibility |
| Slot 4: Runeguard of Still Waters | Slot 4: Elemental Blockade |
| Slot 5: Polar Wind | Slot 5: Soul Burst |
| Ultimate: Gibbering Shelter | Ultimate: Gibbering Shelter |
A setup for trash packs in Dungeons
| Front Bar | Back Bar |
|---|---|
| Slot 1: Inner Rage | Slot 1: Expansive Frost Cloak |
| Slot 2: Razor Caltrops | Slot 2: Wield Soul |
| Slot 3: Siphoning Attacks | Slot 3: Pulsar |
| Slot 4: Power Slam | Slot 4: Elemental Blockade |
| Slot 5: Polar Wind | Slot 5: Runeguard of Still Waters |
| Ultimate: Gibbering Shelter | Ultimate: Gibbering Shelter |
A setup for trash packs in Trials
| Front Bar | Back Bar |
|---|---|
| Slot 1: Shield Throw | Slot 1: Expansive Frost Cloak |
| Slot 2: Razor Caltrops | Slot 2: Wield Soul |
| Slot 3: Siphoning Attacks | Slot 3: Pulsar |
| Slot 4: Runeguard of Still Waters | Slot 4: Elemental Blockade |
| Slot 5: Polar Wind | Slot 5: Charging Maneuver |
| Ultimate: Gibbering Shelter | Ultimate: Gibbering Shelter |
A setup which focuses on your own survivability
| Front Bar | Back Bar |
|---|---|
| Slot 1: Shield Throw | Slot 1: Expansive Frost Cloak |
| Slot 2: Revealing Flare | Slot 2: Wield Soul |
| Slot 3: Siphoning Attacks | Slot 3: Elemental Susceptibility |
| Slot 4: Impervious Runeward | Slot 4: Elemental Blockade |
| Slot 5: Polar Wind | Slot 5: Runeguard of Still Waters |
| Ultimate: Gibbering Shelter | Ultimate: Gibbering Shelter |
Ardent Flame Skill Setups
Default setup
| Front Bar | Back Bar |
|---|---|
| Slot 1: Shield Throw | Slot 1: Expansive Frost Cloak |
| Slot 2: Trample | Slot 2: Wield Soul |
| Slot 3: Soul of Flame | Slot 3: Elemental Susceptibility |
| Slot 4: Ulfsild's Contingency | Slot 4: Elemental Blockade |
| Slot 5: Polar Wind | Slot 5: Hearth and Home |
| Ultimate: Temporal Guard | Ultimate: Glacial Colossus |
A setup for trash packs in Dungeons
| Front Bar | Back Bar |
|---|---|
| Slot 1: Inner Rage | Slot 1: Expansive Frost Cloak |
| Slot 2: Unnerving Boneyard | Slot 2: Wield Soul |
| Slot 3: Soul of Flame | Slot 3: Pulsar |
| Slot 4: Power Slam | Slot 4: Elemental Blockade |
| Slot 5: Polar Wind | Slot 5: Hearth and Home |
| Ultimate: Temporal Guard | Ultimate: Glacial Colossus |
A setup for trash packs in Trials
| Front Bar | Back Bar |
|---|---|
| Slot 1: Shield Throw | Slot 1: Expansive Frost Cloak |
| Slot 2: Unnerving Boneyard | Slot 2: Wield Soul |
| Slot 3: Soul of Flame | Slot 3: Pulsar |
| Slot 4: Ulfsild's Contingency | Slot 4: Elemental Blockade |
| Slot 5: Polar Wind | Slot 5: Hearth and Home |
| Ultimate: Temporal Guard | Ultimate: Glacial Colossus |
A setup which focuses on your own survivability
| Front Bar | Back Bar |
|---|---|
| Slot 1: Shield Throw | Slot 1: Expansive Frost Cloak |
| Slot 2: Burning Embers | Slot 2: Wield Soul |
| Slot 3: Soul of Flame | Slot 3: Elemental Susceptibility |
| Slot 4: Ulfsild's Contingency | Slot 4: Elemental Blockade |
| Slot 5: Polar Wind | Slot 5: Hearth and Home |
| Ultimate: Temporal Guard | Ultimate: Glacial Colossus |
Passives
The only passive you specifically have to skip is Tri Focus
Some trees are only needed when using situational skills, for example Support provides nothing without Revealing Flare or Reviving Barrier
 Class
Class
 Weapon
 Armor
Armor
 Guild
Guild
 Alliance War
 Racial
 Craft
Craft
Class - Grave Lord (Necromancer)
![]() Reusable Parts - Not Needed (Low Priority if combined with Living Death)
Reusable Parts - Not Needed (Low Priority if combined with Living Death)
![]() Death Knell - Low Priority
Death Knell - Low Priority
![]() Dismember - Low Priority
Dismember - Low Priority
![]() Rapid Rot - Low Priority
Rapid Rot - Low Priority
Class - Siphoning (Nightblade)
![]() Catalyst - High Priority
Catalyst - High Priority
![]() Magicka Flood - High Priority
Magicka Flood - High Priority
![]() Soul Siphoner - High Priority
Soul Siphoner - High Priority
![]() Transfer - High Priority
Transfer - High Priority
Class - Winter's Embrace (Warden)
![]() Glacial Presence - Medium Priority
Glacial Presence - Medium Priority
![]() Frozen Armor - High Priority
Frozen Armor - High Priority
![]() Icy Aura - High Priority
Icy Aura - High Priority
![]() Piercing Cold - High Priority
Piercing Cold - High Priority
Class - Daedric Summoning (Sorcerer)
![]() Rebate - Medium Priority
Rebate - Medium Priority
![]() Power Stone - High Priority
Power Stone - High Priority
![]() Daedric Protection - High Priority
Daedric Protection - High Priority
![]() Expert Summoner - High Priority
Expert Summoner - High Priority
Class - Restoring Light (Templar)
![]() Mending - High Priority
Mending - High Priority
![]() Sacred Ground - High Priority
Sacred Ground - High Priority
![]() Light Weaver - Medium Priority
Light Weaver - Medium Priority
![]() Master Ritualist - Medium Priority
Master Ritualist - Medium Priority
Class - Soldier of Apocrypha (Arcanist)
![]() Aegis of the Unseen - High Priority
Aegis of the Unseen - High Priority
![]() Wellspring of the Abyss - High Priority
Wellspring of the Abyss - High Priority
![]() Circumvented Fate - High Priority
Circumvented Fate - High Priority
![]() Implacable Outcome - High Priority
Implacable Outcome - High Priority
Class - Ardent Flame (Dragonknight)
![]() Combustion - High Priority
Combustion - High Priority
![]() Traumatic Burns - High Priority
Traumatic Burns - High Priority
![]() Fan the Flames - High Priority
Fan the Flames - High Priority
![]() A Soul Ablaze - High Priority
A Soul Ablaze - High Priority
Weapon - One Hand and Shield
![]() Fortress - High Priority
Fortress - High Priority
![]() Sword and Board - High Priority
Sword and Board - High Priority
![]() Deadly Bash - Medium Priority
Deadly Bash - Medium Priority
![]() Deflect Bolts - High Priority
Deflect Bolts - High Priority
![]() Battlefield Mobility - Medium Priority
Battlefield Mobility - Medium Priority
Weapon - Destruction Staff
![]() Tri Focus - Do Not Unlock
Tri Focus - Do Not Unlock
![]() Penetrating Magic - Low Priority
Penetrating Magic - Low Priority
![]() Elemental Force - High Priority
Elemental Force - High Priority
![]() Ancient Knowledge - High Priority
Ancient Knowledge - High Priority
![]() Destruction Expert - Low Priority
Destruction Expert - Low Priority
Armor - Light Armor
![]() Grace - Low Priority
Grace - Low Priority
![]() Evocation - High Priority
Evocation - High Priority
![]() Spell Warding - Medium Priority
Spell Warding - Medium Priority
![]() Prodigy - Medium Priority
Prodigy - Medium Priority
![]() Concentration - Low Priority
Concentration - Low Priority
Armor - Medium Armor
![]() Dexterity - Low Priority
Dexterity - Low Priority
![]() Wind Walker - High Priority
Wind Walker - High Priority
![]() Improved Sneak - Not needed
Improved Sneak - Not needed
![]() Agility - Medium Priority
Agility - Medium Priority
![]() Athletics - High Priority
Athletics - High Priority
Armor - Heavy Armor
![]() Resolve - High Priority
Resolve - High Priority
![]() Constitution - Medium Priority
Constitution - Medium Priority
![]() Juggernaut - High Priority
Juggernaut - High Priority
![]() Revitalize - High Priority
Revitalize - High Priority
![]() Rapid Mending - High Priority
Rapid Mending - High Priority
Guild - Mages Guild
![]() Persuasive Will - Not needed
Persuasive Will - Not needed
![]() Mage Adept - High Priority
Mage Adept - High Priority
![]() Everlasting Magic - High Priority
Everlasting Magic - High Priority
![]() Magicka Controller - Medium Priority
Magicka Controller - Medium Priority
![]() Might of the Guild - Low Priority
Might of the Guild - Low Priority
Guild - Psijic Order
![]() Clairvoyance - Not Needed
Clairvoyance - Not Needed
![]() Spell Orb - Not Needed
Spell Orb - Not Needed
![]() Concentrated Barrier - Medium Priority
Concentrated Barrier - Medium Priority
![]() Deliberation - Not Needed
Deliberation - Not Needed
Alliance War - Support
![]() Magicka Aid - Medium Priority
Magicka Aid - Medium Priority
![]() Combat Medic - Not needed
Combat Medic - Not needed
![]() Battle Resurrection - Not needed
Battle Resurrection - Not needed
Race - Your Race
Get all of your racials, no matter which race you are
Craft - Alchemy
![]() Solvent Proficiency - Not needed
Solvent Proficiency - Not needed
![]() Keen Eye: Reagents - Not needed
Keen Eye: Reagents - Not needed
![]() Medicinal Use - High Priority
Medicinal Use - High Priority
![]() Chemistry - Not needed
Chemistry - Not needed
![]() Laboratory Use - Not needed
Laboratory Use - Not needed
![]() Snakeblood - Not needed
Snakeblood - Not needed
Gear
Base Setup
A base setup - the item sets shown are intended for Dungeons specifically, but the weights, traits and enchants are meant for any boss fight
Most support sets provide a similar group DPS increase. The most important thing is making sure your sets don't overlap with other Tank's and Healers' sets, though you can overlap sets which provide imperfect uptimes like Saxhleel's Champion or Archdruid Devyric
Switching gear for trash packs isn't worth it unless you're using gear-swap addons
| Gear Slot | Set | Weight/Type | Trait | Enchantment |
|---|---|---|---|---|
 Head Head |
Archdruid Devyric | Medium | Divines / Sturdy | Tri-Stat |
 Shoulders Shoulders |
Archdruid Devyric | Light | Divines / Sturdy | Tri-Stat |
 Chest Chest |
Saxhleel's Champion | Heavy | Reinforced | Tri-Stat |
 Hands Hands |
Saxhleel's Champion | Heavy | Divines / Sturdy | Tri-Stat |
 Belt Belt |
Saxhleel's Champion | Heavy | Divines / Sturdy | Tri-Stat |
 Legs Legs |
Saxhleel's Champion | Heavy | Reinforced | Tri-Stat |
 Boots Boots |
Saxhleel's Champion | Heavy | Reinforced | Tri-Stat |
 Necklace Necklace |
War Machine | Jewelry | Harmony / Infused | Reduce Magicka Cost |
 Ring Ring |
War Machine | Jewelry | Harmony / Infused | Reduce Magicka Cost |
| Ring |
War Machine | Jewelry | Harmony / Infused | Reduce Magicka Cost |
 Frontbar Main Hand Frontbar Main Hand |
Armor of the Trainee | Any 1-handed weapon | Decisive | Hardening |
 Frontbar Off Hand Frontbar Off Hand |
Druid's Braid | Shield | Divines / Sturdy | Tri-Stat |
| Backbar Main Hand |
War Machine | Ice Staff | Infused | Crusher |
Gear that can be better than the setup from the table in specific situations
- Vestments of Olorime - replacement for War Machine when playing without a Healer
- Baron Zaudrus - replacement for Archdruid Devyric whenever you're using Grave Lord. The Ultimate generation from Baron Zaudrus lets you keep up 100% uptime on Major Vulnerability through Glacial Colossus, making Archdruid Devyric unnecessary. Applying Elemental Susceptibility to multiple targets will generate a lot of Ultimate from this set. Use Assassin's Misery on Trample to proc it more
Alternative gear that can also be used and might be easier to obtain
It lists all useful gear, even sets that are already in the gear table and Situational tab
Crafted
All of these are tradable and can be bought from other players
Overland
All of these are tradable and can be bought from other players
PvP
All of these are tradable and can be bought from other players
Dungeons
Trials
Monster Sets
Body
- Sturdy and Divines - both are very good options, which one is better depends on the specific encounter
- Reinforced - depending on your race and many other aspects you might be over the armor cap, in which case you can change Reinforced pieces to Sturdy / Divines
Jewelry
- Harmony and Infused - Harmony is stronger whenever you have at least 2 different synergies available to you, which means that Harmony will be better in the vast majority of situations, but Infused can be better when playing with randoms or if the specific encounter makes it really difficult for your teammates to provide you synergies
- Swift - extremely useful for trash packs
Weapons
- Charged - an option for the backbar Ice Staff for trash packs. It will cause Pulsar to be almost guaranteed to proc Chilled status effect
- Infused - an option for the frontbar One Handed weapon when playing without a Healer. You can then combine it with the Weakening enchant to reduce enemies' damage done
- You can double-bar War Machine if you want to be able to provide Major Slayer also with your frontbar Ultimate
- If you want to provide Minor Brittle, you can replace your frontbar Sword and Shield with an Ice Staff. Use Decisive trait (Charged if you gave up Winter's Embrace) with a Glyph of Frost enchant. The frontbar Ice Staff should usually be Armor of the Trainee, but you can also move your backbar set to frontbar and put Crushing Wall on backbar. You can also frontbar Destructive Impact when using Destructive Clench
Other Setups
Starting setup if you only have access to crafted gear
| Gear Slot | Set | Weight/Type | Trait | Enchantment |
|---|---|---|---|---|
| Head |
Druid's Braid | Medium | Divines / Sturdy | Tri-Stat |
| Shoulders |
Druid's Braid | Light | Divines / Sturdy | Tri-Stat |
| Chest |
Wretched Vitality | Heavy | Reinforced | Tri-Stat |
| Hands |
Wretched Vitality | Heavy | Divines / Sturdy | Tri-Stat |
| Belt |
Wretched Vitality | Heavy | Divines / Sturdy | Tri-Stat |
| Legs |
Wretched Vitality | Heavy | Reinforced | Tri-Stat |
| Boots |
Wretched Vitality | Heavy | Reinforced | Tri-Stat |
| Necklace |
Druid's Braid | Jewelry | Harmony / Infused | Reduce Magicka Cost |
| Ring |
Druid's Braid | Jewelry | Harmony / Infused | Reduce Magicka Cost |
| Ring |
Druid's Braid | Jewelry | Harmony / Infused | Reduce Magicka Cost |
| Frontbar Main Hand |
Druid's Braid | Any 1-handed weapon | Decisive | Hardening |
| Frontbar Off Hand |
Druid's Braid | Shield | Divines / Sturdy | Tri-Stat |
| Backbar Main Hand |
Druid's Braid | Ice Staff | Infused | Crusher |
Setup if you don't have access to Trial gear
| Gear Slot | Set | Weight/Type | Trait | Enchantment |
|---|---|---|---|---|
| Head |
Archdruid Devyric | Medium | Divines / Sturdy | Tri-Stat |
| Shoulders |
Archdruid Devyric | Light | Divines / Sturdy | Tri-Stat |
| Chest |
Turning Tide | Heavy | Reinforced | Tri-Stat |
| Hands |
Turning Tide | Heavy | Divines / Sturdy | Tri-Stat |
| Belt |
Turning Tide | Heavy | Divines / Sturdy | Tri-Stat |
| Legs |
Turning Tide | Heavy | Reinforced | Tri-Stat |
| Boots |
Turning Tide | Heavy | Reinforced | Tri-Stat |
| Necklace |
Crimson Oath's Rive | Jewelry | Harmony / Infused | Reduce Magicka Cost |
| Ring |
Crimson Oath's Rive | Jewelry | Harmony / Infused | Reduce Magicka Cost |
| Ring |
Crimson Oath's Rive | Jewelry | Harmony / Infused | Reduce Magicka Cost |
| Frontbar Main Hand |
Armor of the Trainee | Any 1-handed weapon | Decisive | Hardening |
| Frontbar Off Hand |
Druid's Braid | Shield | Divines / Sturdy | Tri-Stat |
| Backbar Main Hand |
Crimson Oath's Rive | Ice Staff | Infused | Crusher |
Additional Info
- Powerful Assault is another good set that doesn't come from a Trial, but it would require you to include Resolving Vigor or Echoing Vigor in your boss skill setup
Setup for trash packs, the item sets shown are intended for Dungeons specifically, but the weights, traits and enchants shown are meant for any trash
Dungeon Trash
| Gear Slot | Set | Weight/Type | Trait | Enchantment |
|---|---|---|---|---|
| Head |
Magma Incarnate | Medium | Divines / Sturdy | Tri-Stat |
| Shoulders |
Spaulder of Ruin | Light | Divines / Sturdy | Tri-Stat |
| Chest |
Turning Tide | Heavy | Reinforced | Tri-Stat |
| Hands |
Turning Tide | Heavy | Divines / Sturdy | Tri-Stat |
| Belt |
Turning Tide | Heavy | Divines / Sturdy | Tri-Stat |
| Legs |
Turning Tide | Heavy | Reinforced | Tri-Stat |
| Boots |
Turning Tide | Heavy | Reinforced | Tri-Stat |
| Necklace |
Powerful Assault | Jewelry | Swift | Reduce Magicka Cost |
| Ring |
Powerful Assault | Jewelry | Swift | Reduce Magicka Cost |
| Ring |
Powerful Assault | Jewelry | Swift | Reduce Magicka Cost |
| Frontbar Main Hand |
Void Bash | Any 1-handed weapon | Decisive | Hardening |
| Frontbar Off Hand |
Void Bash | Shield | Divines / Sturdy | Tri-Stat |
| Backbar Main Hand |
Powerful Assault | Ice Staff | Charged | Crusher |
Explanation
- Archdruid Devyric changes to Spaulder of Ruin because Archdruid Devyric is extremely buggy and has issues hitting moving targets
- Saxhleel's Champion changes to Turning Tide because you don't want to spend your Ultimate in trash
- War Machine changes to Powerful Assault because you don't want to spend your Ultimate in trash and because you can proc it with Razor Caltrops. Swap Caltrops around with Expansive Frost Cloak when using Powerful Assault. If you're playing without a Healer keep using Vestments of Olorime. If you're using Powerful Assault, don't replace Razor Caltrops with Unnerving Boneyard even with Grave Lord, because you need Caltrops to proc the set
- Void Bash is extremely good for stacking enemies in dungeon trash packs
- Backbar Ice Staff trait changes to Charged so that Pulsar becomes almost guaranteed to proc Chilled status effect
- Jewelry traits change to Swift as movement speed is extremely useful while running through trash
Trial Trash
A Trash setup for Trials could look like this. Unlike Dungeon trash setup, it doesn't switch away from Ultimate sets because Trial trash packs can be difficult so it's worth spending Ultimate on them. The table shows it with Pearlescent Ward + Saxhleel's Champion (Trial Setup 1), but the same changes apply if you're using Lucent Echoes + Powerful Assault (Trial Setup 2). If you're using Powerful Assault, swap Razor Caltrops around with Expansive Frost Cloak so Caltrops is on your back bar to proc the set, just like in Dungeon Trash setup
| Gear Slot | Set | Weight/Type | Trait | Enchantment |
|---|---|---|---|---|
| Head |
Archdruid Devyric | Medium | Divines / Sturdy | Tri-Stat |
| Shoulders |
Archdruid Devyric | Light | Divines / Sturdy | Tri-Stat |
| Chest |
Pearlescent Ward | Heavy | Reinforced | Tri-Stat |
| Hands |
Pearlescent Ward | Heavy | Divines / Sturdy | Tri-Stat |
| Belt |
Pearlescent Ward | Heavy | Divines / Sturdy | Tri-Stat |
| Legs |
Pearlescent Ward | Heavy | Reinforced | Tri-Stat |
| Boots |
Pearlescent Ward | Heavy | Reinforced | Tri-Stat |
| Necklace |
Saxhleel's Champion | Jewelry | Swift | Reduce Magicka Cost |
| Ring |
Saxhleel's Champion | Jewelry | Swift | Reduce Magicka Cost |
| Ring |
Saxhleel's Champion | Jewelry | Swift | Reduce Magicka Cost |
| Frontbar Main Hand |
Armor of the Trainee | Any 1-handed weapon | Decisive | Hardening |
| Frontbar Off Hand |
Druid's Braid | Shield | Divines / Sturdy | Tri-Stat |
| Backbar Main Hand |
Saxhleel's Champion | Ice Staff | Charged | Crusher |
Setups for tanking Trials
These are just 2 examples of setups the 2 Tanks could use in a PUG Trial run. If you're in a more organized team, the gear your Raid Lead wants you to wear takes priority
Setup 1
| Gear Slot | Set | Weight/Type | Trait | Enchantment |
|---|---|---|---|---|
| Head |
Archdruid Devyric | Medium | Divines / Sturdy | Tri-Stat |
| Shoulders |
Archdruid Devyric | Light | Divines / Sturdy | Tri-Stat |
| Chest |
Pearlescent Ward | Heavy | Reinforced | Tri-Stat |
| Hands |
Pearlescent Ward | Heavy | Divines / Sturdy | Tri-Stat |
| Belt |
Pearlescent Ward | Heavy | Divines / Sturdy | Tri-Stat |
| Legs |
Pearlescent Ward | Heavy | Reinforced | Tri-Stat |
| Boots |
Pearlescent Ward | Heavy | Reinforced | Tri-Stat |
| Necklace |
Saxhleel's Champion | Jewelry | Harmony / Infused | Reduce Magicka Cost |
| Ring |
Saxhleel's Champion | Jewelry | Harmony / Infused | Reduce Magicka Cost |
| Ring |
Saxhleel's Champion | Jewelry | Harmony / Infused | Reduce Magicka Cost |
| Frontbar Main Hand |
Armor of the Trainee | Any 1-handed weapon | Decisive | Hardening |
| Frontbar Off Hand |
Druid's Braid | Shield | Divines / Sturdy | Tri-Stat |
| Backbar Main Hand |
Saxhleel's Champion | Ice Staff | Infused | Crusher |
Setup 2
| Gear Slot | Set | Weight/Type | Trait | Enchantment |
|---|---|---|---|---|
| Head |
Archdruid Devyric | Medium | Divines / Sturdy | Tri-Stat |
| Shoulders |
Archdruid Devyric | Light | Divines / Sturdy | Tri-Stat |
| Chest |
Lucent Echoes | Heavy | Reinforced | Tri-Stat |
| Hands |
Lucent Echoes | Heavy | Divines / Sturdy | Tri-Stat |
| Belt |
Lucent Echoes | Heavy | Divines / Sturdy | Tri-Stat |
| Legs |
Lucent Echoes | Heavy | Reinforced | Tri-Stat |
| Boots |
Lucent Echoes | Heavy | Reinforced | Tri-Stat |
| Necklace |
Powerful Assault | Jewelry | Harmony / Infused | Reduce Magicka Cost |
| Ring |
Powerful Assault | Jewelry | Harmony / Infused | Reduce Magicka Cost |
| Ring |
Powerful Assault | Jewelry | Harmony / Infused | Reduce Magicka Cost |
| Frontbar Main Hand |
Armor of the Trainee | Any 1-handed weapon | Decisive | Hardening |
| Frontbar Off Hand |
Druid's Braid | Shield | Divines / Sturdy | Tri-Stat |
| Backbar Main Hand |
Powerful Assault | Ice Staff | Infused | Crusher |
Additional Info
- This setup requires you to fit either Resolving Vigor or Echoing Vigor on your backbar
Champion Points
Use these Champion Points as default for Boss and Trash fights respectively. Further below you'll find a list of all useful CPs with explanations on when to use them.
All Useful Champion Points
A full list of useful Champion Points with explanations on when to slot them.
- Ironclad - reduces damage taken from direct damage attacks by 6%
- Enduring Resolve - reduces damage taken from damage over time attacks by 6%
- Duelist's Rebuff - reduces damage taken from single target attacks by 6%
- Unassailable - reduces damage taken from area of effect attacks by 6%
- Bulwark - increases your armor by 1900 while you have a shield or frost staff equipped, which should be at all times anyway
- Focused Mending - increases your single target healing by 10%. Boosts your Polar Wind and Shield Throw's Sage's Remedy
Race

Mundus


Attributes
Put all 64 points into Health. However, your Max Stamina must be higher than your Max Magicka, because the Combustion synergy restores your dominant resource and you want it to be Stamina. If you have passives (such as Gift of Magnus) or item set bonuses that increase Max Magicka, put just enough points into Stamina to keep it higher than your Max Magicka, then put the rest into Health.
Food
Use Jewels of Misrule as your default. Orzorga's Smoked Bear Haunch provides slightly higher stats but is expensive.
Potions
Most of the time you should use Tri-Stat potions. They'll greatly improve your sustain.
Heroism potions can provide 100% uptime on Minor Heroism which generates ultimate, but they're expensive.
Gameplay
Here you can see this build tackling Veteran Dungeons and Trials with different subclasses
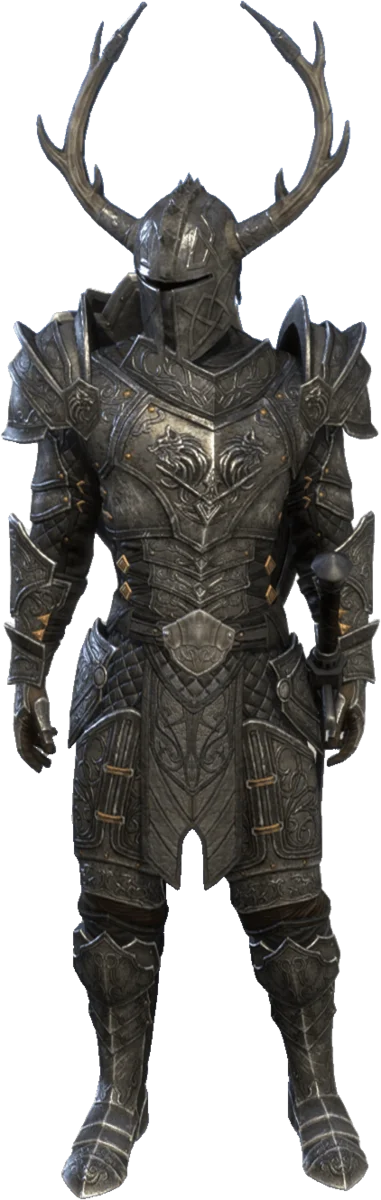
Fashion
| Slot | Style | Dyes |
|---|---|---|
| Head |
Thalmor Black
Thalmor Black
Thalmor Black
|
|
| Shoulders |
Thalmor Black
|
|
| Chest |
Thalmor Black
Thalmor Black
Thalmor Black
|
|
| Hands |
Thalmor Black
Thalmor Black
Wolf's Fur Brown
|
|
| Belt |
Empty
|
|
| Legs |
Thalmor Black
Thalmor Black
Wolf's Fur Brown
|
|
| Feet |
Thalmor Black
Thalmor Black
|
|
| Frontbar Main Hand |
Thalmor Black
Thalmor Black
Thalmor Black
|
|
| Frontbar Off Hand |
Thalmor Black
Thalmor Black
Thalmor Black
|
|
| Backbar Main Hand |
Thalmor Black
Thalmor Black
Thalmor Black
|
|
FAQ
Nord is the best race for tanking in ESO. The Rugged racial passive grants 2600 armor which translates to roughly 7% damage reduction near armor cap, and Stalwart gives you ultimate generation. You can complete any content on any race, but non-Nords will have to adjust their build to compensate - see the Race section for more details.
There is no specific number to aim for - your Health is a result of your gear, attributes, enchants and passives, not a target you build towards. That said, some fights in ESO have mechanics that scale with your Maximum Health, so you generally don't want to go above 45k Health unless a specific fight requires it.
Put all 64 points into Health. The only exception is if your Max Magicka ends up higher than your Max Stamina due to racials or item set bonuses - in that case, put just enough points into Stamina so it stays higher than Magicka, then put the rest into Health. See the Attributes section for details.
THANKS FOR READING

If you've enjoyed this guide and want to support me, you can do so through Patreon. Your support will help me produce more guides.