BEGINNER ARCANIST TANK GUIDE
This is a simplified guide which skips a lot of nuance and is intended for beginners or players who don't intend to tackle extremely hard content. Every fight in ESO is situational and ideal skill/gear setup is different for almost every boss. This guide is a compromise where I'll be showing you a single skill setup and very few gear setups that might not be perfect for every single situation, but they'll be at the very least good enough for every situation, and won't overwhelm new players with lots of information.
Last changed: Update 44 - 18th December 2024
The Arcanist plays quite differently from other tank classes in ESO, with its main strength lying in its damage shields. The Impervious Runeward's damage shield value is incredibly high, and can be further buffed with the Intricate Runeforms passive. Arcanist also gets tons of raw stats from their passives and abilities. Runic Sunder and Aegis of the Unseen together provide 4180 additional armor. Wellspring of the Abyss will boost your recoveries for each Soldier of Apocrypha ability slotted, which will then also get boosted by Erudition on top of that.
In terms of group support, the Arcanist brings 2200 armor penetration from Runic Sunder, providing roughly a 4% damage increase. The Arcanist also has much easier access to the Minor Brittle debuff thanks to Rune of the Colorless Pool which increases critical damage by 10%, lasting 20 seconds compared to the usual 4 seconds that come from proccing the Chilled effect with an Ice Staff. The Arcanist also brings the almost unique Minor Evasion buff, reducing damage taken from area of effect attacks by 10%.
SKILL SETUPS
| Front Bar | Back Bar |
|---|---|
| Slot 1: Shield Throw | Slot 1: Cruxweaver Armor |
| Slot 2: Soul Burst | Slot 2: Wield Soul |
| Slot 3: Impervious Runeward | Slot 3: Elemental Susceptibility |
| Slot 4: Ulfsild's Contingency | Slot 4: Elemental Blockade |
| Slot 5: Runeguard of Still Waters | Slot 5: Runic Sunder |
| Ultimate: Glyphic of the Tides | Ultimate: Aggressive Horn |
ADDITIONAL INFO:
- Use the Taunt, Sage's Remedy and Maim combination on your Shield Throw
- Use Destructive Clench instead of Shield Throw and then swap the positions around with Runic Sunder (because you can't use Destructive Clench on your frontbar) if you don't have access to Scribing
- Use the Damage Shield, Crusader's Defiance and Courage combination on your Soul Burst
- Use the Damage Shield, Gladiator's Tenacity and Intellect and Endurance combination on your Ulfsild's Contingency
- Use Zenas' Empowering Disc instead of Soul Burst if you don't have access to Scribing
- Use Rune of the Colorless Pool, Defensive Stance, Revealing Flare or Heroic Slash instead of Ulfsild's Contingency if you don't have access to Scribing
- Glyphic of the Tides isn't meant to be activated, at least most of the times. It's on your front bar to proc the Intricate Runeforms passive, which will increase effectiveness and reduce cost of your damage shields by 10%. This affects Soul Burst, Impervious Runeward and Ulfsild's Contingency. Keep in mind that if you do not have access to Scribing and went with Zenas' Empower Disc in one of your previous skill slots because of that, Zenas' is already triggering Intricate Runeforms so you can instead use Gibbering Shelter as your frontbar ultimate
- Use the Pull, Druid's Resurgence and Cowardice combination on your Wield Soul
- Use Silver Leash instead of Wield Soul if you don't have access to Scribing
- You will have to slot Crushing Shock for fights that require ranged interrupts, such as Thurvokun in Fang Lair dungeon or Ansuul in Sanity's Edge trial
- You will have to slot Immovable for fights that require lots of block mitigation, such as Archdruid Devyric in Earthen Root Enclave dungeon or Xalvakka in Rockgrove trial.
GEAR
This is the crafted gear setup you can start with. You do not need to start with a crafted setup and you can move on straight to the setup from dungeons, because Normal difficulty dungeons are easy enough to clear while wearing random gear pieces you pick up from questing. This crafted setup is for people who are anxious about tanking and need a "stepping stone" setup even though it isn't really needed.
| Gear Slot | Set | Weight/Type | Trait | Enchantment |
|---|---|---|---|---|
 Head |
Druid's Braid | Medium | Reinforced | Magicka |
 Shoulders |
Druid's Braid | Light | Sturdy /Divines | Health |
 Chest |
Wretched Vitality | Heavy | Reinforced | Health |
 Hands |
Wretched Vitality | Heavy | Sturdy /Divines | Stamina |
 Belt |
Wretched Vitality | Heavy | Sturdy /Divines | Magicka |
 Legs |
Wretched Vitality | Heavy | Reinforced | Stamina |
 Boots |
Wretched Vitality | Heavy | Reinforced | Health |
 Necklace |
Druid's Braid | Jewelry | Harmony /Infused | Reduce Magicka Cost/Reduce Block Cost |
 Ring |
Druid's Braid | Jewelry | Harmony /Infused | Reduce Magicka Cost |
Ring |
Druid's Braid | Jewelry | Harmony /Infused | Reduce Magicka Cost |
 Frontbar Main Hand |
Druid's Braid | Any 1-handed weapon | Decisive | Hardening |
 Frontbar Off Hand |
Druid's Braid | Shield | Sturdy /Divines | Stamina/Tri-Stat |
Backbar Main Hand |
Druid's Braid | Ice Staff | Infused | Crusher |
ADDITIONAL INFO:
- Sets like Fortified Brass or Senchal Defender (this one is from Overland, not crafted) can be better than Druid's Braid, but Druid's Braid has the benefit of not becoming mostly useless when you stop wearing 5 pieces of it, and it's important because I can't know what content you're going to farm first. Are you going to get a Monster Set first and replace head and shoulder slots? Or are you replacing weapons and jewelry first? With Druid's Braid it doesn't matter, because it's slowly losing effectiveness piece by piece. The Druid's Braid shield will also stay relevant for you even past your beginner phase.
These are the best sets you can get from easy content, only the Tremorscale requires you to finish the content on Veteran difficulty but Volenfell is a base game dungeon so its extremely easy even in the Veteran difficulty.
| Gear Slot | Set | Weight/Type | Trait | Enchantment |
|---|---|---|---|---|
Head |
Tremorscale | Medium | Reinforced | Magicka/Tri-Stat |
Shoulders |
Tremorscale | Light | Divines /Sturdy | Health/Tri-Stat |
Chest |
Turning Tide | Heavy | Reinforced | Health/Tri-Stat |
Hands |
Turning Tide | Heavy | Divines /Sturdy | Stamina/Tri-Stat |
Belt |
Turning Tide | Heavy | Divines /Sturdy | Magicka/Tri-Stat |
Legs |
Turning Tide | Heavy | Reinforced | Stamina/Tri-Stat |
Boots |
Turning Tide | Heavy | Reinforced | Health/Tri-Stat |
Necklace |
Crimson Oath's Rive | Jewelry | Harmony /Infused | Reduce Magicka Cost/Reduce Block Cost |
Ring |
Crimson Oath's Rive | Jewelry | Harmony /Infused | Reduce Magicka Cost |
Ring |
Crimson Oath's Rive | Jewelry | Harmony /Infused | Reduce Magicka Cost |
Frontbar Main Hand |
Armor of the Trainee | Any 1-handed weapon | Decisive | Hardening |
Frontbar Off Hand |
Druid's Braid | Shield | Divines /Sturdy | Stamina/Tri-Stat |
Backbar Main Hand |
Crimson Oath's Rive | Ice Staff | Infused | Crusher |
ADDITIONAL INFO:
- Turning Tide drops from Normal or Veteran Shipwrights Regret
- Crimson Oath's Rive drops from Normal or Veteran The Dread Cellar
- Puncturing Remedy drops from Normal or Veteran Dragonstar Arena
- Tremorscale drops from Veteran Volenfell
- Tri-Stat enchants are better than single stat ones, but they're extremely expensive. The reason I listed them here but not in the Crafted setup is because Tremorscale and Turning Tide will stay relevant past your beginner phase, so if you can afford Tri-Stat enchants you should go for it.
This is my suggested setup for dungeons. Since you can't fit in that many support sets in 4-man content, any combination of support sets will perform well.
| Gear Slot | Set | Weight/Type | Trait | Enchantment |
|---|---|---|---|---|
Head |
Archdruid Devyric | Medium | Reinforced | Tri-Stat |
Shoulders |
Archdruid Devyric | Light | Divines /Sturdy | Tri-Stat |
Chest |
Lucent Echoes | Heavy | Reinforced | Tri-Stat |
Hands |
Lucent Echoes | Heavy | Divines /Sturdy | Tri-Stat |
Belt |
Lucent Echoes | Heavy | Divines /Sturdy | Tri-Stat |
Legs |
Lucent Echoes | Heavy | Reinforced | Tri-Stat |
Boots |
Lucent Echoes | Heavy | Reinforced | Tri-Stat |
Necklace |
War Machine | Jewelry | Harmony /Infused | Reduce Magicka Cost |
Ring |
War Machine | Jewelry | Harmony /Infused | Reduce Magicka Cost |
Ring |
War Machine | Jewelry | Harmony /Infused | Reduce Magicka Cost |
Frontbar Main Hand |
Armor of the Trainee | Any 1-handed weapon | Decisive | Hardening |
Frontbar Off Hand |
Druid's Braid | Shield | Divines /Sturdy | Tri-Stat |
Backbar Main Hand |
War Machine | Ice Staff | Infused | Crusher |
ADDITIONAL INFO:
- If you're a Nord, you should replace 2 Reinforced traits with Divines/Sturdy, as these would put you over the armor cap with Rugged
- Use Vestments of Olorime instead of War Machine if you're playing without a healer (1 Tank, 3 Damage Dealers group comp)
- Turning Tide is a decent alternative for Lucent Echoes
- Powerful Assault is a decent alternative for War Machine, but you'll need an Assault ability to proc it, so you'll have to fit Resolving Vigor into your skill setup
- Crimson Oath's Rive is a decent alternative for War Machine, but it will be useless for Damage Dealers who already brought enough armor penetration on their own
This is my suggested setup for main tanking trials.
| Gear Slot | Set | Weight/Type | Trait | Enchantment |
|---|---|---|---|---|
Head |
Archdruid Devyric | Medium | Reinforced | Tri-Stat |
Shoulders |
Archdruid Devyric | Light | Divines /Sturdy | Tri-Stat |
Chest |
Pearlescent Ward | Heavy | Reinforced | Tri-Stat |
Hands |
Pearlescent Ward | Heavy | Divines /Sturdy | Tri-Stat |
Belt |
Pearlescent Ward | Heavy | Divines /Sturdy | Tri-Stat |
Legs |
Pearlescent Ward | Heavy | Reinforced | Tri-Stat |
Boots |
Pearlescent Ward | Heavy | Reinforced | Tri-Stat |
Necklace |
Crimson Oath's Rive | Jewelry | Harmony /Infused | Reduce Magicka Cost |
Ring |
Crimson Oath's Rive | Jewelry | Harmony /Infused | Reduce Magicka Cost |
Ring |
Crimson Oath's Rive | Jewelry | Harmony /Infused | Reduce Magicka Cost |
Frontbar Main Hand |
Armor of the Trainee | Any 1-handed weapon | Decisive | Hardening |
Frontbar Off Hand |
Druid's Braid | Shield | Divines /Sturdy | Tri-Stat |
Backbar Main Hand |
Crimson Oath's Rive | Ice Staff | Infused | Crusher |
ADDITIONAL INFO:
- This setup is a recommendation for random PUG groups. In an organized trial, always listen to what the raid lead wants you to wear, rather than what I'm showing here
- If you're a Nord, you should replace 2 Reinforced traits with Divines/Sturdy, as these would put you over the armor cap with Rugged
- Crimson Oath's Rive will be rendered useless if a Damage Dealer in your group is wearing Alkosh, but it's very unlikely you'll find a Damage Dealer wearing a support set in a random PUG group
- Crimson Oath's Rive has 2 bonus armor lines which together will grant you 2974 additional armor. This will put you way over the armor cap if you're a Nord because of Rugged. You could change all of your Reinforced traits to Divines/Sturdy to offset this, but it's not really worth it because Crimson Oath's Rive is a set purely for random groups, and it will be completely invalidated by Alkosh in any organized group, so you will definitely stop using it at some point
This is my suggested setup for off tanking trials.
| Gear Slot | Set | Weight/Type | Trait | Enchantment |
|---|---|---|---|---|
Head |
Magma Incarnate | Medium | Reinforced | Tri-Stat |
Shoulders |
Spaulder of Ruin | Light | Divines /Sturdy | Tri-Stat |
Chest |
Saxhleel's Champion | Heavy | Reinforced | Tri-Stat |
Hands |
Saxhleel's Champion | Heavy | Divines /Sturdy | Tri-Stat |
Belt |
Saxhleel's Champion | Heavy | Divines /Sturdy | Tri-Stat |
Legs |
Saxhleel's Champion | Heavy | Reinforced | Tri-Stat |
Boots |
Saxhleel's Champion | Heavy | Reinforced | Tri-Stat |
Necklace |
Powerful Assault | Jewelry | Harmony /Infused | Reduce Magicka Cost |
Ring |
Powerful Assault | Jewelry | Harmony /Infused | Reduce Magicka Cost |
Ring |
Powerful Assault | Jewelry | Harmony /Infused | Reduce Magicka Cost |
Frontbar Main Hand |
Armor of the Trainee | Any 1-handed weapon | Decisive | Hardening |
Frontbar Off Hand |
Druid's Braid | Shield | Divines /Sturdy | Tri-Stat |
Backbar Main Hand |
Powerful Assault | Ice Staff | Infused | Crusher |
ADDITIONAL INFO:
- This setup is a recommendation for random PUG groups. In an organized trial, always listen to what the raid lead wants you to wear, rather than what I'm showing here
- If you're a Nord, you should replace 2 Reinforced traits with Divines/Sturdy, as these would put you over the armor cap with Rugged
- You'll need an Assault ability to proc Powerful Assault, so you'll have to fit Resolving Vigor into your skill setup. You could replace Shield Throw if a fight doesn't require a ranged taunt and the boss doesn't hit hard, you could replace Wield Soul if you don't need to chain any adds, but if you're clueless about what to replace then replacing Ulfsild's Contingency is the safest option, though Powerful Assault is on your backbar so you'll have to move some skill (for example Runic Sunder) to frontbar in place of Ulfsild's Contingency and then put Resolving Vigor on backbar
- Saxhleel's Champion allows you to provide Major Force with any ultimate, so you can change your backbar ultimate from Aggressive Horn to Replenishing Barrier or Gibbering Shelter and you'll only lose out on the Horn Resource Buff while providing a defensive ultimate for you and your group
CHAMPION POINTS
Warfare
- Ironclad (6% Direct Damage Reduction)
- Duelist's Rebuff (6% ST Damage Reduction)
- Enduring Resolve (6% DoT Damage Reduction)
- Bulwark (1900 Armor)
Fitness
- Boundless Vitality (1400 Max Health)
- Bastion (15% stronger damage shields)
- Shield Master (10% cheaper damage shields)
- Bracing Anchor (20% Block Mitigation, 16% Movement Speed Penalty)
ADDITIONAL INFO:
- If you're a Nord with fully golded out gear and proper traits you will be over the armor cap with these Champion Points, so you can replace Bulwark with for example Focused Mending or Unassailable.
RACE
Nord is the best race for tanking, due to the increased armor from Rugged and ulti generation from Stalwart. The imbalance between different races can be massive for other classes, but Arcanists get tons of armor from Aegis of the Unseen and Runic Sunder, so the difference is very small.
MUNDUS
The best Mundus is The Atronach which increases your Magicka Recovery by 310 and causes your armor pieces with the Divines trait to increase it by another 28.
ATTRIBUTES
HEALTH
64
STAMINA
0
MAGICKA
0
Majority of the times you should put all your points into Health. However you need your Max Stamina to be higher than your Max Magicka, because the Combustion synergy restores your dominant resource and you want it to be Stamina. Because of that, you might have to put some attribute points into Stamina if you have passives (such as for example the Gift of Magnus racial) or item set bonuses (such as for example 1-piece bonus of Encratis's Behemoth) that increase your Max Magicka. Put just enough points to make your Max Stamina higher than your Max Magicka, and then put the rest into Health.
FOOD
The best food is Orzorga's Smoked Bear Haunch, however it's extremely expensive so you should use Jewels of Misrule instead, it provides only slightly lower stats than Orzorga's Smoked Bear Haunch while being significantly cheaper.
Other decent foods:
- Orzorga's Red Frothgar - provides more Max Health and Magicka Recovery at the cost of providing no Stamina Recovery at all. Stamina Recovery doesn't work while blocking so it can be a decent option if you're permablocking
- Bewitched Sugar Skulls - provides maximum resources instead of recoveries, can be decent for fights where you need to block for a very long time during a very specific period but the pressure is non-existent outside of that specific period so you can recuperate stamina by heavy attacking freely, for example Roksa the Warped boss in Bal Sunnar dungeon. The increased maximum resources will also increase the scaling of some of your healing abilities, such as Resolving Vigor
- Candied Jester's Coin - provides only Max Stamina and Magicka Recovery, can be decent when you want to reduce your Max Health during a specific phase of a fight. For example, in Cloudrest you can eat it right as the execute phase starts, because Maximum Health becomes a detriment due to the Baneful Mark mechanic
POTIONS

Most of the time you should use Tri-Stat potions (Restore Health, Restore Stamina, Restore Magicka). They'll greatly improve your sustain. You can craft them by combining Columbine, Bugloss and Mountain's Flower.
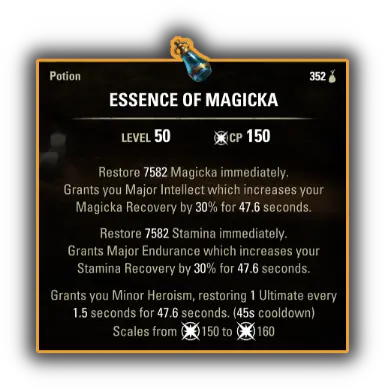
There are better potions but they're extremely expensive so they're only worth using when you're tryharding for the most difficult achievments, such as trial trifectas. Heroism potions (Heroism, Restore Stamina, Restore Magicka) can provide a 100% uptime on Minor Heroism buff which generates ultimate, but they're extremely expensive because they're crafted by combining Dragon Rheum, Dragon's Blood and Columbine.
THANKS FOR READING

If you've enjoyed this guide and want to support me, you can do so through Patreon. Your support will help me produce more guides.