Warm Welcome
Enemies deal double damage.
Your presence is welcomed with two-fold the generosity. Enemies deal double damage to inflict major wounds.
Solo Dungeons launch with Season Two on October 21, 2026.
Solo Moon Hunter Keep is the one-player version of Moon Hunter Keep, added in Update 51. It has the same five bosses, and you pick the difficulty yourself with 0 to 3 Meted Misfortunes.
The entrance is in northern Reaper's March, north of Senalana, and you can also enter from the world map. It's free for everyone.
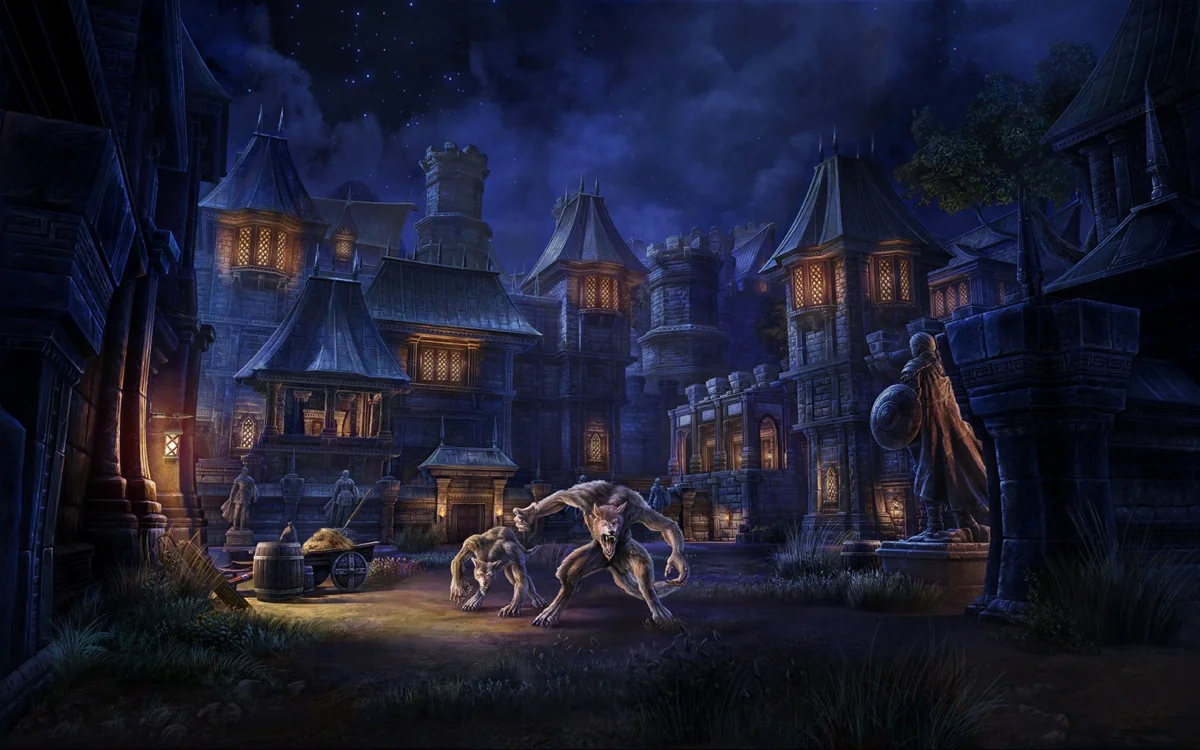
Misfortunes are optional modifiers. Each one you turn on makes the run harder and pays out more.
Right at the entrance there's a glowing pile of weapons and shields called Meted Misfortunes. Activate it and choose up to 3. You can't change them mid-run. To pick different ones, use the Reset Hourglass next to it and start over.
Misfortunes
Enemies deal double damage.
Your presence is welcomed with two-fold the generosity. Enemies deal double damage to inflict major wounds.
Healing you receive is reduced by 50%.
Healing is a crutch used by soft-bellied cowards. Reject it and fight like a warrior!
Enemies heal when you hit them with direct damage, at most once every 3 seconds.
Your pain gives enemies the will to fight on.
1
Alleviating Assault
2
Revoke of Respite
3
Warm Welcome
Difficulty (according to me)
Pretty much Overland, trash mobs have even less Health than regular Overland mobs (24k).
Difficulty (according to ZOS)
Comparable to overland difficulty
Monsters deal the least damage, have low health pools, and have less abilities
Rewards
Difficulty (according to me)
Comparable to Normal Solo Arenas.
Difficulty (according to ZOS)
Comparable to a Normal solo arena
Monsters deal threatening damage, have more health, can access more abilities, and appear in greater numbers
Rewards
Difficulty (according to me)
More difficult than Veteran Solo Arenas.
Difficulty (according to ZOS)
Comparable to a Veteran solo arena
Monsters deal dangerous amounts of damage, have a larger health pool, and can use deadlier abilities, they also appear in greater numbers
Rewards
Difficulty (according to me)
Difficulty is all over the place. In some places it's more difficult than soloing the Group version of the dungeon.
Difficulty (according to ZOS)
Harder than other comparable solo content
Monsters deal deadly damage, have the largest health pool, and have all abilities and mechanics at their disposal while appearing in droves
Rewards
Solo Dungeons have an unusual amount of Armor on enemies. Trash mobs are just like other instanced enemies, they have 18,200 Armor, but most bosses have 27,300 and the final boss has 36,400.
Enemy Armor caps at 25,000 though, which is 50% damage reduction. Anything above that does nothing until you strip it with Penetration, so against most bosses your first 2,300 Penetration is wasted, and against the final boss it's the first 11,400.
This makes being in the middle the worst option. Penetration that doesn't get you past the cap does nothing, so either commit to it or don't bother at all. Against the final boss, Major Breach and Minor Breach strip most of that, so with both up, everything past your first 2,478 Penetration counts. And since the final boss has 36,400 Armor, you can consider the Lover Mundus even on Light Armor builds.
Moon Hunter Keep enemies have extremely low Weapon Damage on all difficulties, so you can reduce their damage a lot with debuffs like Minor Cowardice, Major Cowardice or an enchant like Weakening.
 Minor Cowardice
 Major Cowardice
 Weakening2H, Infused
Minor Cowardice
−215
 Scribing, Cowardice script
Scribing, Cowardice script
Major Cowardice
−430
Scribing, Cowardice script
Scribing, Cowardice script
For the first time ever, enemy abilities also have a flat value, so reducing their Weapon Damage doesn't entirely remove the damage, they still do some damage while they're at 0 Weapon Damage. But it's still extremely worth it, because the values are very small, 283 to 651 Weapon Damage, so even just Major Cowardice or just Weakening reduces the scalable part significantly.
Some abilities don't get cut by that much at 3 Misfortunes though, like Moonlit Rage.
Pick a boss on the list.
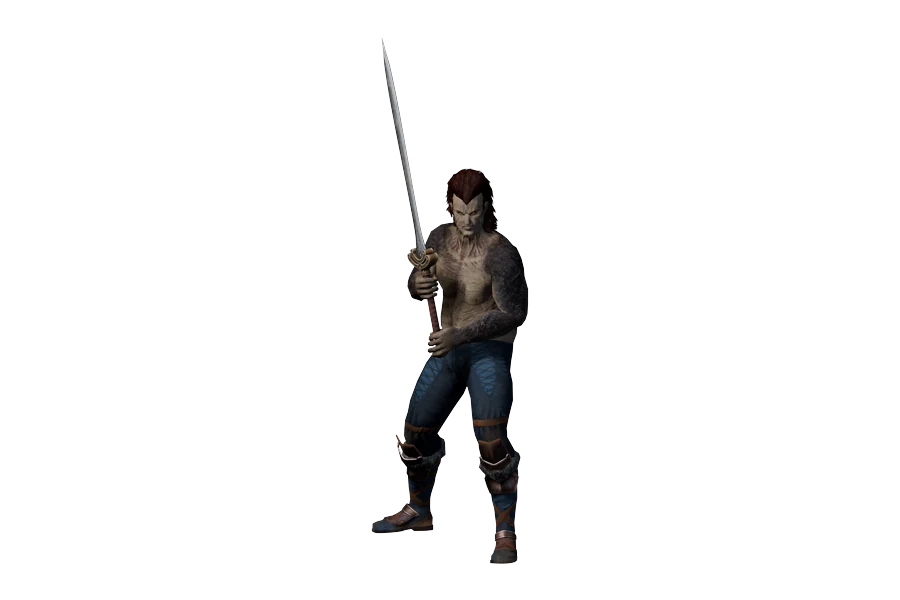
Bloody Cleave deals a lot of damage and it's difficult to react to, so ideally bring a build that can face tank it.
Move away fast when Jailer starts casting his AoE, Bloodmoon's Mercy.
Focus adds as soon as they spawn.
Don't stand in the Archers' Volley, and block the Werewolves' heavy attack, Crushing Leap.
Don't stand in the Archers' Volley, interrupt or dodge roll their Taking Aim, and block the Werewolves' heavy attack, Crushing Leap.
Bring a build that can face tank Bloody Cleave, move away fast from Bloodmoon's Mercy and focus adds as soon as they spawn.

Frontal attack
Frontal attack with a 0.6-second wind-up that deals a lot of damage. A half circle shows on the ground in front of him right before it lands.
It doesn't leave a bleed.
It leaves Hemorrhage on you, an 18-second DoT that ticks every 2 seconds.
It leaves Hemorrhage on you, an 18-second DoT that ticks every 2 seconds.
It leaves Hemorrhage on you, an 18-second DoT that ticks every 2 seconds.
What to do
Have a build strong enough to face tank it and outheal it, or block or dodge roll it.

AoE that shoots out projectiles
Jailer winds up for 2 seconds while a circle grows around him, then deals a lot of damage inside it. It can't be blocked or dodge rolled.
Right after the burst, he sends 6 projectiles outward. If one hits you, it deals a lot of damage, stuns you for 0.8 seconds and slows you down for 9 seconds.
What to do
Get out of the AoE, then side step the projectiles.

Adds at HP thresholds
2 adds spawn at 50% and 2 at 30%, an Archer and a Bloodcaller each time.
1 add spawns at 80%, either an Archer or a Bloodcaller. Then an Archer and a Bloodcaller spawn at 50% and again at 30%.
1 add spawns at 80%, either an Archer or a Bloodcaller. Then an Archer and a Bloodcaller spawn at 50%, and 4 at 30%, 2 of each.
3 adds spawn at 80%, a random mix of Archers and Bloodcallers. Then 4 at 50%, 2 of each, and 5 at 30%, 2 Archers and 3 Bloodcallers.
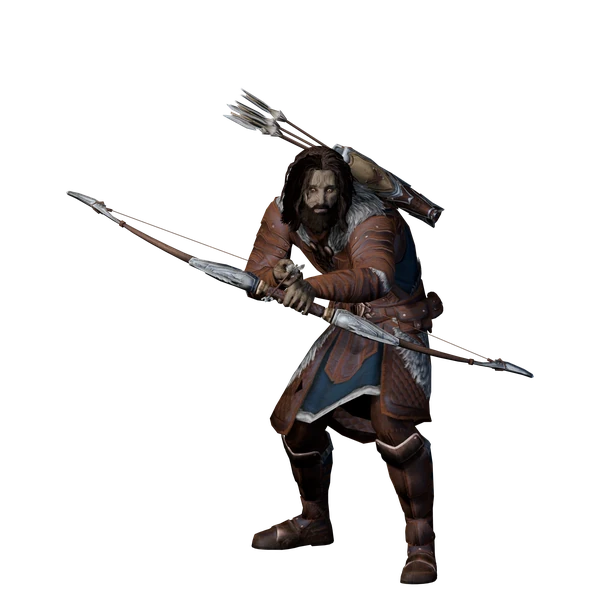
Moon Hunter Archers and Werewolf Bloodcallers spawn at the 2 doors.
What to do
Focus them.
Adds at HP thresholds
0 Misfortunes 21,978 Health
1 Misfortune 61,538 Health
2 Misfortunes 142,857 Health
3 Misfortunes 241,758 Health
They can spawn at 50% and 30%.
They use Volley.
They can spawn at 80%, 50% and 30%.
They use Volley and Taking Aim.
They can spawn at 80%, 50% and 30%.
They use Volley and Taking Aim.
They can spawn at 80%, 50% and 30%.
They use Volley and Taking Aim.
What to do
Don't stand in Volley.
Don't stand in Volley and interrupt or dodge roll Taking Aim.

 Archer
AoE
An Archer channels for 1 second, then an AoE spawns under you for 7 seconds. It deals a lot of damage and can't be blocked.
What to do
Interrupt it or get out of the AoE.

Archer
Interruptible heavy hit
An Archer winds up a charged shot at you for 4 seconds. If it hits you, it knocks you back and stuns you.
What to do
Interrupt it or dodge roll.
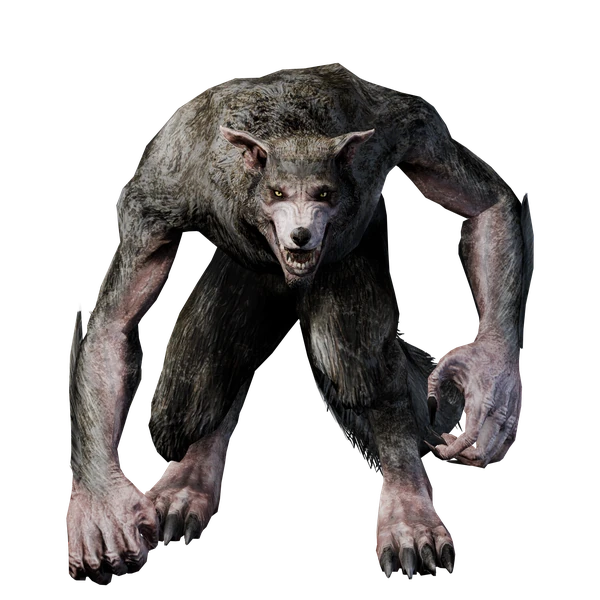
Adds at HP thresholds
0 Misfortunes 23,976 Health
1 Misfortune 67,133 Health
2 Misfortunes 155,844 Health
3 Misfortunes 263,736 Health
They can spawn at 50% and 30%.
They use Crushing Leap.
They can spawn at 80%, 50% and 30%.
They use Crushing Leap and Enraging Howl.
They can spawn at 80%, 50% and 30%.
They use Crushing Leap and Enraging Howl.
They can spawn at 80%, 50% and 30%.
They use Crushing Leap and Enraging Howl.
What to do
Block Crushing Leap.
Interrupt Enraging Howl and block Crushing Leap.

 Bloodcaller
Heavy attack
Heavy attack with a 1.4-second wind-up that stuns you if you don't block it.
What to do
Block or dodge roll it.

Bloodcaller
Interruptible damage buff
A Bloodcaller howls for 2.4 seconds. If you don't interrupt it, a big circle appears around it and moves with it. Enemies standing in it deal 20% more damage.
What to do
Interrupt it. If it goes off, kill that Bloodcaller.

Kite
Jailer channels for 5 seconds, and a geyser erupts under you every second.
What to do
Keep moving.

Companion execute
Jailer stuns your companion and winds up a 3.5-second execute on it. It only targets your companion, so without one he never casts it.
What to do
Interrupt it.
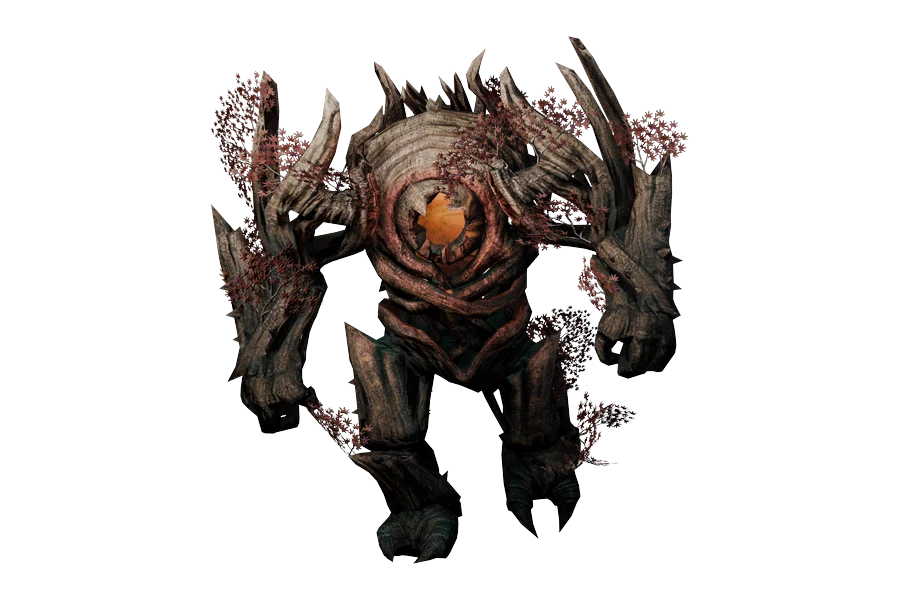
Kill the Spriggans as soon as they spawn, or they keep healing the Guardian back up.
Get out of Thorn Toss before the channel ends, and dodge roll Root Stomp before it reaches you.
Block Crushing Limbs or get behind the Guardian.
Block the Senche's heavy attack, Double Strike.
Block the Senche's heavy attack, Double Strike, and the Bear's heavy attack, Slam.
Kill the Spriggans fast, get out of Thorn Toss and dodge roll Root Stomp.

Healing adds at HP thresholds
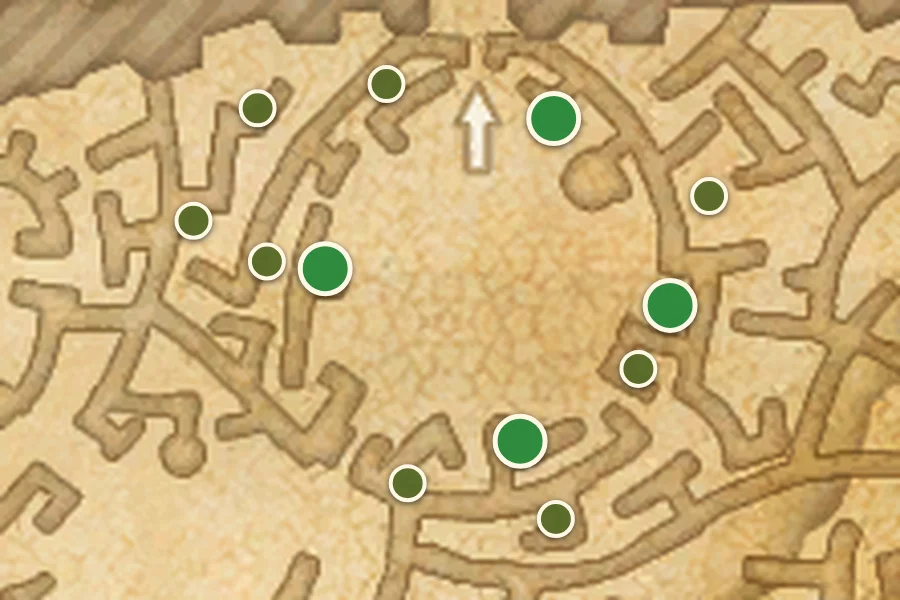
At 80%, 45% and 15% Health the Guardian wakes Spriggans at random spots around the arena. 2 of them always spawn close, on the big markers on the map, and any others on the small ones.
While any Spriggan is up, their heals keep putting him back up to 75% after the first Wake, 50% after the second and 20% after the third.
2 Spriggans wake the first time, 2 or 3 the second time and 3 the third time.
2 Spriggans wake the first time, 3 or 5 the second time and 3 the third time.
2 Spriggans wake the first time, 3 or 5 the second time and 5 the third time.
2 Spriggans wake the first time, 3 or 5 the second time and 5 the third time.
What to do
Kill the Spriggans.
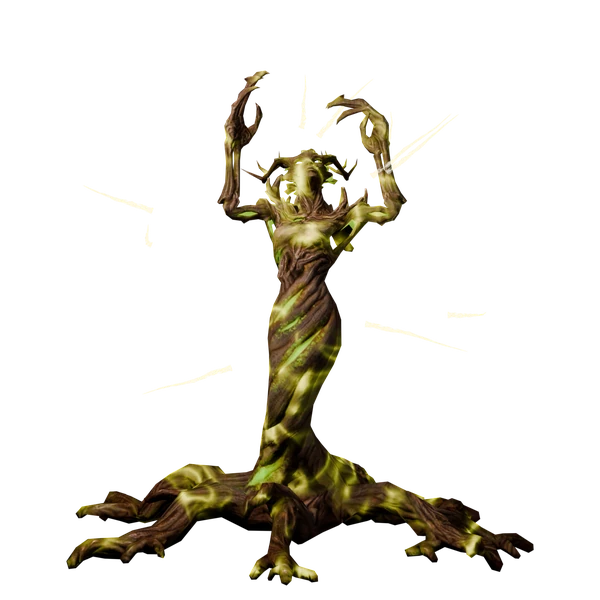
Healing adds at HP thresholds
0 Misfortunes 17,582 Health
1 Misfortune 49,230 Health
2 Misfortunes 114,283 Health
3 Misfortunes 193,402 Health
Adds summoned by the Wake the Trees mechanic, which heal the boss.
Each Spriggan you take down leaves an aura for 5 seconds that restores 5% of your Max Stamina and Magicka every second while you stand in it.
What to do
Kill them.

Conal attack
The Guardian channels for 4 seconds and marks a huge cone. It stays where he aimed it.
It hits 0.35 to 0.6 seconds after the channel ends. The thorns don't look like they travel, but they do, so the farther you are from him, the later it hits. It deals a lot of damage and stuns you if you don't block or dodge roll it.
The cone goes through the hedges.
What to do
Get out of the cone before the channel ends, or block or dodge roll it.
Heavy attack
Heavy attack with a 1.5-second wind-up that stuns you if you don't block it.
Getting behind the Guardian during the wind-up cancels the attack.
What to do
Block or dodge roll it, or get behind the Guardian.
Dodging
Getting hit and dodge rolling after

Homing root
The Guardian stomps and sends roots along the ground that chase you. If they catch you, they deal a lot of damage and root you for 6 seconds, and you keep taking damage until you dodge roll.
What to do
Dodge roll before it hits you. If it hits you, dodge roll to break the root.

DoT
An attack with a 1.35-second wind-up that applies a 9-second DoT if you don't block it.
What to do
Block it.
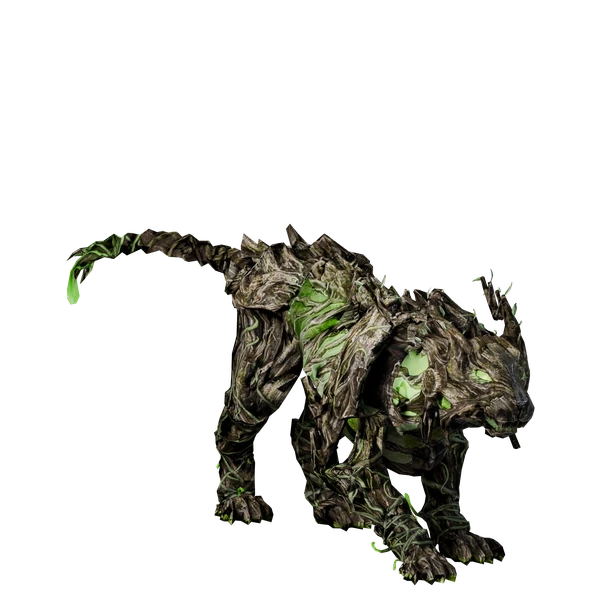
Adds at HP thresholds
1 Misfortune 67,133 Health
2 Misfortunes 155,844 Health
3 Misfortunes 263,736 Health
Senche come in at 72%, 38% and 17%. The first wave has 1 Senche and the second and third have 2 each.
Senche come in at 72%, 38% and 17%. The first wave has 2 Senche and the second has 3. The third wave has 1 Senche and a Wildbriar Bear.
Senche come in at 72%, 38% and 17%, each time with a Wildbriar Bear. The first wave has 2 Senche and the second has 3. The third wave is random: 1 to 3 Senche and 1 or 2 Bears.
They use Double Strike.
What to do
Block their heavy attacks.

 Senche
Heavy attack
Heavy attack with a 1.5-second wind-up.
What to do
Block or dodge roll it.
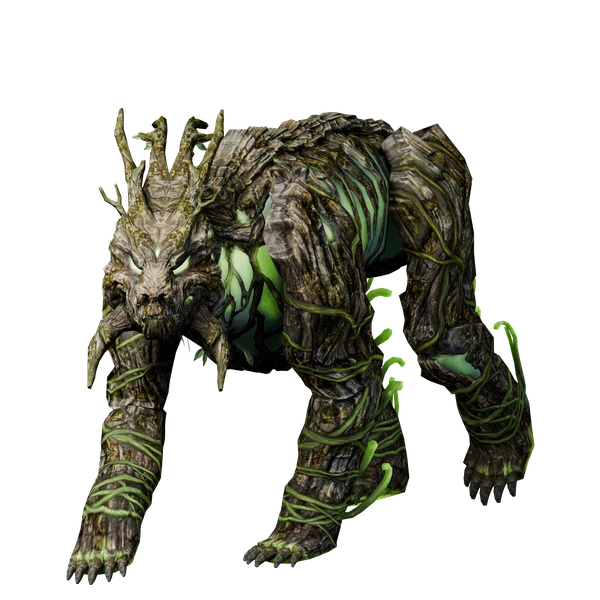
Adds at HP thresholds
2 Misfortunes 428,565 Health
3 Misfortunes 725,263 Health
A Bear comes in with the third Wildbriar wave.
It uses Slam.
One Bear comes in with every Wildbriar wave, and the third wave can spawn two.
It uses Slam.
What to do
Block its heavy attacks or get behind it.

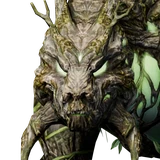 Bear
Heavy attack
Heavy attack with a 2.2-second wind-up that stuns you if you don't block it.
Getting behind the Bear during the wind-up cancels the attack.
What to do
Block or dodge roll it, or get behind the Bear.

Quick stun
Quick attack with a 0.5-second wind-up that stuns you for 0.75 seconds if you don't block it.
What to do
Block it.
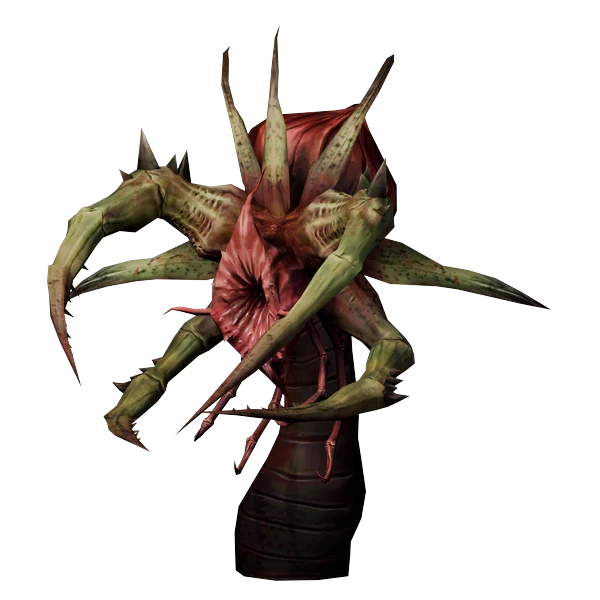
Adds
0 Misfortunes 21,978 Health
1 Misfortune 61,538 Health
2 Misfortunes 142,857 Health
3 Misfortunes 241,758 Health
Stranglers are all over the hedge maze, and they wake up if you stay near them for too long.
They use Grapple.
What to do
Don't stay near them, and break free if they Grapple you.

 Strangler
Stun
A Strangler winds up for 0.4 seconds, then grabs you and stuns you until you break free.
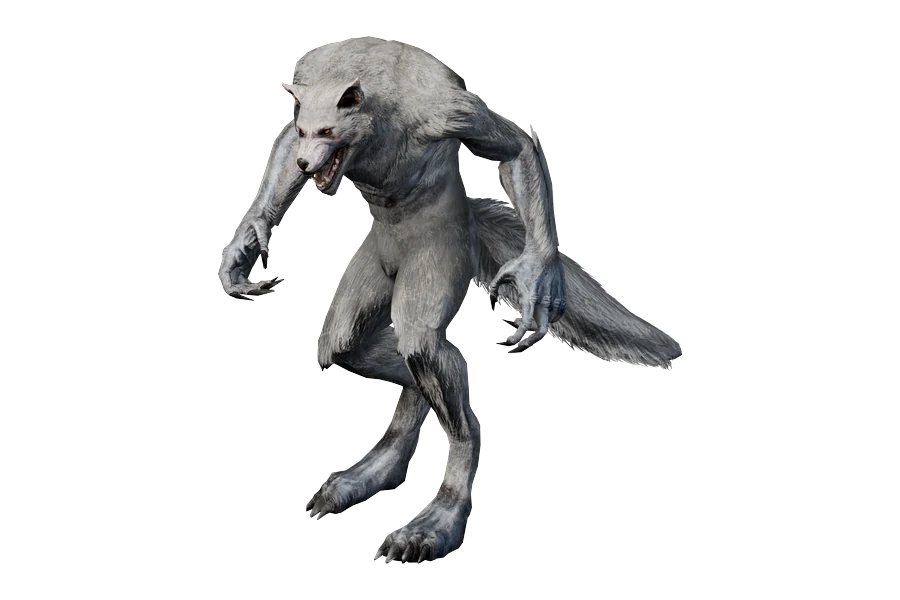
Kill the Shock Wardens fast, they enrage Mylenne with Lunar Rage.
Stay out of the Resonating Pool they leave when they die.
Block Shred, and get out of Lightning Storm and Lightning Rage.
Kill the Dire Wolves.
Kill the Shock Wardens fast, block Shred and stay out of the AoEs.

Heavy attack
Heavy attack with a 1.5-second wind-up that stuns you and applies a 10-second DoT if you don't block it.
What to do
Block or dodge roll it.

Stun
Mylenne winds up for 0.5 seconds, then jumps on you and stuns you for 1.4 seconds.
What to do
Dodge roll it or break free.
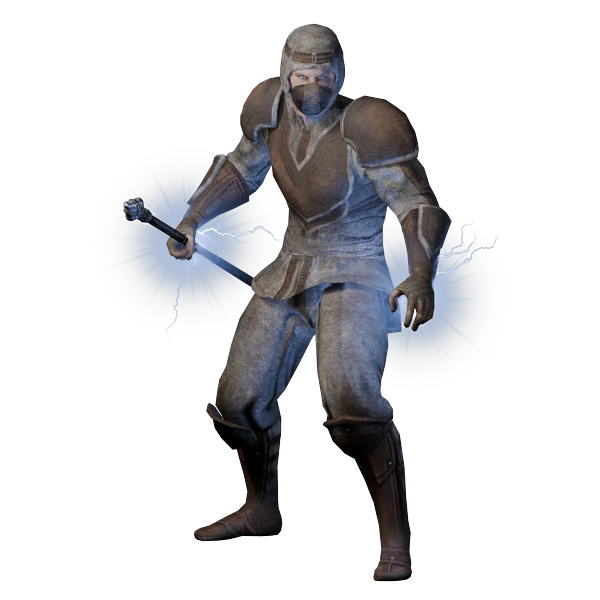
Adds at HP thresholds
0 Misfortunes 21,978 Health
1 Misfortune 61,538 Health
2 Misfortunes 142,857 Health
3 Misfortunes 241,758 Health
They spawn at 80%, 50% and 20%.
They use Lightning Storm and start Lunar Rage.
They leave a Resonating Pool when they die.
1 at 80%, 1 at 50% and 2 at 20%.
1 at 80%, 1 at 50% and 2 at 20%.
1 at 80%, 3 at 50% and 4 at 20%.
3 at 80%, 3 at 50% and 4 at 20%.
What to do
Kill them and then get out of the AoE left after their death.

 Shock Warden
Targeted AoE
Shock Wardens spawn an AoE under you that deals damage.
You can't block or dodge roll it.
What to do
Get out of the AoE.

Enrages Mylenne
Shock Wardens wind up for 1.6 seconds, then throw a projectile at Mylenne. When it hits her, she rages for 10 seconds if she isn't raging already. While she rages, she spawns Lightning Rage around herself.
Bug
You're supposed to be able to un-enrage her by dragging her into a Resonating Pool, but it's currently bugged. It still removes the pool, but she stays enraged.
It only starts the rage.
It only starts the rage.
Every projectile that hits her also makes her deal 15% more damage and take 15% less for 6 seconds.
Every projectile that hits her also makes her deal 15% more damage and take 15% less for 6 seconds.
What to do
there is nothing we can do, it's bugged

Random AoEs
While Lunar Rage is up, Mylenne keeps spawning small AoEs around herself.
You can't block it.
What to do
Get out of the AoEs.

Shock Warden
Pool on a dead Warden
When one of the Shock Wardens dies, it leaves a big pool. The pool stays for up to 21 seconds.
Standing in it damages you and slows you down.
Bug
Dragging Mylenne into it during Lunar Rage is supposed to un-enrage her, but it's currently bugged. It still removes the pool, but she stays enraged.
What to do
Stay out of it.
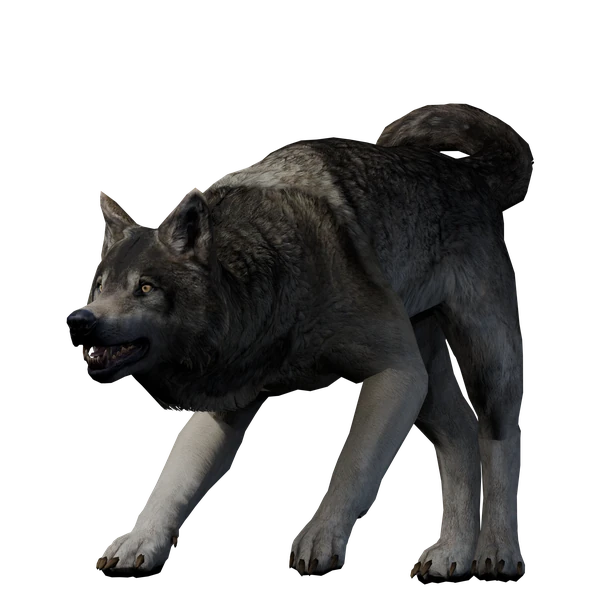
Adds
0 Misfortunes 23,976 Health
1 Misfortune 67,133 Health
2 Misfortunes 155,844 Health
3 Misfortunes 263,736 Health
Mylenne calls Dire Wolves with Wolf Pack. The calls don't come at set Health thresholds like the Shock Wardens do.
Each call brings 1 wolf.
Each call brings 1 wolf.
Mylenne calls 2 wolves at once with Wolf Pack.
Mylenne calls 3 wolves at once with Wolf Pack.
What to do
Kill them.

Calls wolves
Mylenne calls Dire Wolves.
What to do
Kill them.
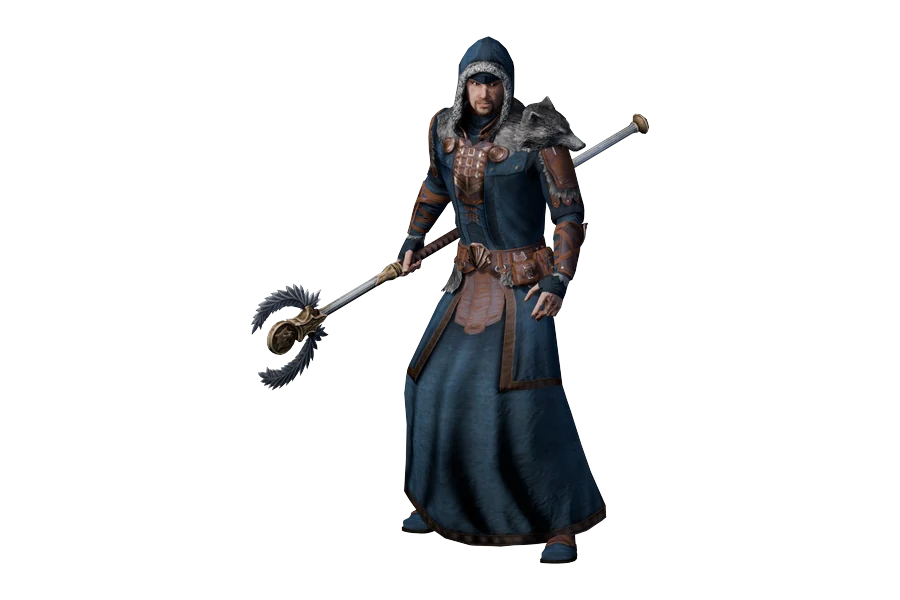
Get into the ring that matches Ernarde's symbol before Symbols of Xarxes goes off.
Kill the Moon Hunter Strikers and Moon Hunter Cleavers before he turns one into a werewolf with Bestial Transformation.
Block Assassinate and Heavy Strike, and block the burst at the end of Shock Blast.
Get out of Lightning Storm and Whirlwind.
Get into the matching ring for Symbols of Xarxes, kill the adds before they transform and block Assassinate.

Stand in the matching ring
At 80%, 50% and 20% Health, rings show up on the floor, each with a symbol over it, while the symbol over Ernarde's head keeps changing. When it stops, that's his symbol, and the ring with the same symbol glows gold. You have 5 seconds before the blast.
Standing in that ring protects you from the blast.
Outside the ring, the blast keeps hitting you until you get in. If you're still outside when it ends, it stuns you for 1.5 seconds.
What to do
Get into the ring with the same symbol as the one over his head before the blast.

Heavy attack
Heavy attack with a 2-second wind-up from Moon Hunter Strikers and Moon Hunter Cleavers.
What to do
Block or dodge roll it.
Targeted AoE
Ernarde spawns an AoE under you that deals damage and slows you down.
What to do
Get out of the AoE.
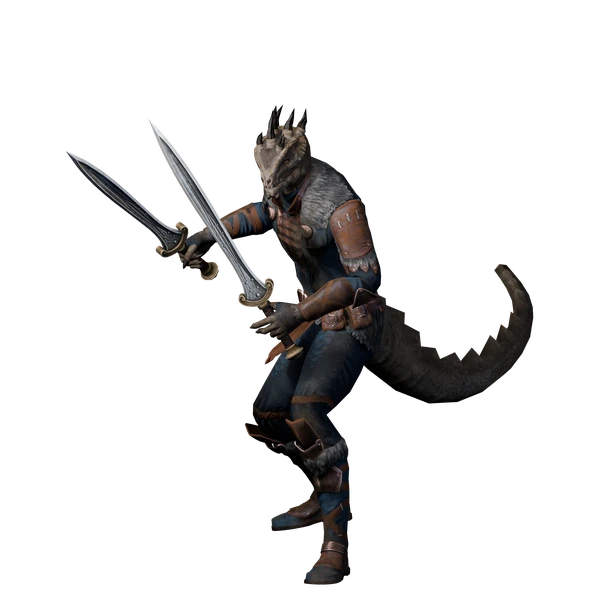
Adds
0 Misfortunes 65,933 Health
1 Misfortune 184,612 Health
2 Misfortunes 428,565 Health
3 Misfortunes 725,263 Health
They use Assassinate and Whirlwind.
Ernarde can turn one into a werewolf with Bestial Transformation.
1 from the start. 1 more can come in when the first Symbols of Xarxes blast ends.
1 from the start, 1 more when the first Symbols of Xarxes blast ends, and 1 more 1.8 seconds after that.
1 from the start, 1 more when the first Symbols of Xarxes blast ends, and 1 more at 20% Health together with 2 Cleavers.
1 from the start, 1 more when the first Symbols of Xarxes blast ends, and 2 more at 20% Health together with a Cleaver.
What to do
Kill them and block Assassinate.
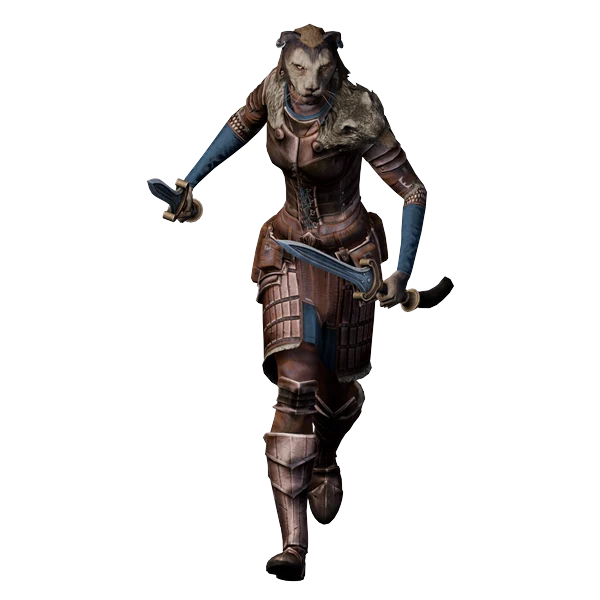
Adds
0 Misfortunes 23,976 / 21,978 Health
1 Misfortune 67,133 / 61,538 Health
2 Misfortunes 155,844 / 142,857 Health
3 Misfortunes 263,736 / 241,758 Health
They use Assassinate, Whirlwind and Heavy Strike.
Ernarde can turn one into a werewolf with Bestial Transformation.
1 from the start and 1 more when the first Symbols of Xarxes blast ends. 1 more can come in at 50% Health and 1 more at 20%.
1 from the start, 1 more when the first Symbols of Xarxes blast ends, and 1 more 1.8 seconds after that.
1 from the start, 1 more when the first Symbols of Xarxes blast ends, and 2 more at 20% Health together with a Striker.
1 from the start, 1 more when the first Symbols of Xarxes blast ends, and 1 more at 20% Health together with 2 Strikers.
What to do
Kill them and block Assassinate and Heavy Strike.

Werewolf add
Ernarde turns one of his Moon Hunter Strikers or Moon Hunter Cleavers into a Werewolf Behemoth. It can't do anything for 8 seconds while it changes. It keeps its Health and then uses Roar and Slam.
What to do
Kill the adds before they transform.

Conal attack
The werewolf from Bestial Transformation winds up for 1.85 seconds with a cone in front of it, then hits in the cone. The first hit stuns you for 4 seconds.
What to do
Get out of the cone.

Point-blank AoE
The werewolf from Bestial Transformation slams the ground after a 2.1-second wind-up. It stuns you if you're in the AoE.
What to do
Get out of the AoE.

Channel that ends in a burst
After a 1.2-second cast, Ernarde channels lightning on you for 3 seconds. It shocks you every second while a circle fills in around you, and when the circle is full it bursts.
What to do
Block the burst when the circle is full.
 Cleaver
Heavy attack
Heavy attack with a 1.8-second wind-up from Moon Hunter Cleavers.
What to do
Block or dodge roll it.

Point-blank AoE
Moon Hunter Strikers and Moon Hunter Cleavers spin after a 2.5-second wind-up and hit everything in the AoE around them.
What to do
Get out of the AoE.
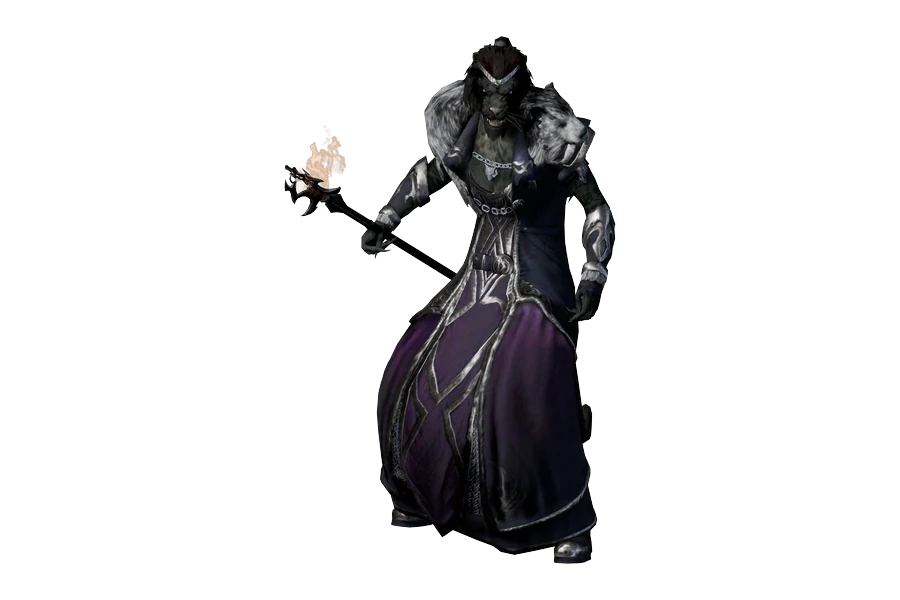
Block Lunge from Ary and Zel.
In her melee phase, block Rending Slash and Brutal Pounce.
Block the Berserker's heavy attack, Crushing Leap.
Interrupt the Bloodcaller's Enraging Howl, block its heavy attack, Crushing Leap, and get out of Totem of Terror.
Get out of Surging Gale, Fire Rune and Deafening Howl.
Block Lunge and Rending Slash.

DoT
Vykosa claws you in her melee phase and leaves a DoT on you for 9 seconds.
It also puts Major Defile on you for 9 seconds, so you get less healing.
What to do
Block or dodge roll it.

Conal attack
In her ranged phase, Vykosa winds up for 1.2 seconds with a cone in front of her, then hits in the cone. If you don't block it, it stuns you for 0.75 seconds.
What to do
Get out of the cone or block it.

Targeted AoE
In her ranged phase, Vykosa spawns an AoE under you that deals damage.
You can't block it.
What to do
Get out of the AoE.
Heavy attack
Heavy attack with a 2-second wind-up in her melee phase.
What to do
Block or dodge roll it.
Add at HP thresholds
1 Misfortune 184,612 Health
2 Misfortunes 428,565 Health
One spawns at the start of each of her melee phases, at 80% and 40%.
It uses Flurry and Crushing Leap.
What to do
Block Crushing Leap.
Berserker
Conal attack
The Werewolf Berserker winds up for 0.7 seconds, then hits in a cone in front of it. The first hit stuns you.
What to do
Get out of the cone.
Berserker
Heavy attack
Heavy attack with a 1.4-second wind-up that stuns you if you don't block it.
What to do
Block or dodge roll it.
Add at HP thresholds
3 Misfortunes 263,736 Health
One spawns at the start of each of her melee phases, at 80% and 40%.
It uses Crushing Leap and Enraging Howl.
What to do
Interrupt Enraging Howl and block Crushing Leap.
Bloodcaller
Heavy attack
Heavy attack with a 1.4-second wind-up that stuns you if you don't block it.
What to do
Block or dodge roll it.
Bloodcaller
Interruptible damage buff
A Werewolf Bloodcaller howls for 2.4 seconds. If you don't interrupt it, a big circle appears around it and moves with it. Enemies standing in it deal 20% more damage.
What to do
Interrupt it. If it goes off, kill that Bloodcaller.

Siphoning Totem Fear
In her ranged phase, Vykosa spawns a totem near you, which starts fearing in an AoE after 2 seconds.
What to do
Get out of the AoE.

Gap closer
In her melee phase, if you're away from her, Vykosa leaps at you. It stuns you if you don't block it.
What to do
Block it.

Buffs her wolves
Vykosa roars for 2 seconds. When it goes off, she gives Major Brutality to her wolves for 30 seconds, and to you too if you're in Werewolf form.
It fears you.
Conal attack
Vykosa howls for 2.1 seconds with a cone in front of her, then hits in the cone.
If you don't block it, it stuns you for 3 seconds.
What to do
Get out of the cone or block it.
Adds
0 Misfortunes 197,798 Health
1 Misfortune 197,798 Health
2 Misfortunes 197,798 Health
3 Misfortunes 197,798 Health
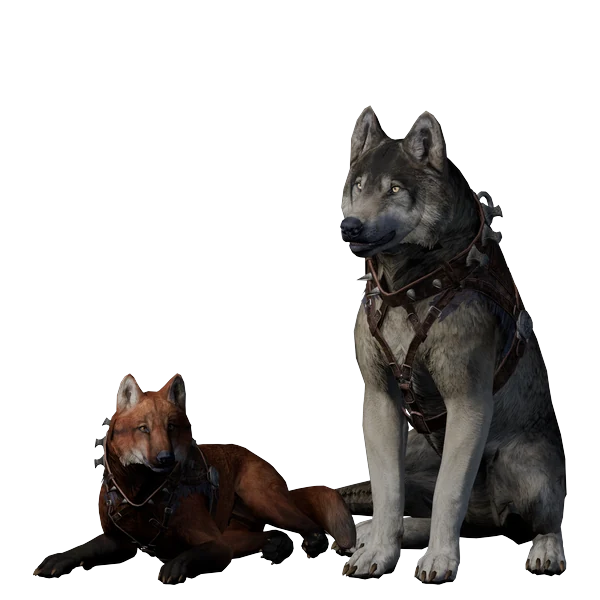
Vykosa's two wolves are chained to the walls. They can't die: at 0 Health they cower by their wall.
One of them fights you from the start. The other one stays at its wall until it breaks loose 40 seconds into the fight.
Only one fights you at a time. When the other one breaks loose or gets back up, the one that was fighting goes back to its wall.
They use Lunge.
From 70 seconds into the fight, a wolf that's down gets back up every 30 seconds.
From 60 seconds into the fight, a wolf that's down gets back up every 20 seconds.
What to do
Block Lunge.
 Ary and Zel
Heavy attack
Conal heavy attack with a 1.5-second wind-up that stuns you for 2 seconds if you don't block it.
An unblocked hit also knocks you back and leaves a bleed on you for 11 seconds.
What to do
Block or dodge roll it.

Phase swap
Vykosa starts in her ranged phase. At 80% and 40% Health she switches to her melee phase, and at 60% and 20% back to her ranged phase.
Ranged phase: Surging Gale and Fire Rune.
Melee phase: Claws of Torment, Primeval Roar, Deafening Howl, Rending Slash and Brutal Pounce.
Vykosa starts in her ranged phase. At 80% and 40% Health she switches to her melee phase, and at 60% and 20% back to her ranged phase.
Ranged phase: Surging Gale and Fire Rune.
Melee phase: Claws of Torment, Primeval Roar, Deafening Howl, Rending Slash and Brutal Pounce.
Vykosa starts in her ranged phase. At 80% and 40% Health she switches to her melee phase, and at 60% and 20% back to her ranged phase.
Ranged phase: Surging Gale and Fire Rune.
Melee phase: Claws of Torment, Primeval Roar, Deafening Howl, Rending Slash and Brutal Pounce.
Vykosa starts in her ranged phase. At 80% and 40% Health she switches to her melee phase, and at 60% and 20% back to her ranged phase.
Ranged phase: Surging Gale, Fire Rune and Totem of Terror.
Melee phase: Claws of Torment, Primeval Roar, Deafening Howl, Rending Slash and Brutal Pounce.
Finishing Moonlight Ascent gives 415 gold every time. It also gives the Solo Moon Hunter Keep Armaments box and 5 Transmute Crystals once a week. The box contains a dungeon set piece. Clearing it again the same week gives the Solo Moon Hunter Keep Overland Rewards box instead, which contains an overland set piece from Reaper’s March. Your first completion also gives a skill point.
Moon Hunter Keep drops Moon Hunter (Light), Savage Werewolf (Medium), Jailer’s Tenacity (Heavy) and Mylenne Moon-Caller head piece (Any Weight).
Dungeon sets drop from any boss on any difficulty, the Monster Helm only drops from the final boss, and is only guaranteed at 2 Misfortunes and up. Boss drops are green at 0 Misfortunes, blue at 1, a mix of blue and purple at 2 and all purple at 3. The final boss drops weapons or jewelry, while every other boss drops only armor pieces.
Random chests in the dungeon don’t drop dungeon sets, and their gear stays green at any Misfortune count.
The Mylenne Moon-Caller shoulder piece does not drop and can only be obtained from boxes bought from Veya Thenim in the Undaunted Enclave.
In earlier weeks of PTS I dropped a lot of Golden Companion gear from 3 Misfortune runs, even when running without companions. During the latest weeks I haven’t dropped any despite doing many more runs, and I don’t know if I’ve been extremely unlucky or if they removed that.
| Misfortunes | 0Story | 1Normal | 2Veteran | 3Dauntless |
|---|---|---|---|---|
| Undaunted Crests | 50 | 100 | 150 | 200 |
| Set quality | Green | Blue | Blue, some purple | Purple |
| Mylenne Moon-Caller mask | Very low chance | Chance | Guaranteed | Guaranteed |
| Bust: Mylenne Moon-Caller | – | Chance | Guaranteed | Guaranteed |
| Mask style page | – | Chance | Moderate chance | Best chance |
Undaunted Crests are a currency exclusive to solo dungeons. You earn them every clear, with the amount depending on how many Misfortunes you have active.
Spend them at Veya Thenim the Crest Merchant, in the Undaunted Enclaves outside Wayrest, Mournhold and Elden Root.
| Item | Crests |
|---|---|
| Curated Mylenne Moon-Caller CofferThis curated ornate bone coffer contains an uncollected piece of shoulder equipment (not including Nirnhoned) from the Mylenne Moon-Caller item set. | 300 |
| Curated Moon Hunter ItemA Light Armor set found in Moon Hunter Keep. | 300 |
| Curated Savage Werewolf ItemA Medium Armor set found in Moon Hunter Keep. | 300 |
| Curated Jailer’s Tenacity ItemA Heavy Armor set found in Moon Hunter Keep. | 300 |
| Bound Style Page: Mylenne Moon-Caller ShoulderGrants an Outfit Style Collectible. Once used, the Outfit Style is available to all characters on your account. Outfit Styles can be used at an Outfit Station to customize your appearance. | 1,000 |
| Argent Pelt | 25 |
| Undaunted Key ContainerThis contains 1 Undaunted Key. | 500 |
| Undaunted Apothecary’s ParcelA wax-lined parcel for alchemists and apothecaries, containing Cultivated Cryptpods and other reagents. | 50 |
| Reward | Type | How to Get It | Preview |
|---|---|---|---|
| Mylenne Moon-Caller Style Pages | Outfit Style | Mask page: rare drop from Vykosa the Ascendant. Shoulder page: Veya Thenim, 1,000. |
|
| Werewolf Form, Red | Skill Style | Skill Stylist IV: Werewolf Form - Use 10 Wolf Totem Shards and 10 Hunter Totem Shards from the Solo March of Sacrifices and Solo Moon Hunter Keep. |
|
| Lone Wolf | Title | Moon Hunter Meted Masochist - Complete Solo Moon Hunter Keep with every Meted Misfortune. | No preview |
| Trophy: Mylenne Moon-Caller | Furnishing | Finish Solo Moon Hunter Keep. | No preview |
| Bust: Mylenne Moon-Caller | Furnishing | Guaranteed from 2 Misfortunes, with a chance at 1. | No preview |
Vykosa the Ascendant drops a  Hunter Totem Shard. The first clear of the day always gets one, with only a low chance after that. 10
 Wolf Totem Shards and 10 Hunter Totem Shards, from the two solo dungeons, unlock the Werewolf Form, Red skill style.
| Item | Drops From |
|---|---|
| Hunter Totem Shardfor Werewolf Form, Red | Vykosa the AscendantGuaranteed on your first clear of the day, then a small chance |
| Argent Peltstyle material | Hedge Maze Guardian and Vykosa the Ascendant |
| Cultivated Cryptpodsalchemy reagent | Bosses, chests and trash mobs |
| Wondrous Nowhere Key | Bosses and chests |
Defeat Jailer Melitus, the Hedge Maze Guardian, Mylenne Moon-Caller, Archivist Ermarde, and Vykosa the Ascendant in the Solo Dungeon Moon Hunter Keep.
Complete the Solo Dungeon Moon Hunter Keep after experiencing each Meted Misfortune individually or in combination.
Complete the Solo Dungeon Moon Hunter Keep with at least two active Meted Misfortunes.
Complete the Solo Dungeon Moon Hunter Keep with every Meted Misfortune.
Complete all associated achievements in the Solo Dungeon Moon Hunter Keep.
Defeat the Hedge Maze Guardian while being hit by the lurcher's Root Stomp attack no more than one time in the Solo Dungeon Moon Hunter Keep.
Gather the ingredients to cure Adonatus Varian in the Solo Dungeon Moon Hunter Keep.
Defeat Jailer Melitus without being damaged by Bloody Geysers in the Solo Dungeon Moon Hunter Keep.
Acquire and use 10 Wolf Totem Shards and 10 Hunter Totem Shards collected from the March of Sacrifices and Moon Hunter Keep solo dungeons to unlock the Werewolf Form, Red skill style.
Solo Moon Hunter Keep drops Moon Hunter, Savage Werewolf, Jailer's Tenacity, and the Mylenne Moon-Caller Monster Set, plus Undaunted Crests, Hunter Totem Shards for Werewolf Form, Red, Argent Pelt, and the Mylenne Moon-Caller Trophy and Bust. See the Rewards section for the full list.
The entrance is in northern Reaper's March, north of Senalana. You can also enter the solo version from the world map. It's free for everyone.
Meted Misfortunes are optional debuffs that make the solo version harder and the rewards better. In Moon Hunter Keep they are Warm Welcome, Revoke of Respite and Alleviating Assault. At 0 it's pretty much overland, 1 is like a normal solo arena, 2 is harder than a veteran solo arena, and 3 is harder than any other solo content.




 Undaunted Crests
 Bust: Mylenne Moon-Caller
 Mask style page


 Werewolf Form, Red
 Lone Wolf
 Trophy: Mylenne Moon-Caller