SPARKS
Cleaving attacks
Lewin's light attacks sometimes cleave in front of him.
What to do
Keep him turned away from the group.
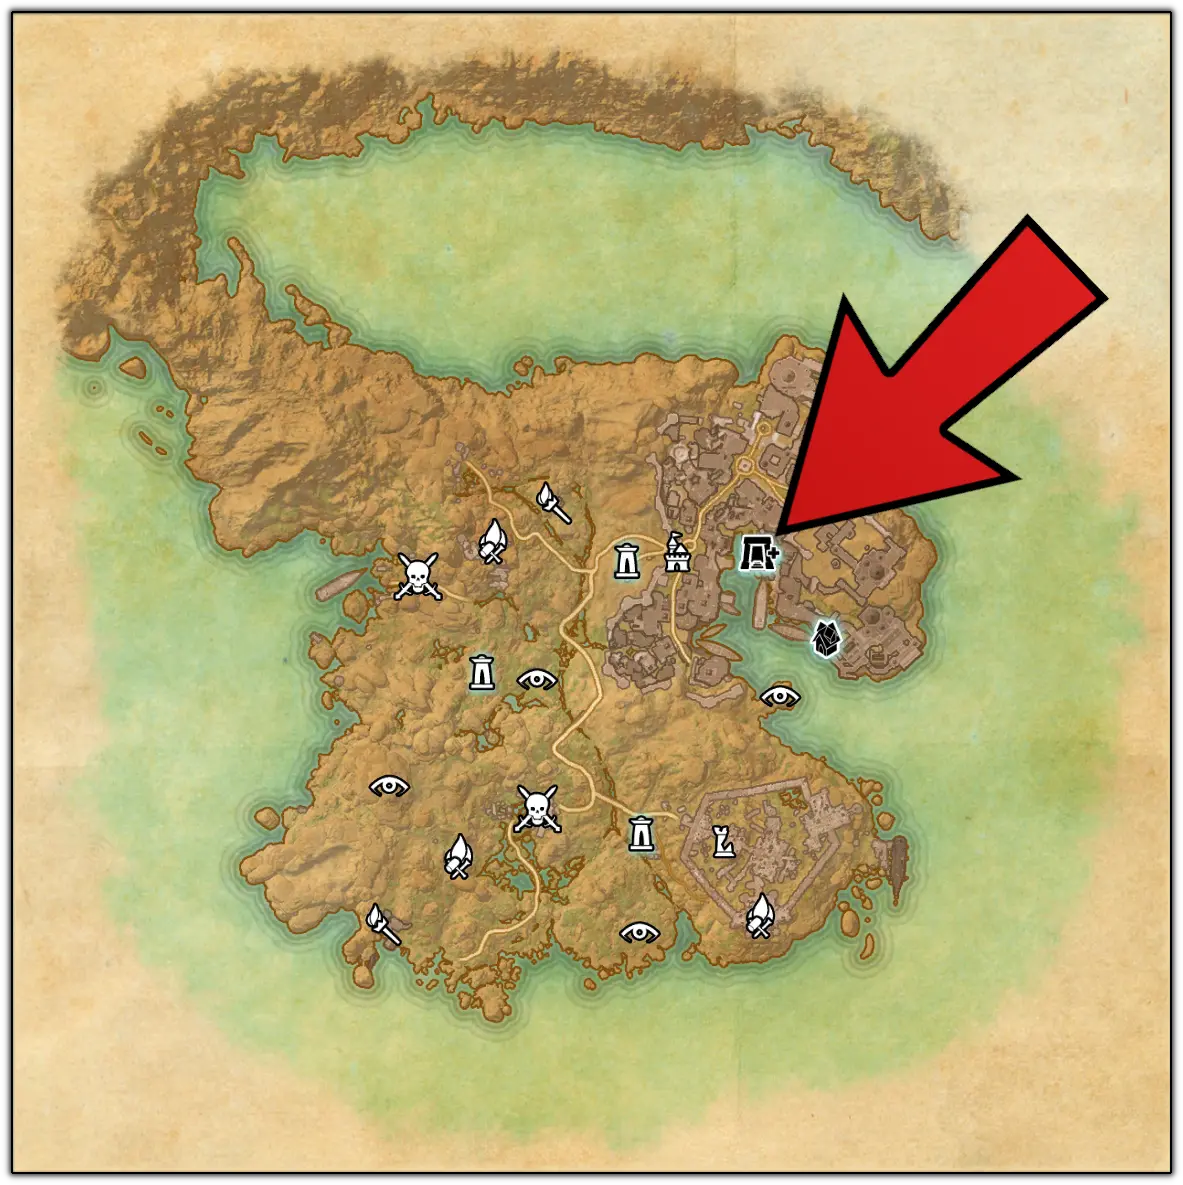
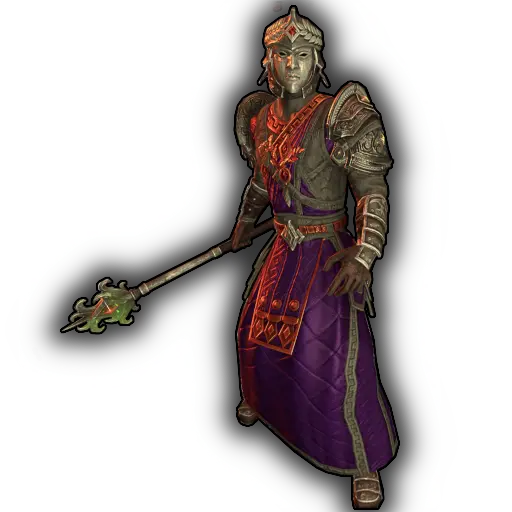
Lep Seclusa is a dungeon located in eastern part of West Weald. It has 3 regular bosses each with its own Hard Mode banner and 3 bosses which don't have Hard Modes and which are supposed to be skippable, but one of them is bugged so only 2 of them are skippable.
Avoid the Shocking Split AoEs. You cannot dodge roll them, and you cannot break free from the stun.
Cleaving attacks
Lewin's light attacks sometimes cleave in front of him.
What to do
Keep him turned away from the group.
AoE sticking to player
Lewin teleports away and puts an AoE on a random player that deals damage to them and people around them.
What to do
Don't stack with other group members.
Teleports to tank
If the tank is far away from Lewin, he will close the distance by teleporting onto the tank and dealing damage in an AoE which can be blocked.
What to do
Block, dodge roll or get out.
AoE knockback and damage reduction
Lewin causes a blast around himself which knocks back if not blocked and then stays in Lightning Form which reduces his damage taken.
What to do
Block, dodge roll or get out.
Travelling AoEs
Lewin spawns 2 Lightning Clones that teleport around the arena, shooting out 4 AoEs on each teleport. These AoEs stun and you can't break free from that stun.
What to do
Avoid the AoEs.
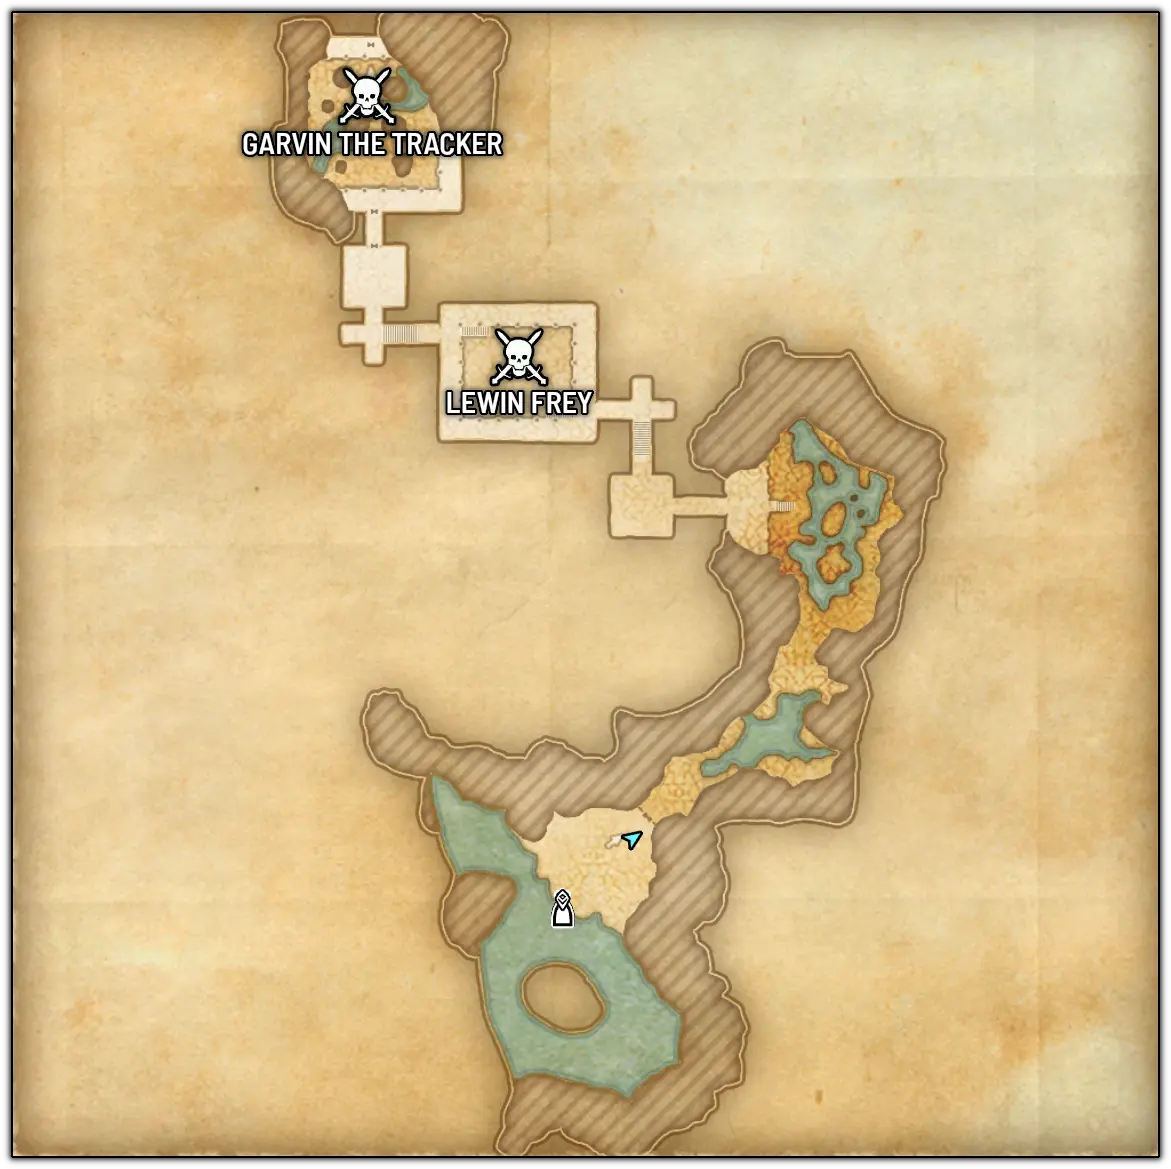
Direct Noxious Boulders into Dunerippers, kill each Duneripper before the next one spawns, push slowly, focus adds, and be ready to hide behind a boulder for Venom Eruption.

Heavy Attack
Heavy attack with a 1.4 second windup.
Applies a Healing Absorb effect.
What to do
Block or dodge roll.
Block or dodge roll, outheal the Healing Absorb.
Block or dodge roll, outheal the Healing Absorb.

AoE travelling in line
Garvin will aim for a short moment and then launch Noxious Boulder in the tank's direction. The boulder stuns everyone it travels through unless they're blocking and explodes upon touching terrain, creating an AoE on the ground.
Noxious Boulder will also one-shot unenraged Monstrous Dunerippers if it touches them.
What to do
Aim Noxious Boulder at Monstrous Dunerippers , or simply aim it away from the group if no Dunerippers are up.
Adds
At 50% HP a Monstrous Duneripper spawns on the side of the arena. It is not aggroed at the beginning and will simply patrol the area until you enter combat with it.
At 70% and 40% HP a Monstrous Duneripper spawns on the side of the arena. They are not aggroed at the beginning and will simply patrol the area until you enter combat with them.
At 80%, 50%, and 40% HP a Monstrous Duneripper spawns on the side of the arena. They are not aggroed at the beginning and will simply patrol the area until you enter combat with them.
As long as they're not in combat and not enraged, you can one-shot them by making Garvin hit them with Noxious Boulder . Enraged Dunerippers still take some damage from Boulders, so it's worth continuing to direct them at them.
While you're supposed to kill them with Noxious Boulder, it's still possible to survive them if you accidentally pull them. They have a conal attack, a Heavy Attack which puts a massive Bleed, and they can burrow underground and emerge at your position.
At 30% HP Garvin lets out a scream which fears everyone around him and pulls and enrages all remaining Monstrous Dunerippers.
What to do
Direct Noxious Boulders at the Duneripper and don't pull it.
Direct Noxious Boulders at the Dunerippers, don't pull them, and slow down DPS after 40% HP so you can Boulder the 40% Duneripper before Garvin screams at 30% HP.
Direct Noxious Boulders at the Dunerippers, don't pull them, and slow down DPS after 40% HP so you can Boulder the 40% Duneripper before Garvin screams at 30% HP.
Teleports away
Garvin teleports away and sets up traps which immobilize you if you step over them.
What to do
Don't interrupt him. The traps he's placing while channeling are extremely irrelevant, so let him waste time on it.

Cone in front and behind the boss
Garvin deals damage, applies a DoT and a Healing Absorb towards the tank and in the opposite direction. If the tank moves to the side trying to avoid it, Garvin will change the direction of this ability, always trying to shoot it at the tank.
What to do
DPS and Healers should stand to the sides of Garvin to avoid the damage. The Tank shouldn't turn Garvin to the sides because that makes it harder for the group to avoid it.

Arena-wide damage
After a 3 second delay, Garvin starts dealing massive damage to players in his line of sight over 6 seconds.
What to do
Hide behind rocks to break line of sight.
Adds
Deserter Storm Mage is summoned at 75%. They can electrify water in the area, channel an AoE attack on one of the players, and summon lightning AoEs that keep spawning on players.
Deserter Flame Archer is summoned at 50%. They can channel a conal attack, channel a rapid fire attack, and spawn Volley AoEs that keep spawning on players.
Deserter Infuser is summoned at 25%. They can heal and enrage all adds, including Garvin, and channel a shield on other adds.
Deserter Storm Mages are summoned at 95% and 50%. They can electrify water in the area, channel an AoE attack on one of the players, and summon lightning AoEs that keep spawning on players.
Deserter Flame Archers are summoned at 80% and 35%. They can channel a conal attack, channel a rapid fire attack, and spawn Volley AoEs that keep spawning on players.
Deserter Infusers are summoned at 65% and 20%. They can heal and enrage all adds, including Garvin, and channel a shield on other adds.
Deserter Storm Mages are summoned at 95%, 65%, and 35%. They can electrify water in the area, channel an AoE attack on one of the players, and summon lightning AoEs that keep spawning on players.
Deserter Flame Archers are summoned at 85%, 55%, and 30%. They can channel a conal attack, channel a rapid fire attack, and spawn Volley AoEs that keep spawning on players.
Deserter Infusers are summoned at 75%, 45%, and 25%. They can heal and enrage all adds, including Garvin, and channel a shield on other adds.
At certain HP thresholds Garvin summons 3 types of adds.
What to do
Start focusing the adds instead of Garvin if you're getting overwhelmed, and interrupt the Infusers.

Group-wide DoT
Garvin puts a hard hitting 8 second DoT on everyone, which ticks 17 times over its duration.
What to do
Outheal the DoT.
Link between players
Garvin puts Ricochet on 2 players for 10 seconds. If the 2 players are within line of sight of each other when the effect ends, they take damage equal to 75% of their Max HP as Oblivion damage.
Garvin puts Ricochet on 2 players for 6 seconds. If the 2 players are within line of sight of each other when the effect ends, they die.
What to do
Break line of sight with the other group member.
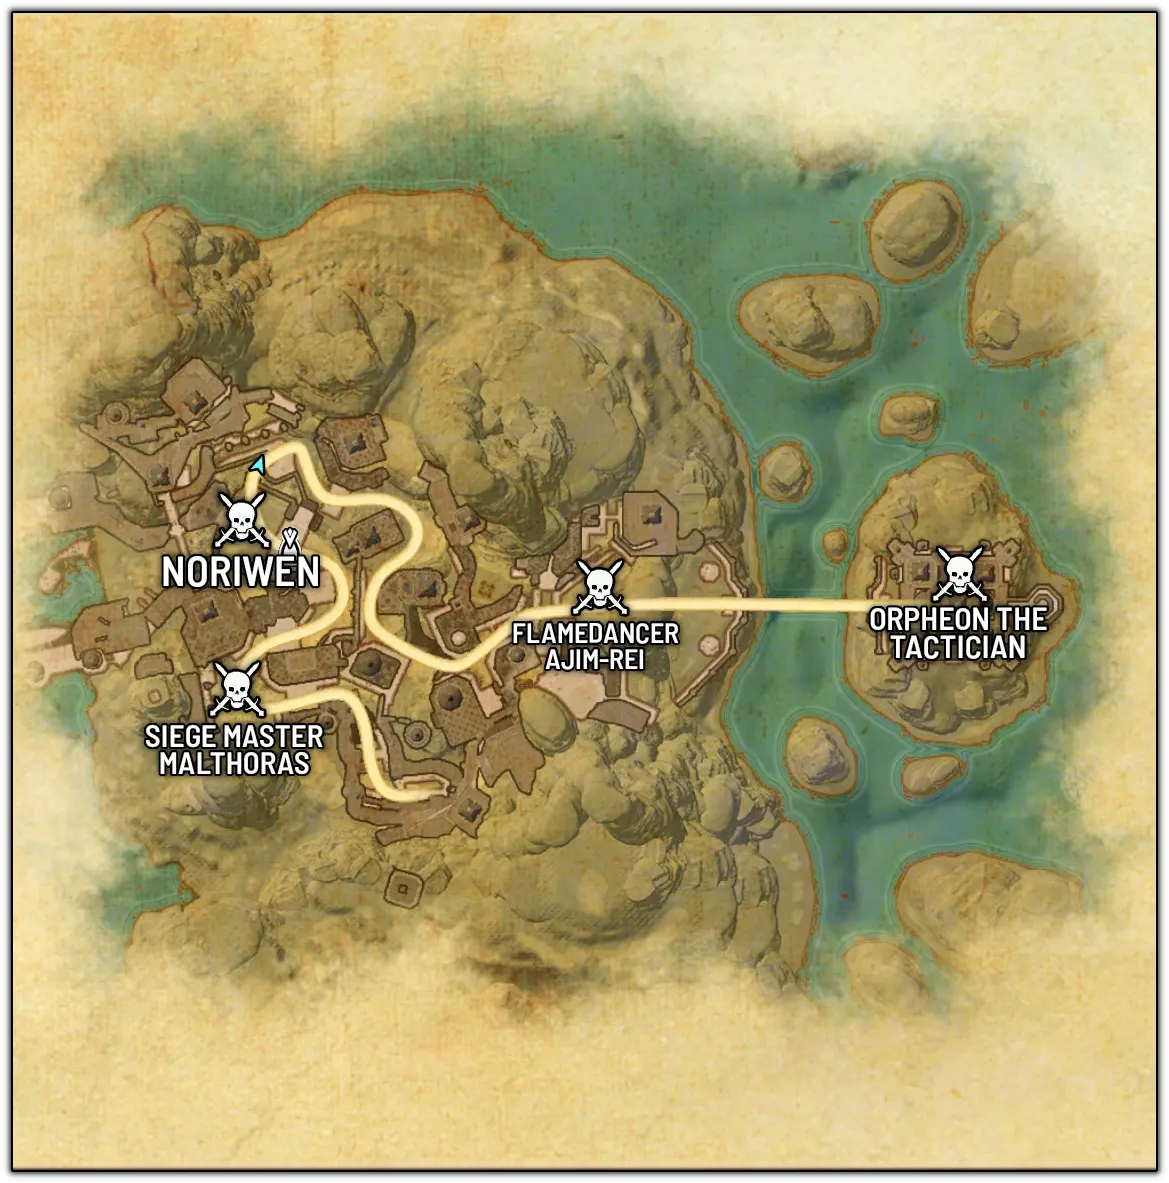
Repair the Ballistas before the fight and force Malthoras down with them.
Siege
Before you begin the fight, you have to fetch Ballista Parts to repair Ballistas and destroy Malthoras's 4 Siege Weapons.
What to do
Fix Ballista and shoot at Malthoras.
Adds
At 50% HP Malthoras summons a wave of adds. The adds don't have any special mechanics.
What to do
Kill the adds.

AoE spawning at player
Malthoras targets a player and spawns Volley AoEs at their location.
What to do
Keep moving.
Conal AoE
Malthoras targets a player and shoots a volley of arrows in their direction.
What to do
Block or dodge roll.
Traveling AoEs that bounce off walls
Malthoras shoots out 3 projectiles in the tank's direction, which stagger you if you're not blocking. They also bounce off of walls.
What to do
Block.

AoE stagger
Malthoras stomps and staggers everyone around him.
What to do
Get out of the AoE.

Interruptible heavy hit
Malthoras channels for a long time and then shoots a heavy hitting arrow at one of the players.
What to do
Interrupt or dodge roll.
Teleports away
Malthoras teleports away.
What to do
Chase after him.

AoEs
Malthoras throws fire bombs at players, spawning AoEs at their locations.
What to do
Get out of the AoEs.
Outheal or purge the Chain Pull DoT, avoid Wing Gust AoEs, and be careful during the Flame Gryphon phases.
Heavy Attack
Heavy Attack with a 1.8 second windup which enrages Noriwen if you dodge roll it.
What to do
Block.
Movement
Noriwen periodically charges away.
What to do
Follow her.

Chains tank and puts massive DoT
If the tank is standing away from her melee range she will simply chain them in, applying a massive purgable DoT.
What to do
Purge or outheal the DoT.
If you cannot comfortably survive it, you can slowly block and walk after Noriwen's random jumps to drag her toward the center so later jumps stay close enough to follow.

AoEs
Noriwen throws fiery AoEs at a random non-tank player.
What to do
Move out of AoEs.

AoEs
Alcunar swipes his wings, creating 3 lightning AoEs that travel through the arena. Touching these applies a DoT.
The DoT deals damage in an AoE around you.
What to do
Avoid the AoEs.
Phases
At 70% Noriwen charges to Alcunar and stays there until 50%. Alcunar will peck and swipe at players, staggering them if not blocked.
She does the same thing at 20% and stays there until the end of the fight.
What to do
Block Alcunar's attacks.
If you cannot comfortably survive the Chain Pull DoT, slowly drag Noriwen toward Alcunar by blocking and walking before pushing her to 70% and 20%. Otherwise, just purge or outheal it.
AoEs
Gryphon Bombers dive through the area, staggering you if they hit you unless you're blocking.
Starting from 50% HP, some of them will drop fiery bombs instead of diving.
What to do
Avoid them.
Adds
At 50% HP Noriwen spawns 2 Flame Gryphons and leaves the arena. She comes back when both of them are dead or after 80 seconds.
At 40% HP Noriwen spawns 2 Flame Gryphons and you have to fight them at the same time as Noriwen.
Flame Gryphons have a conal attack, a charge which shoots out fiery AoEs, and they can shoot a massive Fiery Cyclone in the tank's direction which can be deadly to DPS and Healers.
What to do
Focus them and avoid their AoEs.
Interrupt Imminent Eruption.

Heavy Attack
Heavy attack with a 1.7 second windup.
Applies a Healing Absorb.
What to do
Block or dodge roll.
Adds
Ajim-Rei starts the fight with 1 Shalk. She has a special move which summons 1 Shalk, but she also summons 1 Shalk whenever casting Firestorm Waltz and Heat Wave .
Ajim-Rei starts the fight with 1 Shalk. Her special move summons 2 Shalks instead, but she still summons 1 Shalk whenever casting Firestorm Waltz and Heat Wave .
Shalks leave Burning Ground behind. Standing inside Burning Ground puts a DoT on you that deals damage in an AoE.
What to do
Kill the Shalks, avoid the Burning Ground.
Interruptible group-wide damage
Spawns a Fiery Clone that channels and shoots fireballs at random players until interrupted. It also simultaneously spawns a Shalk .
What to do
Interrupt the clone.
Interruptible big damage
Ajim-Rei teleports away and channels an ability. If not interrupted, she deals big damage to every player in an AoE after a short delay.
What to do
Interrupt, and make sure you're full HP before the explosion goes off if you've failed to interrupt.

AoE
Ajim-Rei targets a random player and shoots 3 fiery lines their way which apply a DoT that deals damage in an AoE around you.
What to do
Avoid the lines.

Cone
Ajim-Rei spawns an untargetable clone that deals damage in a cone towards a random player. It also simultaneously spawns a Shalk .
What to do
Move away from the clone, and don't point it at your group.
As the tank, stay away from your group and drag Orpheon so he does not end up inside the Planemeld.

Heavy Attack
Heavy attack with a 2.4 second windup that cannot be dodge rolled. It also deals damage in a circle around the tank.
What to do
Block, and keep DPS and Healers away from the tank.

Cleave
Orpheon's light attacks cleave in a cone in front of him.
Unblocked hits apply a 3 second effect which drains 3% of the target's Max Stamina and Max Magicka. It ticks 4 times in total, once when applied and then once every second.
Hard Mode increases the drain to 5% of the target's Max Stamina and Max Magicka.
What to do
Tank should block. DPS and Healers should stay away from the tank.
Area denial
Area is restricted by Arcane Planemeld, which deals ramping damage to players standing inside of it. If Orpheon stands inside the Planemeld it renders him untargetable and allows him to cast Forbidden Knowledge .
At certain HP thresholds, the accessible area starts moving to one of the sides. When it reaches the side, Orpheon teleports away and begins the Add Phase .
At 80% HP the area moves from center to right.
At 50% HP the area moves from right to left.
At 30% HP the area moves from left to right.
Past 20% HP the area keeps moving between the sides until the end of the fight.
The accessible area is smaller.
The accessible area is even smaller than in Veteran.
What to do
Stay in the safe area between Planemelds.
Add Phase
After the Planemeld finishes moving at 80%, 50%, and 30% HP, Orpheon teleports away and summons 1 big and 3 small adds.
The big add is either Arcane Hulk or Arcane Wraith. They both have Heavy Attacks and AoEs that should be avoided by DPS and Healers but can be simply blocked by Tanks.
The small adds don't have any important mechanics, but they should be chained in by the Tank.
What to do
Avoid the big add's AoEs and kill the adds.

Group-wide damage
Orpheon launches 11 runeblades at each group member. A well timed dodge roll allows you to avoid most of them. They cannot be blocked.
Orpheon can only cast this while standing inside Planemeld , which is why the Tank should make sure he stays out of it while Planemeld is moving.
What to do
Dodge roll, and try to keep Orpheon out of Planemeld while it is moving.
AoE
Tentacle AoEs spawn randomly and deal damage and knock players back.
What to do
Block, dodge roll or move away.
Adds
Orpheon summons tentacles at 2 players' locations. These perform AoE attacks which deal damage and knock players back.
What to do
Block the AoEs and kill the tentacles.
AoEs
During add phases and during the 20 to 0% HP phase, Alcunar pecks and swipes at players, staggering them if not blocked.
What to do
Block Alcunar's attacks.
AoEs
Alcunar swipes his wings, creating 3 lightning AoEs that travel through the arena. Touching these applies a DoT.
The DoT deals damage in an AoE around you.
What to do
Avoid the AoEs.

If you've enjoyed this guide and want to support me, you can do so through Patreon. Your support will help me produce more guides.