Light's banner instills hope. You are its bearer.
Upgrades rank 2 of to also grant Bright Harbinger for the duration, which grants 300 Weapon and Spell Damage to allies and doubles for you.
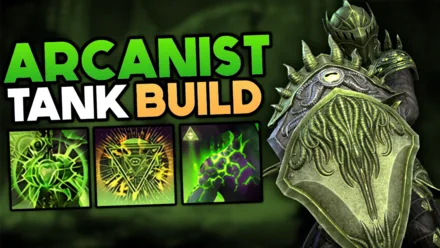
Templar Tank build for ESO Update 50, a pure class setup with a lot of group healing. Extended Ritual provides a purge synergy for your team, and since Soul Burst is your main self-heal you'll be healing the group a lot just by keeping yourself alive. Extended Ritual and Restoring Focus also heal you a lot if you can stand still. Sacred Ground gives decent block mitigation passively.
Bright Harbinger grants your team a unique 300 Weapon and Spell Damage buff and the Devout Guardian Class Mastery will constantly shield you, increase your recoveries and generate 10 Ultimate every 6 seconds.
Works in normal and veteran dungeons, trials, hard modes, Dragonstar Arena, Blackrose Prison, and early arcs in Infinite Archive.
Class Masteries are a new U50 system where each class picks 2 of 5 passive bonuses (Class Mastery Points, not Skill Points). Activating subclassing disables Class Mastery, so it's a tradeoff between keeping your native skill lines or subclassing.
Light's banner instills hope. You are its bearer.
Upgrades rank 2 of to also grant Bright Harbinger for the duration, which grants 300 Weapon and Spell Damage to allies and doubles for you.
300 Weapon and Spell Damage bonus for your group.
Radiant is the shield that pushes back the dark.
While is active, you gain a damage shield for 6 seconds, up to once every 6 seconds. The shield absorbs up to Damage Shield and provides 300 Health, Magicka, and Stamina Recovery while active. If the shield breaks, you gain 10 Ultimate.
| Coefficient | 20% Max Health | ||
|---|---|---|---|
| Tags | |||
Constant Damage Shields and Ultimate generation.
Your conviction is unwavering. Light gives no quarter.
now activates and refreshes itself while Bracing. Increases the amount of damage you can block by 20% while stationary.
Situational Mastery for when you need more Block Mitigation.
Light consecrates the ground on which you tread.
is now applied while you are in your own and , and while and are active.
While is active, you heal for Health every 1 second. If you are at full Health after being healed from this effect while in combat, you also gain 2 Ultimate.
| Coefficient | 8% Max Health | ||
|---|---|---|---|
| Tick Rate | Every 1s | ||
| Tags | |||
Constant Healing and Ultimate generation. Very similar to Devout Guardian, it can replace it in fights where Healing is better than Damage Shields. It can also replace Bright Harbinger if you have another Templar in your group using it.
Judgement follows in the wake of your radiance.
When rank 2 of deals damage, your Templar abilities gain 1400 damage done for 3.1 seconds. This bonus is halved against players.
Not useful for this setup.
A base setup that will work for most situations and which should be your starting point when making situational setups. It prioritizes survivability over group damage.
| Front Bar | Back Bar |
|---|---|
| Slot 1: Shield Throw | Slot 1: Restoring FocusMorph of Rune Focus |
| Slot 2: Living DarkMorph of Eclipse | Slot 2: Wield Soul |
| Slot 3: Radiant WardMorph of Sun Shield | Slot 3: Elemental SusceptibilityMorph of Weakness to Elements |
| Slot 4: Ulfsild's Contingency | Slot 4: Elemental BlockadeMorph of Wall of Elements |
| Slot 5: Soul Burst | Slot 5: Extended RitualMorph of Cleansing Ritual |
| Ultimate: Reviving BarrierMorph of Barrier | Ultimate: Reviving BarrierMorph of Barrier |
If you need to slot something situational, replace Living Dark only if another Templar in your group is using Bright Harbinger , Soul Burst if you don't need the heal and someone else provides Minor Courage , or Extended Ritual if the fight doesn't need the cleanse
Why no Inner Rage in the Regular setup?
The synergy from Inner Rage taunt is extremely strong but because of the way it works it always turns out extremely weak in Group Finder runs. The way it works is, instead of granting the synergy to 11 people and disappearing once 3 people use it, it first selects 3 people and only those 3 people have the option to use the synergy at all. And if one of those 3 people don't use it, it will never pass onto the remaining players, no matter how many times you recast your Inner Rage . Which is why, 3 clueless players not pressing their synergy in a Group Finder run are enough to completely "clog" your Inner Rage . Which is why I decided to go with Shield Throw taunt as a default option.
A few examples of final setups you could end up with after applying the situational skills to the base setup
A setup for trash packs in Dungeons
| Front Bar | Back Bar |
|---|---|
| Slot 1: Inner RageMorph of Inner Fire | Slot 1: Restoring FocusMorph of Rune Focus |
| Slot 2: Power Bash | Slot 2: Wield Soul |
| Slot 3: Radiant WardMorph of Sun Shield | Slot 3: PulsarMorph of Impulse |
| Slot 4: Ulfsild's Contingency | Slot 4: Elemental BlockadeMorph of Wall of Elements |
| Slot 5: Soul Burst | Slot 5: Razor CaltropsMorph of Caltrops |
| Ultimate: Reviving BarrierMorph of Barrier | Ultimate: Reviving BarrierMorph of Barrier |
WHAT CHANGES
A setup for trash packs in Trials
| Front Bar | Back Bar |
|---|---|
| Slot 1: Shield Throw | Slot 1: Restoring FocusMorph of Rune Focus |
| Slot 2: Charging ManeuverMorph of Rapid Maneuver | Slot 2: Wield Soul |
| Slot 3: Radiant WardMorph of Sun Shield | Slot 3: PulsarMorph of Impulse |
| Slot 4: Ulfsild's Contingency | Slot 4: Elemental BlockadeMorph of Wall of Elements |
| Slot 5: Soul Burst | Slot 5: Razor CaltropsMorph of Caltrops |
| Ultimate: Reviving BarrierMorph of Barrier | Ultimate: Reviving BarrierMorph of Barrier |
WHAT CHANGES
A setup which focuses on your own survivability
| Front Bar | Back Bar |
|---|---|
| Slot 1: Shield Throw | Slot 1: Restoring FocusMorph of Rune Focus |
| Slot 2: Revealing Flare | Slot 2: Wield Soul |
| Slot 3: Radiant WardMorph of Sun Shield | Slot 3: Elemental SusceptibilityMorph of Weakness to Elements |
| Slot 4: Ulfsild's Contingency | Slot 4: Elemental BlockadeMorph of Wall of Elements |
| Slot 5: Resolving VigorMorph of Vigor | Slot 5: Extended RitualMorph of Cleansing Ritual |
| Ultimate: Reviving BarrierMorph of Barrier | Ultimate: Reviving BarrierMorph of Barrier |
WHAT CHANGES
ADDITIONAL INFO
The only passive you specifically have to skip is Tri Focus
Some trees are only needed when using situational skills, for example Psijic Order provides nothing without Race Against Time
 Class
Class
 Weapon
 Armor
Armor
 Guild
Guild
 Alliance War
 Racial
 Craft
Craft
Class - Aedric Spear
![]() Piercing Spear
- Low Priority
Piercing Spear
- Low Priority
![]() Spear Wall
- High Priority
Spear Wall
- High Priority
![]() Burning Light
- Low Priority
Burning Light
- Low Priority
![]() Balanced Warrior
- High Priority
Balanced Warrior
- High Priority
Class - Dawn's Wrath
![]() Enduring Rays
- Medium Priority
Enduring Rays
- Medium Priority
![]() Prism
- High Priority
Prism
- High Priority
![]() Illuminate
- High Priority
Illuminate
- High Priority
![]() Restoring Spirit
- High Priority
Restoring Spirit
- High Priority
Class - Restoring Light
![]() Mending
- High Priority
Mending
- High Priority
![]() Sacred Ground
- High Priority
Sacred Ground
- High Priority
![]() Light Weaver
- Medium Priority
Light Weaver
- Medium Priority
![]() Master Ritualist
- Medium Priority
Master Ritualist
- Medium Priority
Weapon - One Hand and Shield
![]() Fortress
- High Priority
Fortress
- High Priority
![]() Sword and Board
- High Priority
Sword and Board
- High Priority
![]() Deadly Bash
- Medium Priority
Deadly Bash
- Medium Priority
![]() Deflect Bolts
- High Priority
Deflect Bolts
- High Priority
![]() Battlefield Mobility
- Medium Priority
Battlefield Mobility
- Medium Priority
Weapon - Destruction Staff
![]() Tri Focus
- Do Not Unlock
Tri Focus
- Do Not Unlock
![]() Penetrating Magic
- Low Priority
Penetrating Magic
- Low Priority
![]() Elemental Force
- High Priority
Elemental Force
- High Priority
![]() Ancient Knowledge
- High Priority
Ancient Knowledge
- High Priority
![]() Destruction Expert
- Low Priority
Destruction Expert
- Low Priority
Armor - Light Armor
![]() Grace
- Low Priority
Grace
- Low Priority
![]() Evocation
- High Priority
Evocation
- High Priority
![]() Spell Warding
- Medium Priority
Spell Warding
- Medium Priority
![]() Prodigy
- Medium Priority
Prodigy
- Medium Priority
![]() Concentration
- Low Priority
Concentration
- Low Priority
Armor - Medium Armor
![]() Dexterity
- Low Priority
Dexterity
- Low Priority
![]() Wind Walker
- High Priority
Wind Walker
- High Priority
![]() Improved Sneak
- Not needed
Improved Sneak
- Not needed
![]() Agility
- Medium Priority
Agility
- Medium Priority
![]() Athletics
- High Priority
Athletics
- High Priority
Armor - Heavy Armor
![]() Resolve
- High Priority
Resolve
- High Priority
![]() Constitution
- Medium Priority
Constitution
- Medium Priority
![]() Juggernaut
- High Priority
Juggernaut
- High Priority
![]() Revitalize
- High Priority
Revitalize
- High Priority
![]() Rapid Mending
- High Priority
Rapid Mending
- High Priority
Guild - Mages Guild
![]() Persuasive Will
- Not needed
Persuasive Will
- Not needed
![]() Mage Adept
- High Priority
Mage Adept
- High Priority
![]() Everlasting Magic
- High Priority
Everlasting Magic
- High Priority
![]() Magicka Controller
- Medium Priority
Magicka Controller
- Medium Priority
![]() Might of the Guild
- Low Priority
Might of the Guild
- Low Priority
Guild - Undaunted
![]() Undaunted Command
- High Priority
Undaunted Command
- High Priority
![]() Undaunted Mettle
- High Priority
Undaunted Mettle
- High Priority
Guild - Psijic Order
![]() Clairvoyance
- Not Needed
Clairvoyance
- Not Needed
![]() Spell Orb
- Not Needed
Spell Orb
- Not Needed
![]() Concentrated Barrier
- Medium Priority
Concentrated Barrier
- Medium Priority
![]() Deliberation
- Not Needed
Deliberation
- Not Needed
Alliance War - Support
![]() Magicka Aid
- High Priority
Magicka Aid
- High Priority
![]() Combat Medic
- Not needed
Combat Medic
- Not needed
![]() Battle Resurrection
- Not needed
Battle Resurrection
- Not needed
Race - Your Race
Get all of your racials, no matter which race you are
Craft - Alchemy
![]() Solvent Proficiency
- Not needed
Solvent Proficiency
- Not needed
![]() Keen Eye: Reagents
- Not needed
Keen Eye: Reagents
- Not needed
![]() Medicinal Use
- High Priority
Medicinal Use
- High Priority
![]() Chemistry
- Not needed
Chemistry
- Not needed
![]() Laboratory Use
- Not needed
Laboratory Use
- Not needed
![]() Snakeblood
- Not needed
Snakeblood
- Not needed
These are the best general-use setups when you're playing with randoms or do not know your group comp. Coordinated groups can do better with more specialized setups.
Most support sets provide a similar group DPS increase. The most important thing is making sure your sets don't overlap with other Tank's and Healers' sets, though you can overlap sets which provide imperfect uptimes like Saxhleel's Champion or Archdruid Devyric
Switching gear for trash packs isn't worth it unless you're using gear-swap addons
These are the default setups once you have the gear for them. Trash setups are optional swaps for players using gear-swap addons.
If your group does not have an Arcanist using Ink-Scribe's Verve , use Saxhleel's Champion so the group still gets Major Force . In Dungeons, replace Lucent Echoes . In Trials, replace Turning Tide .
| Gear Slot | Set | Weight/Type | Trait | Enchantment |
|---|---|---|---|---|
 Head Head |
Archdruid Devyric | Medium | Sturdy / Divines | Tri-Stat |
 Shoulders Shoulders |
Archdruid Devyric | Light | Sturdy / Divines | Tri-Stat |
 Chest Chest |
Lucent Echoes | Heavy | Reinforced | Tri-Stat |
 Hands Hands |
Lucent Echoes | Heavy | Sturdy / Divines | Tri-Stat |
 Belt Belt |
Lucent Echoes | Heavy | Sturdy / Divines | Tri-Stat |
 Legs Legs |
Lucent Echoes | Heavy | Reinforced | Tri-Stat |
 Boots Boots |
Lucent Echoes | Heavy | Reinforced | Tri-Stat |
 Necklace Necklace |
War Machine | Jewelry | Harmony / Infused | Reduce Magicka Cost |
 Ring Ring |
War Machine | Jewelry | Harmony / Infused | Reduce Magicka Cost |
| Ring |
War Machine | Jewelry | Harmony / Infused | Reduce Magicka Cost |
 Frontbar Main Hand Frontbar Main Hand |
Armor of the Trainee | Any 1-handed weapon | Decisive | Hardening |
 Frontbar Off Hand Frontbar Off Hand |
Druid's Braid | Shield | Sturdy / Divines | Tri-Stat |
| Backbar Main Hand |
War Machine | Ice Staff | Infused | Crusher |
Setup Notes
Optional setup for dungeon trash packs. The item sets shown are intended for Dungeons specifically, but the weights, traits and enchants shown are meant for any trash
| Gear Slot | Set | Weight/Type | Trait | Enchantment |
|---|---|---|---|---|
| Head |
Magma Incarnate | Medium | Sturdy / Divines | Tri-Stat |
| Shoulders |
Spaulder of Ruin | Light | Sturdy / Divines | Tri-Stat |
| Chest |
Turning Tide | Heavy | Reinforced | Tri-Stat |
| Hands |
Turning Tide | Heavy | Sturdy / Divines | Tri-Stat |
| Belt |
Turning Tide | Heavy | Sturdy / Divines | Tri-Stat |
| Legs |
Turning Tide | Heavy | Reinforced | Tri-Stat |
| Boots |
Turning Tide | Heavy | Reinforced | Tri-Stat |
| Necklace |
Powerful Assault | Jewelry | Swift | Reduce Magicka Cost |
| Ring |
Powerful Assault | Jewelry | Swift | Reduce Magicka Cost |
| Ring |
Powerful Assault | Jewelry | Swift | Reduce Magicka Cost |
| Frontbar Main Hand |
Void Bash | Any 1-handed weapon | Decisive | Hardening |
| Frontbar Off Hand |
Void Bash | Shield | Sturdy / Divines | Tri-Stat |
| Backbar Main Hand |
Powerful Assault | Ice Staff | Charged | Crusher |
Setup Notes
Setups for tanking Trials
These are just 2 examples of setups the 2 Tanks could use in a PUG Trial run. If you're in a more organized team, the gear your Raid Lead wants you to wear takes priority
Setup 1 uses Pearlescent Ward + Turning Tide with Archdruid Devyric . Setup 2 uses Lucent Echoes + Powerful Assault with Baron Zaudrus .
Trials are much more likely to have an Arcanist using Ink-Scribe's Verve . If nobody has it, swap Turning Tide for Saxhleel's Champion .
| Gear Slot | Set | Weight/Type | Trait | Enchantment |
|---|---|---|---|---|
| Head |
Archdruid Devyric | Medium | Sturdy / Divines | Tri-Stat |
| Shoulders |
Archdruid Devyric | Light | Sturdy / Divines | Tri-Stat |
| Chest |
Pearlescent Ward | Heavy | Reinforced | Tri-Stat |
| Hands |
Pearlescent Ward | Heavy | Sturdy / Divines | Tri-Stat |
| Belt |
Pearlescent Ward | Heavy | Sturdy / Divines | Tri-Stat |
| Legs |
Pearlescent Ward | Heavy | Reinforced | Tri-Stat |
| Boots |
Pearlescent Ward | Heavy | Reinforced | Tri-Stat |
| Necklace |
Turning Tide | Jewelry | Harmony / Infused | Reduce Magicka Cost |
| Ring |
Turning Tide | Jewelry | Harmony / Infused | Reduce Magicka Cost |
| Ring |
Turning Tide | Jewelry | Harmony / Infused | Reduce Magicka Cost |
| Frontbar Main Hand |
Armor of the Trainee | Any 1-handed weapon | Decisive | Hardening |
| Frontbar Off Hand |
Druid's Braid | Shield | Sturdy / Divines | Tri-Stat |
| Backbar Main Hand |
Turning Tide | Ice Staff | Infused | Crusher |
Setup Notes
| Gear Slot | Set | Weight/Type | Trait | Enchantment |
|---|---|---|---|---|
| Head |
Archdruid Devyric | Medium | Sturdy / Divines | Tri-Stat |
| Shoulders |
Archdruid Devyric | Light | Sturdy / Divines | Tri-Stat |
| Chest |
Pearlescent Ward | Heavy | Reinforced | Tri-Stat |
| Hands |
Pearlescent Ward | Heavy | Sturdy / Divines | Tri-Stat |
| Belt |
Pearlescent Ward | Heavy | Sturdy / Divines | Tri-Stat |
| Legs |
Pearlescent Ward | Heavy | Reinforced | Tri-Stat |
| Boots |
Pearlescent Ward | Heavy | Reinforced | Tri-Stat |
| Necklace |
Turning Tide | Jewelry | Swift | Reduce Magicka Cost |
| Ring |
Turning Tide | Jewelry | Swift | Reduce Magicka Cost |
| Ring |
Turning Tide | Jewelry | Swift | Reduce Magicka Cost |
| Frontbar Main Hand |
Armor of the Trainee | Any 1-handed weapon | Decisive | Hardening |
| Frontbar Off Hand |
Druid's Braid | Shield | Sturdy / Divines | Tri-Stat |
| Backbar Main Hand |
Turning Tide | Ice Staff | Charged | Crusher |
| Gear Slot | Set | Weight/Type | Trait | Enchantment |
|---|---|---|---|---|
| Head |
Baron Zaudrus | Medium | Sturdy / Divines | Tri-Stat |
| Shoulders |
Baron Zaudrus | Light | Sturdy / Divines | Tri-Stat |
| Chest |
Lucent Echoes | Heavy | Reinforced | Tri-Stat |
| Hands |
Lucent Echoes | Heavy | Sturdy / Divines | Tri-Stat |
| Belt |
Lucent Echoes | Heavy | Sturdy / Divines | Tri-Stat |
| Legs |
Lucent Echoes | Heavy | Reinforced | Tri-Stat |
| Boots |
Lucent Echoes | Heavy | Reinforced | Tri-Stat |
| Necklace |
Powerful Assault | Jewelry | Harmony / Infused | Reduce Magicka Cost |
| Ring |
Powerful Assault | Jewelry | Harmony / Infused | Reduce Magicka Cost |
| Ring |
Powerful Assault | Jewelry | Harmony / Infused | Reduce Magicka Cost |
| Frontbar Main Hand |
Armor of the Trainee | Any 1-handed weapon | Decisive | Hardening |
| Frontbar Off Hand |
Druid's Braid | Shield | Sturdy / Divines | Tri-Stat |
| Backbar Main Hand |
Powerful Assault | Ice Staff | Infused | Crusher |
Setup Notes
| Front Bar | Back Bar |
|---|---|
| Slot 1: Shield Throw | Slot 1: Restoring FocusMorph of Rune Focus |
| Slot 2: Living DarkMorph of Eclipse | Slot 2: Wield Soul |
| Slot 3: Radiant WardMorph of Sun Shield | Slot 3: Elemental SusceptibilityMorph of Weakness to Elements |
| Slot 4: Ulfsild's Contingency | Slot 4: Elemental BlockadeMorph of Wall of Elements |
| Slot 5: Soul Burst | Slot 5: Resolving VigorMorph of Vigor |
| Ultimate: Reviving BarrierMorph of Barrier | Ultimate: Reviving BarrierMorph of Barrier |
WHAT CHANGES
| Gear Slot | Set | Weight/Type | Trait | Enchantment |
|---|---|---|---|---|
| Head |
Baron Zaudrus | Medium | Sturdy / Divines | Tri-Stat |
| Shoulders |
Baron Zaudrus | Light | Sturdy / Divines | Tri-Stat |
| Chest |
Lucent Echoes | Heavy | Reinforced | Tri-Stat |
| Hands |
Lucent Echoes | Heavy | Sturdy / Divines | Tri-Stat |
| Belt |
Lucent Echoes | Heavy | Sturdy / Divines | Tri-Stat |
| Legs |
Lucent Echoes | Heavy | Reinforced | Tri-Stat |
| Boots |
Lucent Echoes | Heavy | Reinforced | Tri-Stat |
| Necklace |
Powerful Assault | Jewelry | Swift | Reduce Magicka Cost |
| Ring |
Powerful Assault | Jewelry | Swift | Reduce Magicka Cost |
| Ring |
Powerful Assault | Jewelry | Swift | Reduce Magicka Cost |
| Frontbar Main Hand |
Armor of the Trainee | Any 1-handed weapon | Decisive | Hardening |
| Frontbar Off Hand |
Druid's Braid | Shield | Sturdy / Divines | Tri-Stat |
| Backbar Main Hand |
Powerful Assault | Ice Staff | Charged | Crusher |
Use these until you can move into the general-use PUG setups above.
Start with the Crafted (Beginner) setup if you only have access to crafted gear. Use the No Trial Gear setup once you can farm dungeon and monster sets but do not have trial gear yet.
Both progression setups work in Dungeons and Trials if that's all you have right now.
Starting setup if you only have access to crafted gear
| Gear Slot | Set | Weight/Type | Trait | Enchantment |
|---|---|---|---|---|
| Head |
Druid's Braid | Medium | Sturdy / Divines | Tri-Stat |
| Shoulders |
Druid's Braid | Light | Sturdy / Divines | Tri-Stat |
| Chest |
Wretched Vitality | Heavy | Reinforced | Tri-Stat |
| Hands |
Wretched Vitality | Heavy | Sturdy / Divines | Tri-Stat |
| Belt |
Wretched Vitality | Heavy | Sturdy / Divines | Tri-Stat |
| Legs |
Wretched Vitality | Heavy | Reinforced | Tri-Stat |
| Boots |
Wretched Vitality | Heavy | Reinforced | Tri-Stat |
| Necklace |
Druid's Braid | Jewelry | Harmony / Infused | Reduce Magicka Cost |
| Ring |
Druid's Braid | Jewelry | Harmony / Infused | Reduce Magicka Cost |
| Ring |
Druid's Braid | Jewelry | Harmony / Infused | Reduce Magicka Cost |
| Frontbar Main Hand |
Druid's Braid | Any 1-handed weapon | Decisive | Hardening |
| Frontbar Off Hand |
Druid's Braid | Shield | Sturdy / Divines | Tri-Stat |
| Backbar Main Hand |
Druid's Braid | Ice Staff | Infused | Crusher |
Explanation
Setup if you don't have access to Trial gear
| Gear Slot | Set | Weight/Type | Trait | Enchantment |
|---|---|---|---|---|
| Head |
Archdruid Devyric | Medium | Sturdy / Divines | Tri-Stat |
| Shoulders |
Archdruid Devyric | Light | Sturdy / Divines | Tri-Stat |
| Chest |
Turning Tide | Heavy | Reinforced | Tri-Stat |
| Hands |
Turning Tide | Heavy | Sturdy / Divines | Tri-Stat |
| Belt |
Turning Tide | Heavy | Sturdy / Divines | Tri-Stat |
| Legs |
Turning Tide | Heavy | Reinforced | Tri-Stat |
| Boots |
Turning Tide | Heavy | Reinforced | Tri-Stat |
| Necklace |
Crimson Oath's Rive | Jewelry | Harmony / Infused | Reduce Magicka Cost |
| Ring |
Crimson Oath's Rive | Jewelry | Harmony / Infused | Reduce Magicka Cost |
| Ring |
Crimson Oath's Rive | Jewelry | Harmony / Infused | Reduce Magicka Cost |
| Frontbar Main Hand |
Armor of the Trainee | Any 1-handed weapon | Decisive | Hardening |
| Frontbar Off Hand |
Druid's Braid | Shield | Sturdy / Divines | Tri-Stat |
| Backbar Main Hand |
Crimson Oath's Rive | Ice Staff | Infused | Crusher |
Additional Info
Alternative gear that can also be used and might be easier to obtain
It lists all useful gear, even sets that are already in the gear table and Situational tab
Crafted
All of these are tradable and can be bought from other players
Overland
All of these are tradable and can be bought from other players
PvP
All of these are tradable and can be bought from other players
Dungeons
Trials
Monster Sets
Body
Jewelry
Weapons
Body
Weapons
Use these Champion Points as default for Boss and Trash fights respectively. Further below you'll find a list of all useful CPs with explanations on when to use them.
A full list of useful Champion Points with explanations on when to slot them.


Put all 64 points into Health. However, your Max Stamina must be higher than your Max Magicka, because the Combustion synergy restores your dominant resource and you want it to be Stamina. If you have passives (such as Gift of Magnus ) or item set bonuses that increase Max Magicka, put just enough points into Stamina to keep it higher than your Max Magicka, then put the rest into Health.
Use Jewels of Misrule as your default. Orzorga's Smoked Bear Haunch provides slightly higher stats but is expensive.
Most of the time you should use Tri-Stat potions. They'll greatly improve your sustain.
Heroism potions can provide 100% uptime on Minor Heroism which generates ultimate, but they're expensive.
Templar Tank is viable in ESO Update 50 for dungeons and trials, especially if you want a pure class setup. It brings group healing, purge utility, shields, and the unique Weapon and Spell Damage buff from Bright Harbinger . It is not the strongest tank option overall, but it can clear hard content when played and geared properly.
Not really. Templar Tank has group healing, purge utility, and shields, but it lacks a proper self-heal that scales with Max Health. That makes it less comfortable for newer tanks than stronger tank classes or subclass setups.
Yes. Templar Tank can clear Veteran Dungeons and Trials, including hard content, when built and played correctly. The page includes setups for regular fights, trash packs, and situational swaps depending on the encounter.
Yes, for Infinite Archive Arcs 1-4. Those arcs are still close enough to normal PvE content that this Tank setup works well, and you usually will not have enough important Visions yet to build around them. Wield Soul is especially useful here because it applies Major Cowardice , reducing enemy Weapon and Spell Damage. Damage reductions like that become more valuable in Infinite Archive because enemies in IA have extremely low base Weapon Damage.
For deep Infinite Archive runs, such as Arc 10+, this is not the right type of build. Deep IA setups have to change heavily around the Visions earned during that run, so they are usually built very differently from standard dungeon, trial, or Arcs 1-4 tank builds.
No. Subclass Tank generally offers stronger overall group utility and better access to the best tanking tools. Pure Class Templar Tank is for players who want to stay fully Templar and still have a tank that can clear Veteran Dungeons and Trials.
Templar Tank's main strengths are group healing, purge utility, shields, and its unique Weapon and Spell Damage buff. It works best when those strengths are useful to the group or encounter.
Nord is the best general race for Templar Tank because of its resistances and Ultimate generation. You can clear all content on any race, but Nord is the safest recommendation.

If you've enjoyed this guide and want to support me, you can do so through Patreon. Your support will help me produce more guides.