Hyperioxes
Hyperioxes

One Bar Heavy Attack Sorcerer Solo Build - ESO Guide

Solo One Bar Magicka Heavy Attack Pure Class Sorcerer
Up to date for: Update 51 - 8th November 2026
Last changed: Update 51 - 8th November 2026

One Bar Heavy Attack Sorcerer Solo Build for ESO Update 51. It gets constant damage shields from the Class Mastery, and is very easy to play. It's on the lower end of DPS though. This build uses a single skill bar, so you don't need to manage bar swapping.

This setup cleared Solo Moon Hunter Keep and Solo March of Sacrifices with 3 Misfortunes, and parses 50.9k DPS on the 6 million dummy, going up to 61.6k in the Oakensoul setup.

Works for all kinds of solo content - overland at any Challenge Difficulty up to Vestige, World Bosses, Maelstrom Arena, Vateshran Hollows, early arcs in Infinite Archive, and Veteran Dungeon soloing.

There's also a two bar version of this build - the Heavy Attack Sorcerer Solo Build.

Simulated Parse Tables

I built a simulator that takes the current setup from the guide and plays it through the listed rotation. It uses the listed gear, skills, Champion Points, race, Mundus, food, potions, target armor and target health. It tracks skill casts, heavy attacks, DoT ticks, cooldowns, execute scaling, crits and status effect rolls.

Every comparison table in this guide is the average of 10 deterministic sims, with the dummy's health spread between 5.55 and 6.45 million HP. A single sim can be off by up to 1.0%, because the result depends on when the killing hit lands. The Base Setup is treated as the default.

For comparison tables I keep the setup identical and change one thing at a time. That makes the tables better for comparing options than random dummy parses, where one run can get better crits, different status effects or a better execute window.

Base Setup

Run DPS
Deterministic sim (5.55-6.45m average)
50.8k DPS
Real 6m CMX parse
50.9k DPS
100 random 6m sims
Lowest 48.7k DPS
Highest 54.2k DPS

Oakensoul Setup

Base Setup Oakensoul Setup
Run DPS
Deterministic sim (5.55-6.45m average)
57.9k DPS
Real 6m CMX parse
61.6k DPS
100 random 6m sims
Lowest 54.2k DPS
Highest 60.1k DPS
Advertisement

Class Mastery

Class Masteries are a system where each class picks 2 of 5 passive bonuses (Class Mastery Points, not Skill Points). Activating subclassing disables Class Mastery, so it's a tradeoff between keeping your native skill lines or subclassing.

Situational

Sorcerer Class Mastery

Font of Power

Within you is a wellspring of near unlimited power.

Upgrades rank 2 of to work with any Sorcerer ability and increases your Weapon and Spell Damage for 10 seconds. The Weapon and Spell Damage increases by 1% for every 1750 Max Magicka or Stamina you have, whichever is higher.

Notes

A 2.0% DPS boost if you want to give up the shields from .

Sorcerer Class Mastery

Conservation of Energy

Spellcasting is second nature to you. A skill honed by tireless study.

Upgrades rank 2 of to work with all abilities with a cost, excluding cost per tick abilities, and restores Magicka and Stamina when it activates.

Magicka

Coefficient1.5% Max Magicka

Stamina

Coefficient1.5% Max Stamina

Notes

Can help if you need more sustain.

Not worth it

Sorcerer Class Mastery

Sphere of Influence

Magicka extends your reach, a benefit to those who fight beside you.

Casting a damage shield on yourself or an ally grants an additional shield that absorbs up to Damage Shield for 4 seconds and 225 Health, Magicka, and Stamina Recovery for 12 seconds.

Damage Shield

Coefficient15% higher Max Health or Max Magicka
Cap25% of target's Max Health
TagsDamage ShieldSingle TargetDirect

Notes

Not useful for this setup.

Class Mastery Simulated Parse Damage Change
51.8k DPS
+2.0%
50.8k DPS
Baseline
49.9k DPS
-1.7%

Skill Setups

Base Setup

A base setup that will work for most situations and which should be your starting point when making situational setups.

Front Bar Back Bar
Slot 1: Ulfsild's ContingencyShock Damage / Gladiator's Tenacity / Force Slot 1: Bound AegisMorph of Bound Armor
Slot 2: Critical SurgeMorph of Surge
Slot 3: HurricaneMorph of Lightning Form
Slot 4: Crystal WeaponMorph of Crystal Shard
Slot 5: Elemental SusceptibilityMorph of Weakness to Elements
Ultimate: Summon Charged AtronachMorph of Summon Storm Atronach
  • (, , ) - your source of crucial buff, which increases damage done by Heavy Attacks against monsters by 150%. Since Ulfsild's Contingency is a Mages Guild skill, it will trigger the passive, which grants you for 10 seconds. It also deals decent damage in an AoE and grants you buff, increasing your Critical Damage by 10%. Ulfsild's Contingency is delayed until the next skill cast but whenever it's needed you can activate it early by bashing your enemy. If you cast this ability as you're finishing your Heavy Attack, the you gain from it will start working just in time to boost the final tick of that Heavy Attack you just finished.
  • - your source of that will also heal you for 3300 whenever you deal critical damage, up to once every second. The heal itself can also be a critical heal.
  • - your source of which is a crucial defensive buff. It also deals decent damage and grants Weapon and Spell Damage through the passive.
  • - makes your next Heavy Attacks deal bonus damage, applies a 1000 armor debuff and triggers , increasing your Max Magicka by 10%.
  • - a very strong ability that does a lot. It applies , which reduces enemies' armor by 5948 and is a big damage increase. It also applies , and status effects at the beginning and then every 7.5 seconds. will apply for 4 seconds, increasing enemies' damage taken by 5%. will apply for 4 seconds, reducing enemies' damage done by 5%.
  • - the most powerful ultimate Sorcerer has access to. It will also keep proccing status effect which will keep up the debuff, which increases enemies' damage taken by 5%.
  • - slotted for the passive and .

is the first skill that has to go if you need to slot something situational, unless the situational skill specifically says that it's replacing something else.

  • - use it for more difficult fights where the pressure is constant. It can also be used as your main source of healing before you obtain the Mythic or in fights with invulnerability phases where you can't heal with .
  • - an extremely powerful Damage Shield that shields you for 45.8% of Max Health.
  • - slot it for more difficult fights where you need more damage mitigation. It's a skill that passively grants , reducing your damage taken by 10%. It will also trigger the passive, which increases Magicka Recovery by 10%
  • - a chain ability that you can slot in trash packs to stack enemies and get through them faster.
  • - a source of AoE which can be used instead of in AoE fights.
  • - an ability that teleports you forward. Use it in fights where you need more mobility or in fights where this teleport allows you to invalidate some mechanic.
  • - snare removal which will be crucial for some fights
  • - an ultimate that breaks you out of some otherwise unavoidable stuns, you'll need it to get around some mechanics which are otherwise impossible or very difficult to solo, like for example Inferno's Hold in Zaan the Scalecaller fight.

Priority List

This is just a list of priorities. Simply recast abilities when they run out and follow this list of priorities when there are multiple things to refresh.

  • 1. - if has run out or will run out before the final hit of your Heavy Attack lands
  • 2. - when ready
  • 3. - refresh 1 Heavy Attack early
  • 4. - refresh 1 Heavy Attack early
  • 5. - refresh 1 Heavy Attack early
  • 6. - if your is out or if it's going to run out by the end of the Heavy Attack you're channeling
  • 7. (Oakensoul setup) - refresh 1 Heavy Attack early
  • 8.

Pre-buff

These abilities can be pre-cast before entering combat.

Final Setups

A few examples of final setups you could end up with after applying the situational skills to the base setup.

A setup for dealing with trash packs.

Front Bar Back Bar
Slot 1: Ulfsild's ContingencyShock Damage / Gladiator's Tenacity / Force Slot 1: Bound AegisMorph of Bound Armor
Slot 2: Critical SurgeMorph of Surge
Slot 3: HurricaneMorph of Lightning Form
Slot 4: Silver LeashMorph of Silver Bolts
Slot 5: Razor CaltropsMorph of Caltrops
Ultimate: Summon Charged AtronachMorph of Summon Storm Atronach

What Changes

Changes compared to the Base Setup.

  • replaces
  • replaces

Skill Setup Comparison

Setup Simulated Parse Damage Change
Oakensoul
57.9k DPS
+14.1%
Base
50.8k DPS
Baseline
Tanky
44.9k DPS
-11.5%

Passives

There are no passives you need to skip with this build

Some trees are only needed when using situational skills, for example Psijic Order provides nothing without .

Class

Weapon

Armor

Guild

Alliance War

Racial

Craft

Class - Dark Magic

Unholy Knowledge - Medium Priority

Blood Magic - High Priority

Persistence - Low Priority

Exploitation - High Priority

Gear

Base is your starting point and works for most situations. Crafted is a beginner version using only craftable sets.

Switching gear for trash packs isn't worth it unless you're using gear-swap addons.

is the default because of its healing. You can replace it with for more damage, but you lose a lot of survivability.

Gear Slot Set Weight/Type Trait Enchantment
HeadHead Medium
ShouldersShoulders Light
ChestChest Heavy
HandsHands Light
BeltBelt Light
LegsLegs Light
BootsBoots Light
NecklaceNecklace Jewelry
RingRing Jewelry
RingRing Jewelry
Frontbar Main HandFrontbar Main Hand Lightning Staff
Weapons and Jewelry
Sergeant's Mail - Dungeon Set (Wayrest Sewers I & II)

If you don't have it, use in order

  1. - Dungeon Set (Tempest Island)
  2. - Dungeon Set (Blackheart Haven)
  3. - Dungeon Set (Arx Corinium)
  4. - Crafted
  5. - Crafted
Body
Noble Duelist's Silks - Dungeon Set (Blessed Crucible)

If you don't have it, use in order

  1. - Dungeon Set (Blackheart Haven)
  2. - Dungeon Set (Tempest Island)
  3. - Dungeon Set (Arx Corinium)
  4. - Crafted
  5. - Crafted

Use the Penetration Calculator to fine-tune your penetration for different content. Overland enemies have 9,100 armor while Instanced enemies (Arenas and Dungeons) have 18,200.

Tool Penetration Calculator Check your total armor penetration in ESO and see exactly how much DPS you're losing. Find out if you've hit the penetration cap for the type of content you're doing.

Gear Set Comparisons

Damage comparison for the set options.

Weapons + Jewelry

Compares + X weapons and jewelry set.

Source
Replacement Set Source Simulated Parse Damage Change
Dungeon - Wayrest Sewers I & II
50.8k DPS
Baseline
Dungeon - Tempest Island
47.5k DPS
-6.3%
Dungeon - Blackheart Haven
47.3k DPS
-6.8%
Dungeon - Arx Corinium
46.9k DPS
-7.6%
Trial - Sanity's Edge
No Interrupt 42.1k DPS
Interrupt 45.0k DPS
-17.0% -11.3%
Crafted
41.7k DPS
-17.8%
Crafted
41.3k DPS
-18.6%
Crafted
41.2k DPS
-18.7%
Trial - Rockgrove
No Soul 41.0k DPS
Soul 45.4k DPS
-19.2% -10.6%
Crafted
0 Stacks 40.7k DPS
3 Stacks 41.8k DPS
-19.8% -17.6%

Additional Tips

  • You can change some (or all) of the enchants to ones for very hard hitting bosses.
Advertisement

Champion Points

Unlock Order

Warfare
20% Light and Heavy Attack Damage
6% Single Target Damage
8% Critical Damage and Healing
205 Weapon and Spell Damage
More Mitigation
Replace + with 2 mitigation CPs: , , , or (depending on the type of damage the Boss deals to you)
More Healing
is a decent option if you need more HPS
Fitness
1400 Max Health
1731 Armor
20% Block Mitigation, -16% Movement Speed
15% stronger damage shields
Movement Speed
Use in fights where you have to move a lot
Damage Shields
Drop when you're not using or
Craft
20% Movement Speed out of combat
Quality of Life
Green Champion Points don't affect Combat, choose whatever Quality of Life you prefer

Race

For solo you need both damage and survivability, so every race brings something to the table. I use Nord because in difficult solo content the armor racial is worth the DPS trade-off.

Nord
Nord
The tankiest race. Nord is also what I use for soloing Veteran Hard Mode DLC Dungeons. provides around 5-7% damage mitigation depending on your current armor, making difficult content easier to survive without sacrificing much damage.
Rugged 2600 armor
Stalwart 1500 Max Stamina, 0.5 Ultimate per second
Resist Frost 1000 Max Health, 4620 Frost Resistance
Race Simulated Parse Damage Change
Khajiit
53.3k DPS
+5.1%
High Elf
52.8k DPS
+4.0%
Dark Elf
52.7k DPS
+3.9%
Orc
52.0k DPS
+2.4%
Breton
51.6k DPS
+1.6%
Argonian
51.1k DPS
+0.7%
Wood Elf
51.1k DPS
+0.7%
Imperial
50.8k DPS
+0.0%
Nord
50.8k DPS
Baseline
Redguard
50.8k DPS
+0.0%

Mundus

  • Default

    5.53% Critical Chance(9.04% with 7 )
    Use in all content

Attributes

Attributes are the one part of the build where the damage vs survivability trade-off heavily favors survivability. Going 64 Health instead of 64 Magicka costs you 5.2% DPS and gives you 8277 Max Health, which is a 31% increase. Your and shields get bigger too. That's why 64 Health is the default here.

If a fight is easy enough that you don't need the extra Health, you can put everything into Magicka for up to 5.5% more damage, or split it 32/32 for something in between.

Health
64
Magicka
0
Stamina
0
Attributes Simulated Parse Damage Change
64 Magicka
53.5k DPS
+5.5%
32 Health / 32 Magicka
52.2k DPS
+2.8%
64 Health
50.8k DPS
Baseline

Food

  • Default

    Max Health +5,414 Max Magicka +4,938
    The default option. Gives Max Health and Max Magicka.
    Cheaper alternative
    Difference Max Health +5,395 −19 Max Magicka +4,936 −2
  • Situational

    Max Health +4,620 Max Stamina +4,250 Max Magicka +4,250 Health Recovery +462
    Slightly lower damage and slightly less Max Health, but it gives you Max Stamina, so you have a bigger Stamina pool if you need a few more dodge rolls. With , its Max Stamina also turns into a decent amount of Stamina sustain, because Conservation of Energy scales with Max Resources.
  • Sustain

    Max Health +5,395 Stamina Recovery +493
    Provides Stamina Recovery at the cost of Maximum Magicka. It will lower your damage, but it's very useful for fights where you have to dodge roll a lot.
  • Sustain

    Max Health +4,312 Health Recovery +406 Stamina Recovery +369 Magicka Recovery +369
    Provides Magicka and Stamina Recovery at the cost of Maximum Magicka, and has less Max Health and Stamina Recovery than . Only worth it if you have to spam during some phase, since most of the time heavy attacking takes care of your Magicka sustain.
    Cheaper alternative
    Difference Max Health +3,927 −385 Health Recovery — −406 Stamina Recovery +357 −12 Magicka Recovery +357 −12
Setup Simulated Parse Damage Change
50.8k DPS
Baseline
50.5k DPS
-0.5%
48.8k DPS
-3.9%
48.8k DPS
-3.9%

Potions

  • Default

    Restore Stamina
    The default option. is needed because you don't get it from any of your skills. 15.7 second is a nice bonus on top of that.
  • Cheap

    Restore Stamina
    Cheap alternative. It still gives you , but you lose . is useless here since already gives it, it's only there because that's how the recipe works out.
  • Oakensoul

    Restore Health Restore Stamina
    gives you , so you can instead put Restore Health on the potion.
  • Oakensoul

    Restore Health
    When using , you can also use the Armor potions, which will increase your armor by 5280.
Base Setup Simulated Parse Damage Change
50.8k DPS
Baseline
49.4k DPS
-2.7%
Oakensoul Setup Simulated Parse Damage Change
57.9k DPS
Baseline
56.3k DPS
-2.8%

Parses

All parses are recorded on the 6 million Target Dummy

Base Setup
50,932 DPS
Oakensoul Setup
61,559 DPS
Base Setup
50,932DPS
6mil Skeleton Dummy
Patch
Update 51
Armor
5 Light / 1 Medium / 1 Heavy
Gear Setup
Base
Skill Setup
Base
Potion
Food
Mundus
Race
Nord
CMX Parse
CMX Setup
Recording
Oakensoul Setup
61,559DPS
6mil Skeleton Dummy
Patch
Update 51
Armor
5 Light / 1 Medium / 1 Heavy
Gear Setup
Base
Skill Setup
Oakensoul
Potion
Food
Mundus
Race
Nord
CMX Parse
CMX Setup
Recording

Gameplay

Moon Hunter Keep
Solo Dungeon
March of Sacrifices
Solo Dungeon
Moon Hunter Keep
Solo Dungeon 3 Misfortunes
March of Sacrifices
Solo Dungeon 3 Misfortunes

Fashion

Outfit
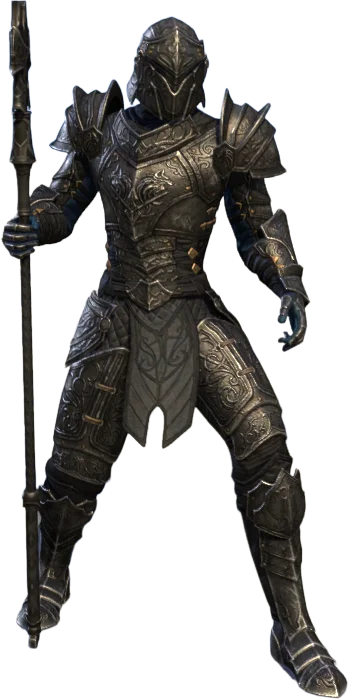
Heavy Attack Sorcerer fashion screenshot
Slot Style Dyes
Head House Mornard HelmHouse Mornard Helm
Obsidian Black
Empty
Arcane Blue
Shoulders House Mornard PauldronsHouse Mornard Pauldrons
Obsidian Black
Empty
Empty
Chest House Mornard CuirassHouse Mornard Cuirass
Obsidian Black
Obsidian Black
Arcane Blue
Hands House Mornard GauntletsHouse Mornard Gauntlets
Obsidian Black
Obsidian Black
Arcane Blue
Waist House Mornard GirdleHouse Mornard Girdle
Obsidian Black
Empty
Empty
Legs House Mornard GreavesHouse Mornard Greaves
Obsidian Black
Obsidian Black
Obsidian Black
Feet House Mornard SabatonsHouse Mornard Sabatons
Obsidian Black
Obsidian Black
Empty
Frontbar Staff House Mornard StaffHouse Mornard Staff
Obsidian Black
Obsidian Black
Obsidian Black
Heavy Attack Sorcerer fashion screenshot

FAQ

Yes. It has a strong damage shield with , gets constant damage shields from the Class Mastery, and is very easy to play. It's on the lower end of DPS though, and it cleared Solo Moon Hunter Keep and Solo March of Sacrifices with 3 Misfortunes.

The Base setup uses , , and . If you're a beginner, the Crafted setup uses only craftable sets.

is better for difficult content because of the healing it provides. does more damage (about 14% in the simulated comparison) but has much worse survivability.

Khajiit, High Elf and Dark Elf do the most damage, around 3.9-5.1% more than Nord. Nord is the best race for survivability, with around 5-7% damage mitigation from .

Yes. This is a pure class setup, so it keeps Sorcerer skill lines and uses Class Masteries instead of subclassing.

Yes. This build is capable of soloing every Veteran dungeon that doesn't have a specific mechanic that requires multiple people. It's also capable of soloing most Hard Mode dungeons, and with some adjustments even the more difficult ones.

Yes, for Infinite Archive Arcs 1-4. Those arcs are still close enough to normal solo content that a standard solo build works well, and you usually will not have enough important Visions yet to build around them. Some effects become more valuable in Infinite Archive, especially enemy Weapon and Spell Damage reductions, but you do not need a dedicated deep-IA build for Arcs 1-4.

For deep Infinite Archive runs, such as Arc 10+, this is not the right type of build. Deep IA setups have to change heavily around the Visions earned during that run, so they are usually built very differently from standard solo builds.

Yes, you can use this build at any Challenge Difficulty, including Vestige. Mobs hit a lot harder and you do less damage on the higher tiers, so fights take longer, but the build itself doesn't change.

No. Use the Base skill and gear setups for both Maelstrom Arena and Vateshran Hollows.


THANKS FOR READING

If you want to support my work, you can do so through Patreon.