

One Bar Breath Dragonknight Solo Build - ESO Guide
One Bar Breath Dragonknight Solo Build for ESO Update 49, built around Engulfing Dragonfire, a channeled fire breath that ramps up in damage over 4.8 seconds and synergizes with the Take Flight ultimate.
It's a simpler One Bar version of the Breath Dragonknight.
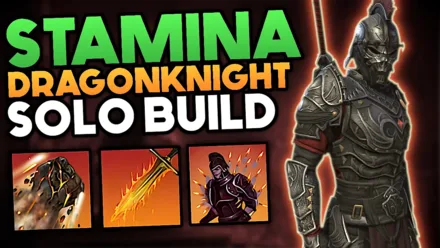
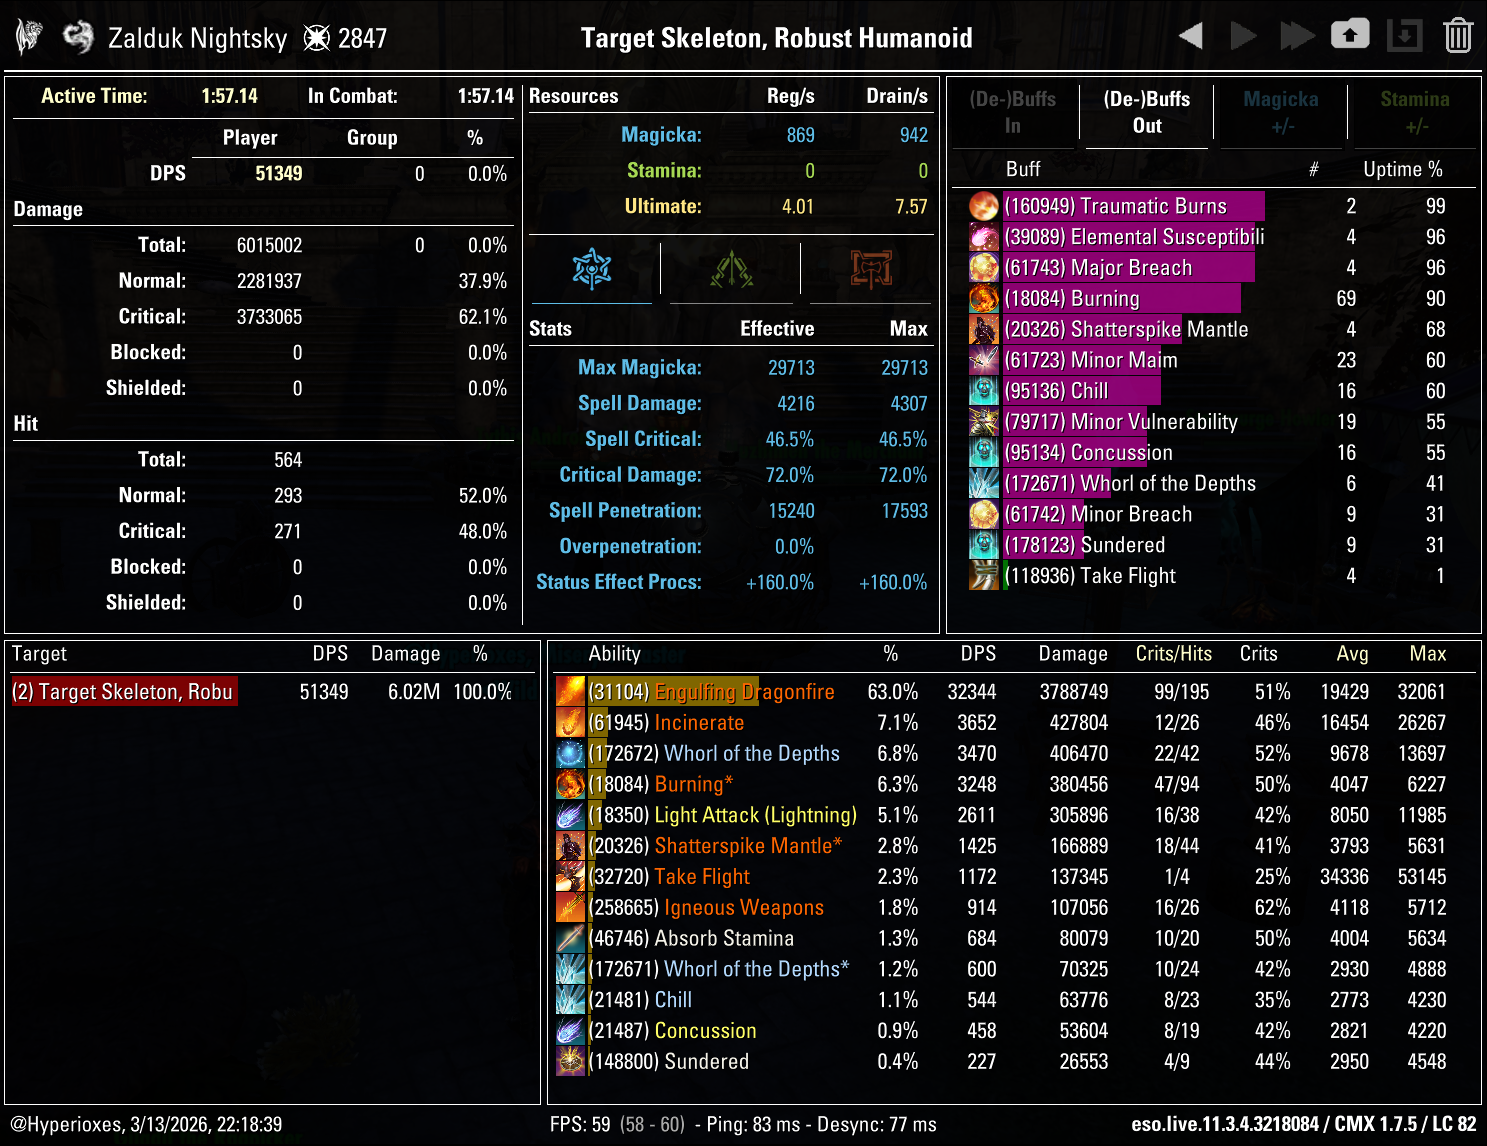
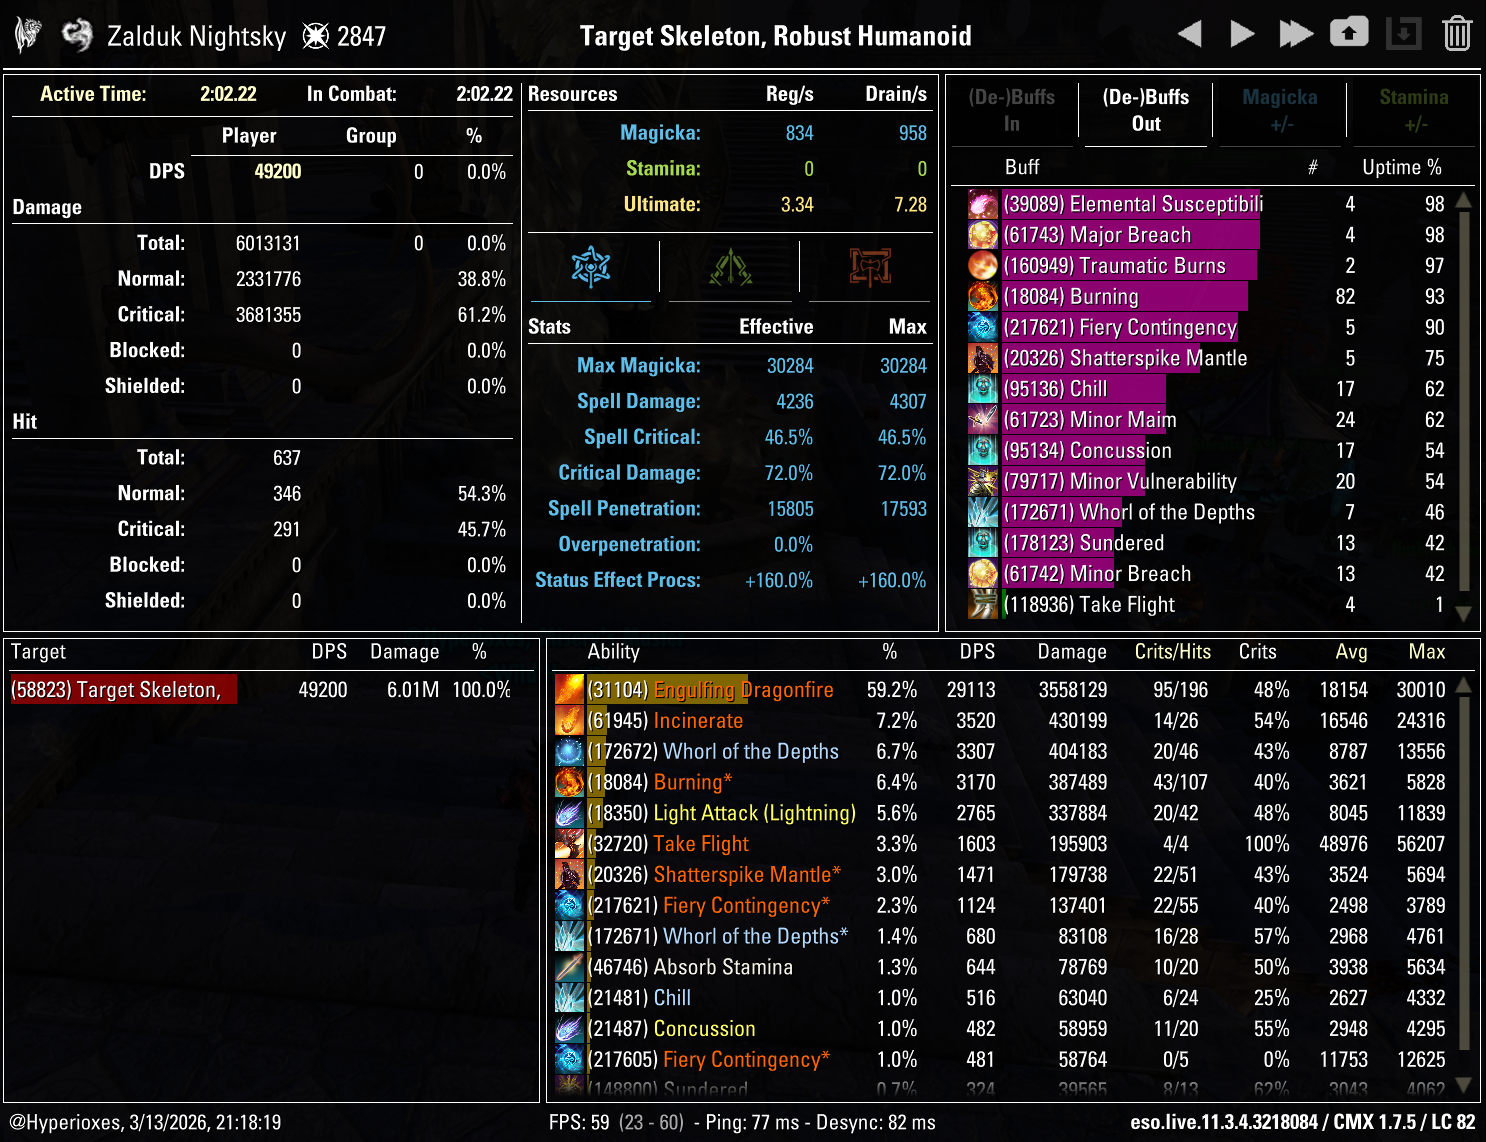
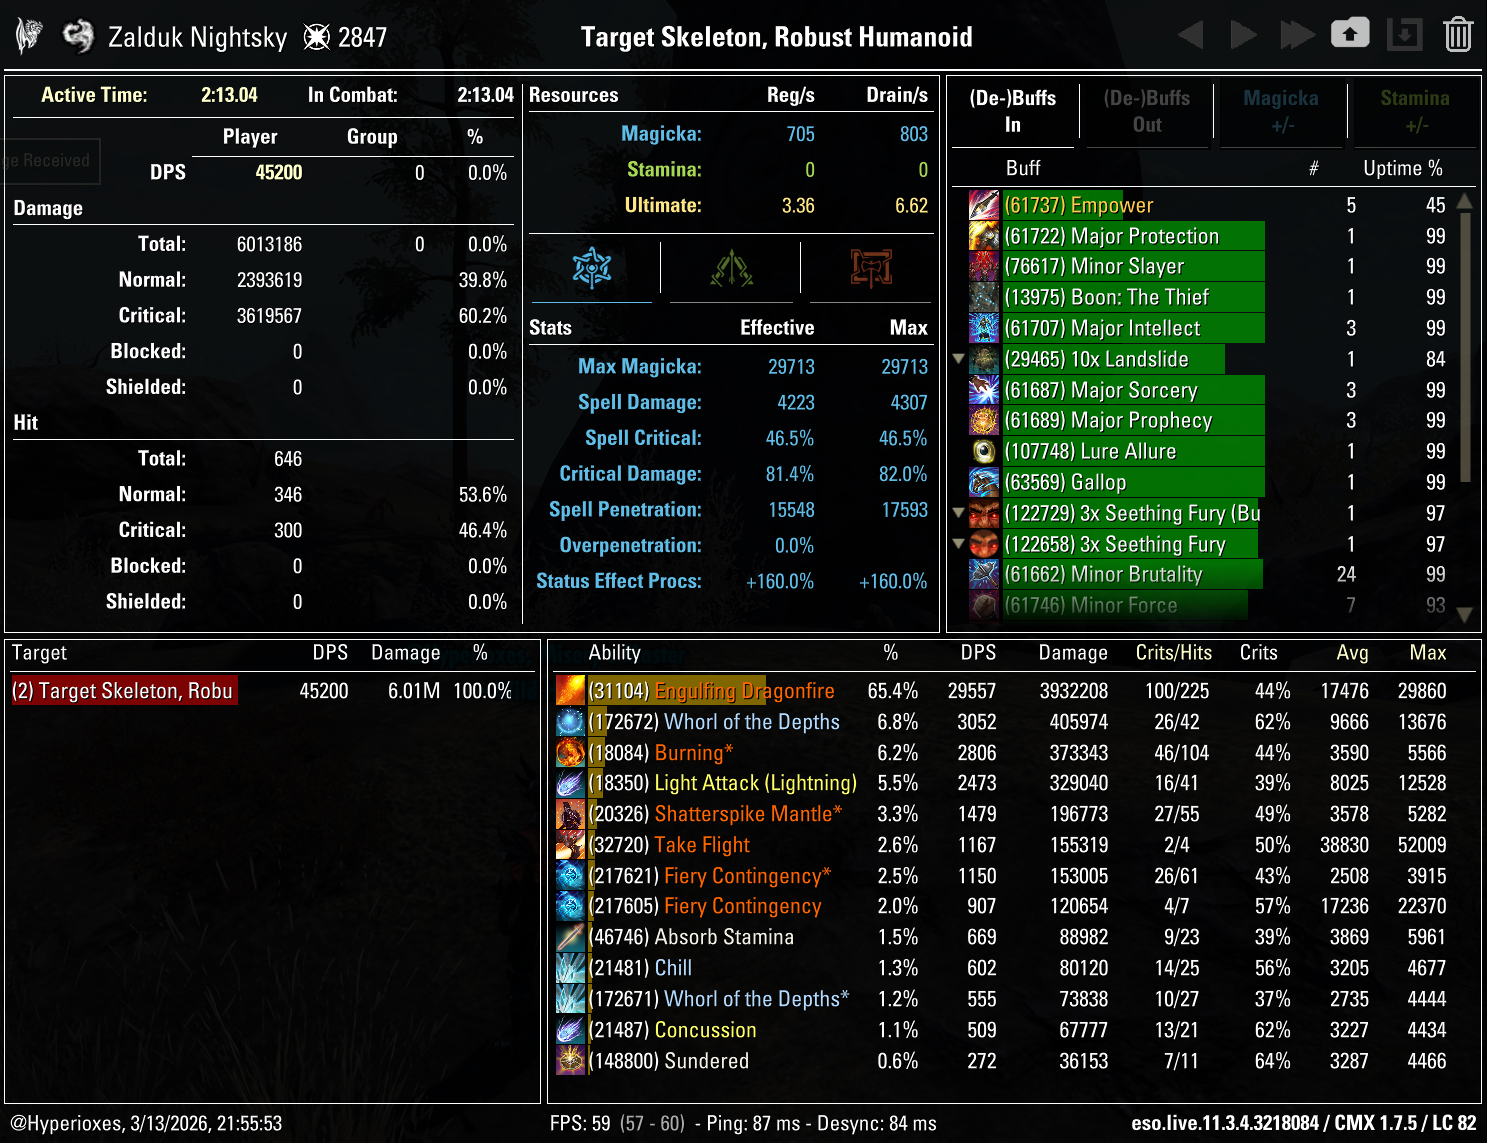
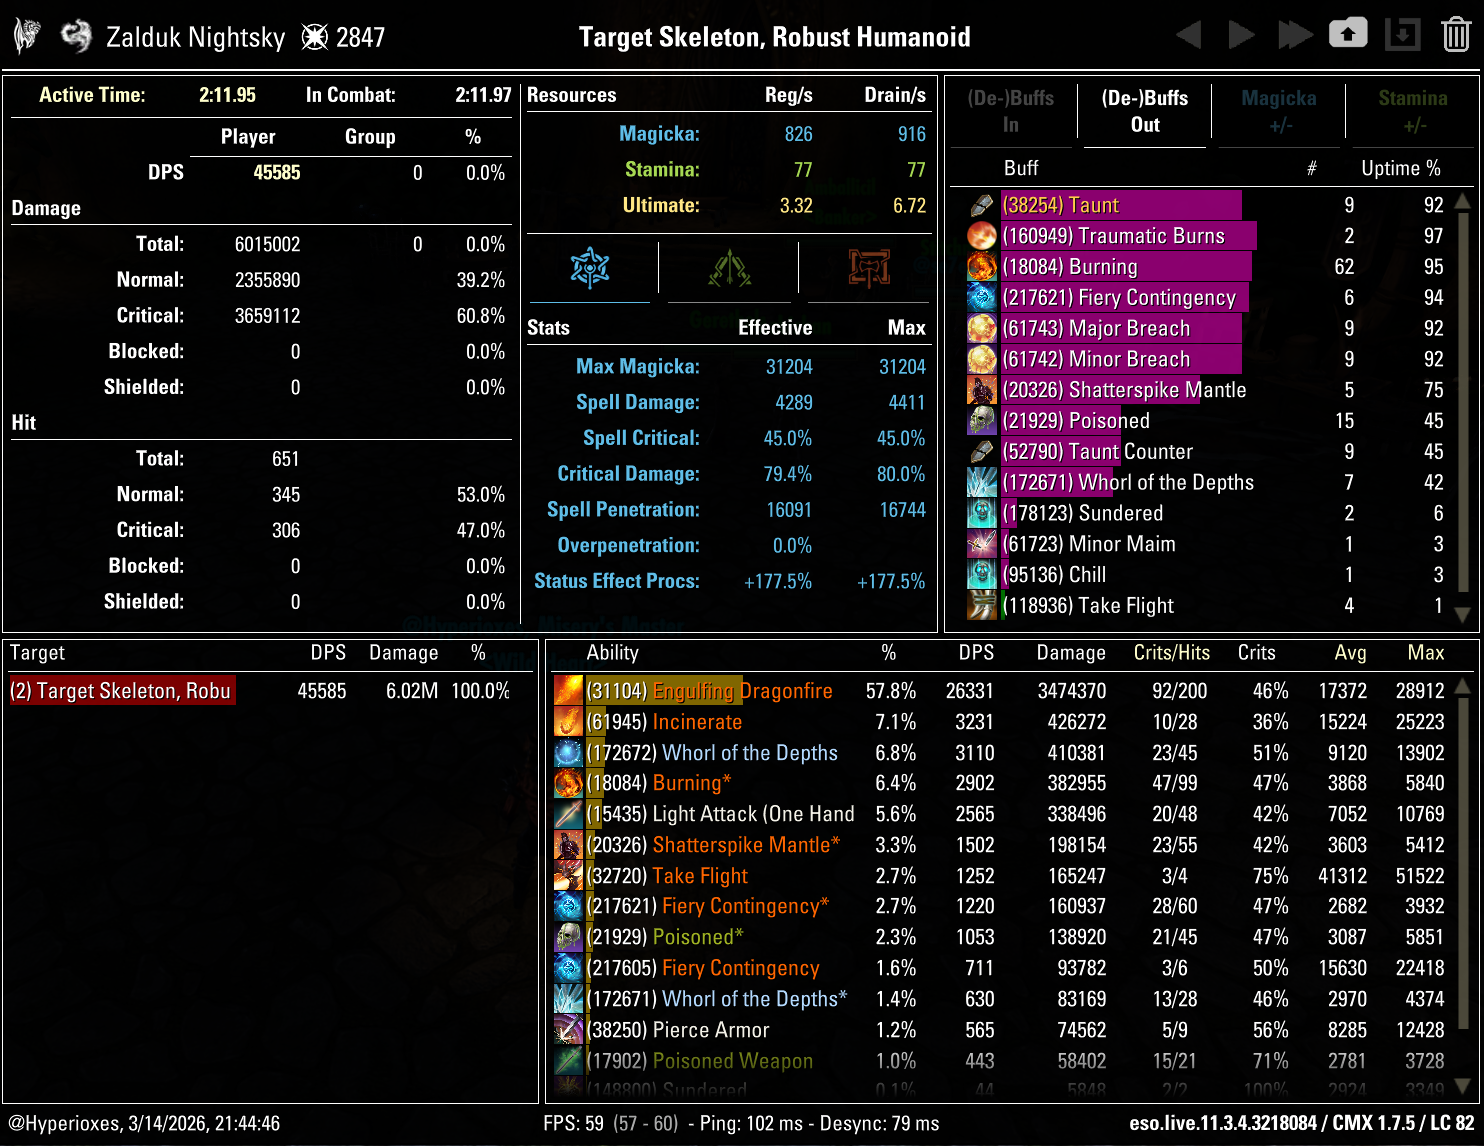
Capable of soloing every Veteran dungeon that doesn't have a mechanic requiring multiple people, including Veteran Hard Mode Cradle of Shadows and Veteran Moongrave Fane. Parses 49.2k in the Regular setup, going up to 58.2k in a Full Damage setup and down to 45.2k in a Tanky setup, with a bonus Sword and Shield parse at 45.5k.
Looking for more damage? Check out the two bar Breath Dragonknight Solo Build which uses the same gameplay with a second skill bar for more DPS and survivability.
Skill Setups
Base Setup
A base setup that will work for most situations and which should be your starting point when making situational setups
| Front Bar | Back Bar |
|---|---|
| Slot 1: Engulfing Dragonfire | Slot 1: Molten Whip |
| Slot 2: Incinerate | |
| Slot 3: Shatterspike Mantle | |
| Slot 4: Elemental Susceptibility | |
| Slot 5: Ulfsild's Contingency | |
| Ultimate: Take Flight |
Final Setups
A few examples of final setups you could end up with after applying the situational skills to the base setup
A setup for trash packs
| Front Bar | Back Bar |
|---|---|
| Slot 1: Engulfing Dragonfire | Slot 1: Molten Whip |
| Slot 2: Incinerate | |
| Slot 3: Shatterspike Mantle | |
| Slot 4: Razor Caltrops | |
| Slot 5: Chains of Dominance | |
| Ultimate: Take Flight |
What Changes
- Razor Caltrops replaces Elemental Susceptibility, so that you can apply Major Breach in AoE
- Chains of Dominance replaces Ulfsild's Contingency
A setup that sacrifices survivability for damage
| Front Bar | Back Bar |
|---|---|
| Slot 1: Engulfing Dragonfire | Slot 1: Molten Whip |
| Slot 2: Incinerate | |
| Slot 3: Shatterspike Mantle | |
| Slot 4: Elemental Susceptibility | |
| Slot 5: Igneous Weapons | |
| Ultimate: Take Flight |
What Changes
- Igneous Weapons replaces Ulfsild's Contingency
Additional Info
- Igneous Weapons allow you to use Tri-Stat or Heroism potions instead of Spell Power potions
A setup which trades damage for more survivability. Use it against harder boss fights or if you simply want a tankier build and don't mind fights taking longer
| Front Bar | Back Bar |
|---|---|
| Slot 1: Engulfing Dragonfire | Slot 1: Molten Whip |
| Slot 2: Revealing Flare | |
| Slot 3: Shatterspike Mantle | |
| Slot 4: Elemental Susceptibility | |
| Slot 5: Ulfsild's Contingency | |
| Ultimate: Take Flight |
What Changes
- Revealing Flare replaces Incinerate
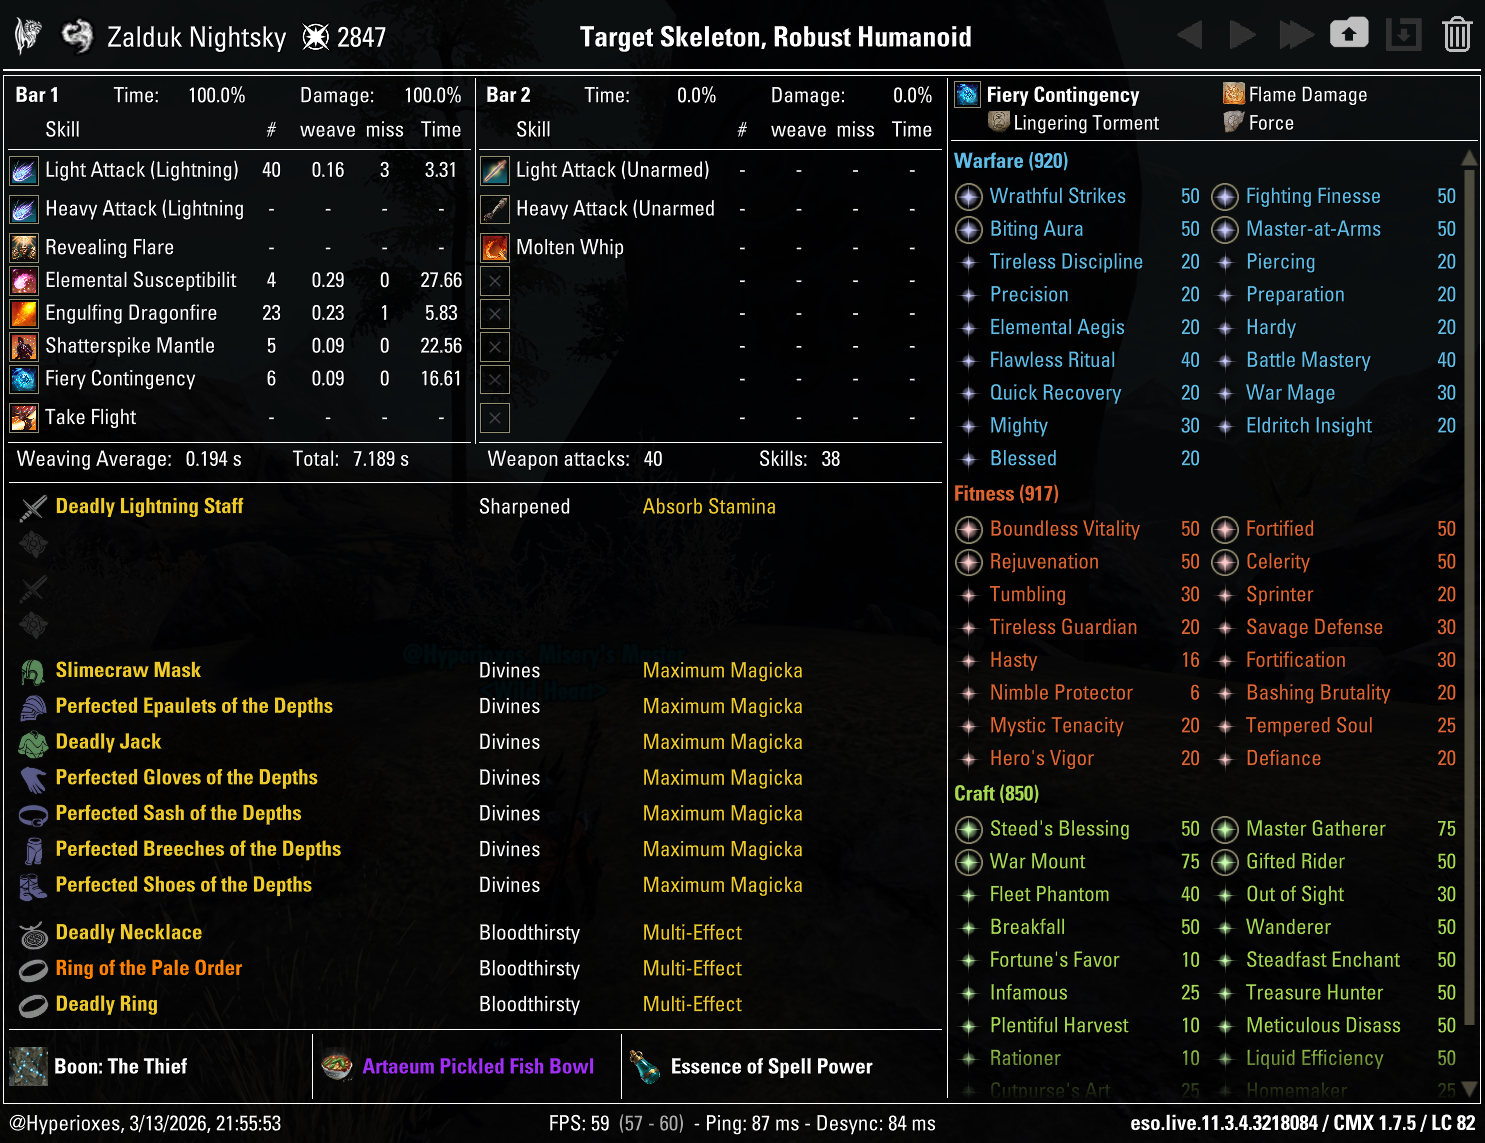
A setup which you could use if you want to play with a Sword and Shield. It parsed ≈7% less than a similar setup with Lightning Staff and Elemental Susceptibility
| Front Bar | Back Bar |
|---|---|
| Slot 1: Engulfing Dragonfire | Slot 1: Molten Whip |
| Slot 2: Incinerate | |
| Slot 3: Shatterspike Mantle | |
| Slot 4: Pierce Armor | |
| Slot 5: Ulfsild's Contingency | |
| Ultimate: Take Flight |
What Changes
- Pierce Armor replaces Elemental Susceptibility
Additional Info
- Pierce Armor is a Taunt which won't matter since this is a Solo build. If you decide to use this build in group content (which you shouldn't do anyway) you absolutely cannot use Pierce Armor
Passives
Some trees are only needed when using situational skills, for example Psijic Order provides nothing without Precognition
 Class
Class
 Weapon
 Armor
Armor
 Guild
Guild
 Alliance War
 Racial
 Craft
Craft
Class - Ardent Flame
![]() Combustion - High Priority
Combustion - High Priority
![]() Traumatic Burns - High Priority
Traumatic Burns - High Priority
![]() Fan the Flames - High Priority
Fan the Flames - High Priority
![]() A Soul Ablaze - High Priority
A Soul Ablaze - High Priority
Class - Draconic Power
![]() Burnished Scales - High Priority
Burnished Scales - High Priority
![]() World in Ruin - High Priority
World in Ruin - High Priority
![]() Elder Dragon - High Priority
Elder Dragon - High Priority
![]() The Storm Voice - High Priority
The Storm Voice - High Priority
Class - Earthen Heart
![]() Heart of Stone - High Priority
Heart of Stone - High Priority
![]() Landslide - High Priority
Landslide - High Priority
![]() Blessing at the Peak - High Priority
Blessing at the Peak - High Priority
![]() Mountain Giant - High Priority
Mountain Giant - High Priority
Weapon - Destruction Staff
![]() Tri Focus - Low Priority
Tri Focus - Low Priority
![]() Penetrating Magic - Low Priority
Penetrating Magic - Low Priority
![]() Elemental Force - High Priority
Elemental Force - High Priority
![]() Ancient Knowledge - High Priority
Ancient Knowledge - High Priority
![]() Destruction Expert - Low Priority
Destruction Expert - Low Priority
Armor - Light Armor
![]() Grace - Low Priority
Grace - Low Priority
![]() Evocation - High Priority
Evocation - High Priority
![]() Spell Warding - High Priority
Spell Warding - High Priority
![]() Prodigy - High Priority
Prodigy - High Priority
![]() Concentration - High Priority
Concentration - High Priority
Armor - Medium Armor
![]() Dexterity - High Priority
Dexterity - High Priority
![]() Wind Walker - High Priority
Wind Walker - High Priority
![]() Improved Sneak - Not needed
Improved Sneak - Not needed
![]() Agility - High Priority
Agility - High Priority
![]() Athletics - High Priority
Athletics - High Priority
Guild - Mages Guild
![]() Persuasive Will - Not needed
Persuasive Will - Not needed
![]() Mage Adept - High Priority
Mage Adept - High Priority
![]() Everlasting Magic - High Priority
Everlasting Magic - High Priority
![]() Magicka Controller - High Priority
Magicka Controller - High Priority
![]() Might of the Guild - Low Priority
Might of the Guild - Low Priority
Guild - Psijic Order
![]() Clairvoyance - Low Priority
Clairvoyance - Low Priority
![]() Spell Orb - Not needed
Spell Orb - Not needed
![]() Concentrated Barrier - Low Priority
Concentrated Barrier - Low Priority
![]() Deliberation - Not needed
Deliberation - Not needed
Alliance War - Support
![]() Magicka Aid - Medium Priority
Magicka Aid - Medium Priority
![]() Combat Medic - Not needed
Combat Medic - Not needed
![]() Battle Resurrection - Not needed
Battle Resurrection - Not needed
Race - Your Race
Get all of your racials, no matter which race you are
Craft - Alchemy
![]() Solvent Proficiency - Not needed
Solvent Proficiency - Not needed
![]() Keen Eye: Reagents - Not needed
Keen Eye: Reagents - Not needed
![]() Medicinal Use - High Priority
Medicinal Use - High Priority
![]() Chemistry - Not needed
Chemistry - Not needed
![]() Laboratory Use - Not needed
Laboratory Use - Not needed
![]() Snakeblood - Not needed
Snakeblood - Not needed
Gear
Base Setup
A base setup that will work for most situations and which should be your starting point when making situational setups
| Gear Slot | Set | Weight/Type | Trait | Enchantment |
|---|---|---|---|---|
 Head Head |
Slimecraw | Light | Divines | Magicka |
 Shoulders Shoulders |
Tide-Born Wildstalker | Medium | Divines | Magicka |
 Chest Chest |
Deadly Strike | Medium | Divines | Magicka |
 Hands Hands |
Tide-Born Wildstalker | Light | Divines | Magicka |
 Belt Belt |
Tide-Born Wildstalker | Light | Divines | Magicka |
 Legs Legs |
Tide-Born Wildstalker | Medium | Divines | Magicka |
 Boots Boots |
Tide-Born Wildstalker | Medium | Divines | Magicka |
 Necklace Necklace |
Deadly Strike | Jewelry | Bloodthirsty | Increase Magical Harm |
 Ring Ring |
Deadly Strike | Jewelry | Bloodthirsty | Increase Magical Harm |
| Ring |
Ring of the Pale Order | Jewelry | Bloodthirsty | Increase Magical Harm |
 Frontbar Main Hand Frontbar Main Hand |
Deadly Strike | Lightning Staff | Charged | Absorb Magicka |
Final Setups
A few examples of final setups you could end up with after applying the situational rules to the base setup
This is the crafted gear setup you can start with
| Gear Slot | Set | Weight/Type | Trait | Enchantment |
|---|---|---|---|---|
| Head |
Highland Sentinel | Light | Divines | Magicka |
| Shoulders |
Tide-Born Wildstalker | Medium | Divines | Magicka |
| Chest |
Order's Wrath | Medium | Divines | Magicka |
| Hands |
Tide-Born Wildstalker | Light | Divines | Magicka |
| Belt |
Tide-Born Wildstalker | Light | Divines | Magicka |
| Legs |
Tide-Born Wildstalker | Medium | Divines | Magicka |
| Boots |
Tide-Born Wildstalker | Medium | Divines | Magicka |
| Necklace |
Order's Wrath | Jewelry | Bloodthirsty | Increase Magical Harm |
| Ring |
Order's Wrath | Jewelry | Bloodthirsty | Increase Magical Harm |
| Ring |
Highland Sentinel | Jewelry | Bloodthirsty | Increase Magical Harm |
| Frontbar Main Hand |
Order's Wrath | Lightning Staff | Charged | Absorb Magicka |
The setup in the table uses only crafted gear, but if you already own parts of the Regular setup like Ring of the Pale Order you can start using them immediately
This is a setup you should use in Instanced content (Arenas and Dungeons). Enemies in instanced content have 18,200 armor, while Overland enemies have only 9,100, so this setup will need much more penetration.
| Gear Slot | Set | Weight/Type | Trait | Enchantment |
|---|---|---|---|---|
| Head |
Slimecraw | Medium | Divines | Magicka |
| Shoulders |
Whorl of the Depths | Light | Divines | Magicka |
| Chest |
Deadly Strike | Medium | Divines | Magicka |
| Hands |
Whorl of the Depths | Light | Divines | Magicka |
| Belt |
Whorl of the Depths | Light | Divines | Magicka |
| Legs |
Whorl of the Depths | Light | Divines | Magicka |
| Boots |
Whorl of the Depths | Light | Divines | Magicka |
| Necklace |
Deadly Strike | Jewelry | Bloodthirsty | Increase Magical Harm |
| Ring |
Deadly Strike | Jewelry | Bloodthirsty | Increase Magical Harm |
| Ring |
Ring of the Pale Order | Jewelry | Bloodthirsty | Increase Magical Harm |
| Frontbar Main Hand |
Deadly Strike | Lightning Staff | Sharpened | Absorb Stamina |
Explanation
- Whorl of the Depths replaces Tide-Born Wildstalker, because in Instanced content you can benefit from the Minor Slayer buff, which makes it better
- Weight composition goes from 4 Medium 3 Light to 2 Medium 5 Light, so that we can benefit a bit more from the Concentration passive
- Weapon trait changes from Charged to Sharpened, in order to get enough penetration
- Weapon enchant changes from Absorb Magicka to Absorb Stamina, because with more Light Armor pieces we don't need Absorb Magicka to sustain
Additional Info
Champion Points
Race
For solo you need both damage and survivability, so every race brings something to the table, but these two stand out as the best options for damage and survivability respectively


Mundus


Attributes
For most content you should put all 64 points into Magicka. For difficult content you should devote as many attribute points as necessary to Health - for some content you'll be able to get away with 32 Health 32 Magicka, for the extremely difficult stuff you'll need 64 Health.
Food
Your sustain can vary greatly because it's impacted by your armor weight composition, your race and how much blocking/dodge rolling you're required to do in a certain fight. Choose the food with more recoveries if you can't sustain.
Potions
Use Spell Power potions most of the time. Using Igneous Weapons enables you to use Tri-Stat or Heroism potions instead.
The default option which improves your Magicka sustain and grants you Major Sorcery, which will increase your Spell Damage by 20%. It does not stack with Minor Brutality from Elder Dragon, but it still ends up being the best default option, since you wouldn't be able to sustain Weapon Power potions
Use these if you're already getting Major Brutality/Sorcery from Igneous Weapons. Just like Spell Power potions they'll improve your Magicka sustain and they'll improve Stamina sustain on top of that
Basically Tri-Stat potions but with Minor Heroism on top of that, which is an extremely powerful buff in this build because of our reliance on Take Flight, but they're expensive
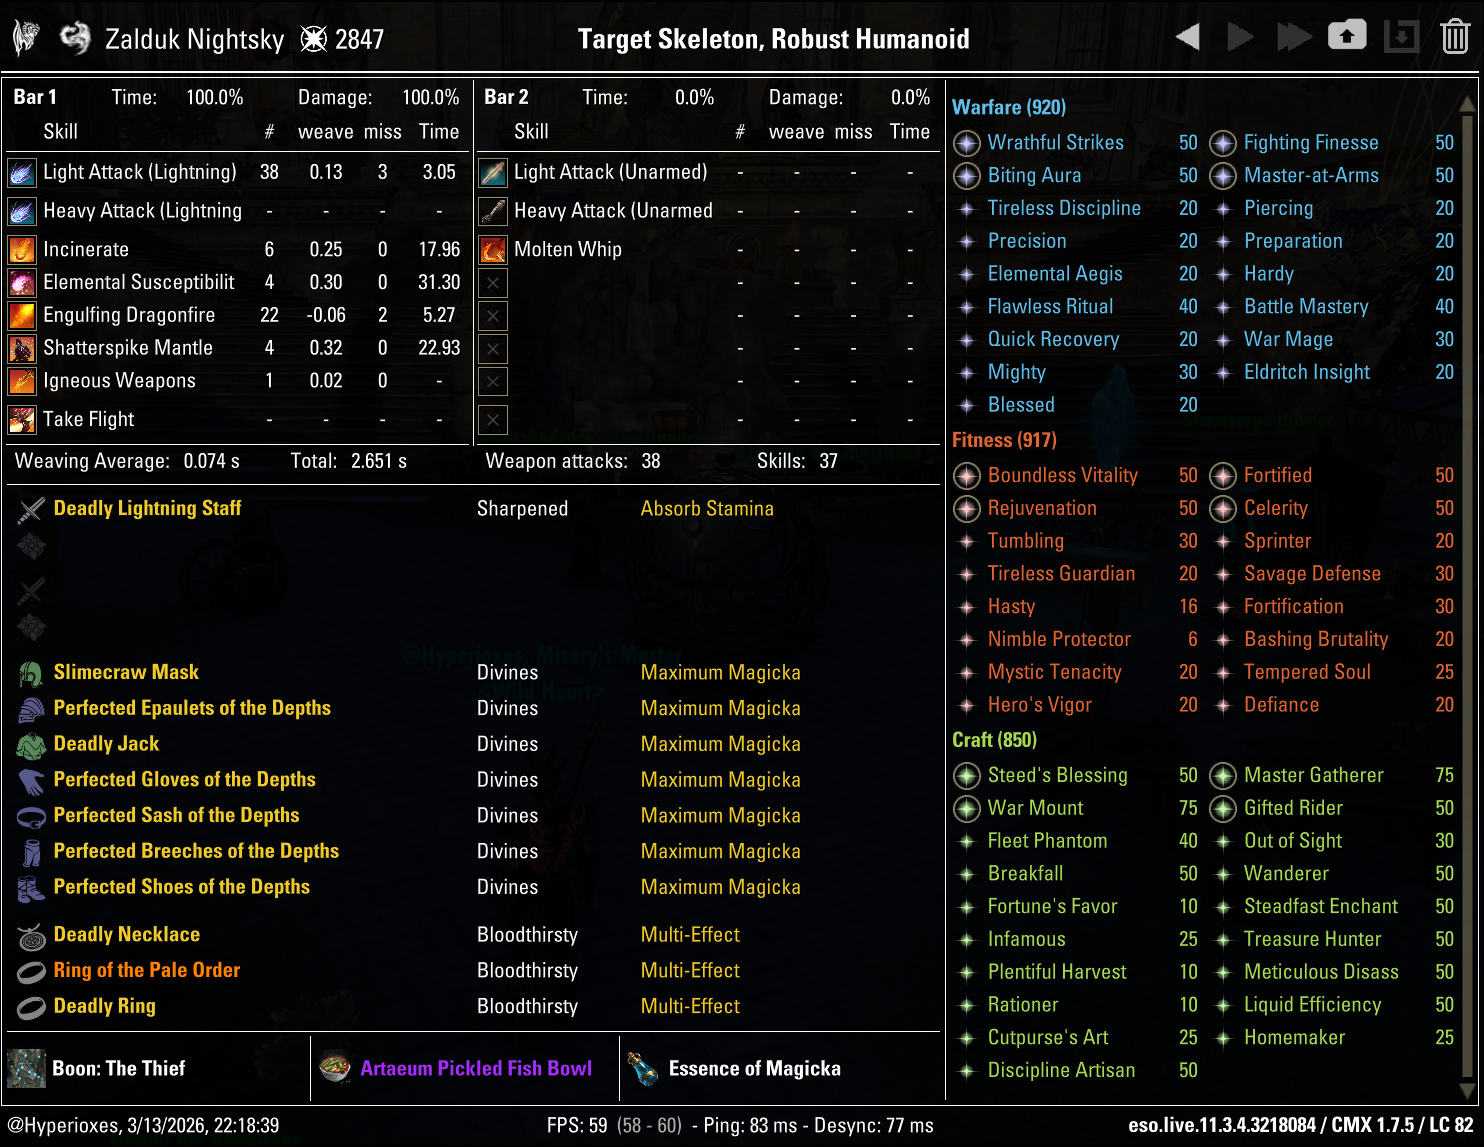
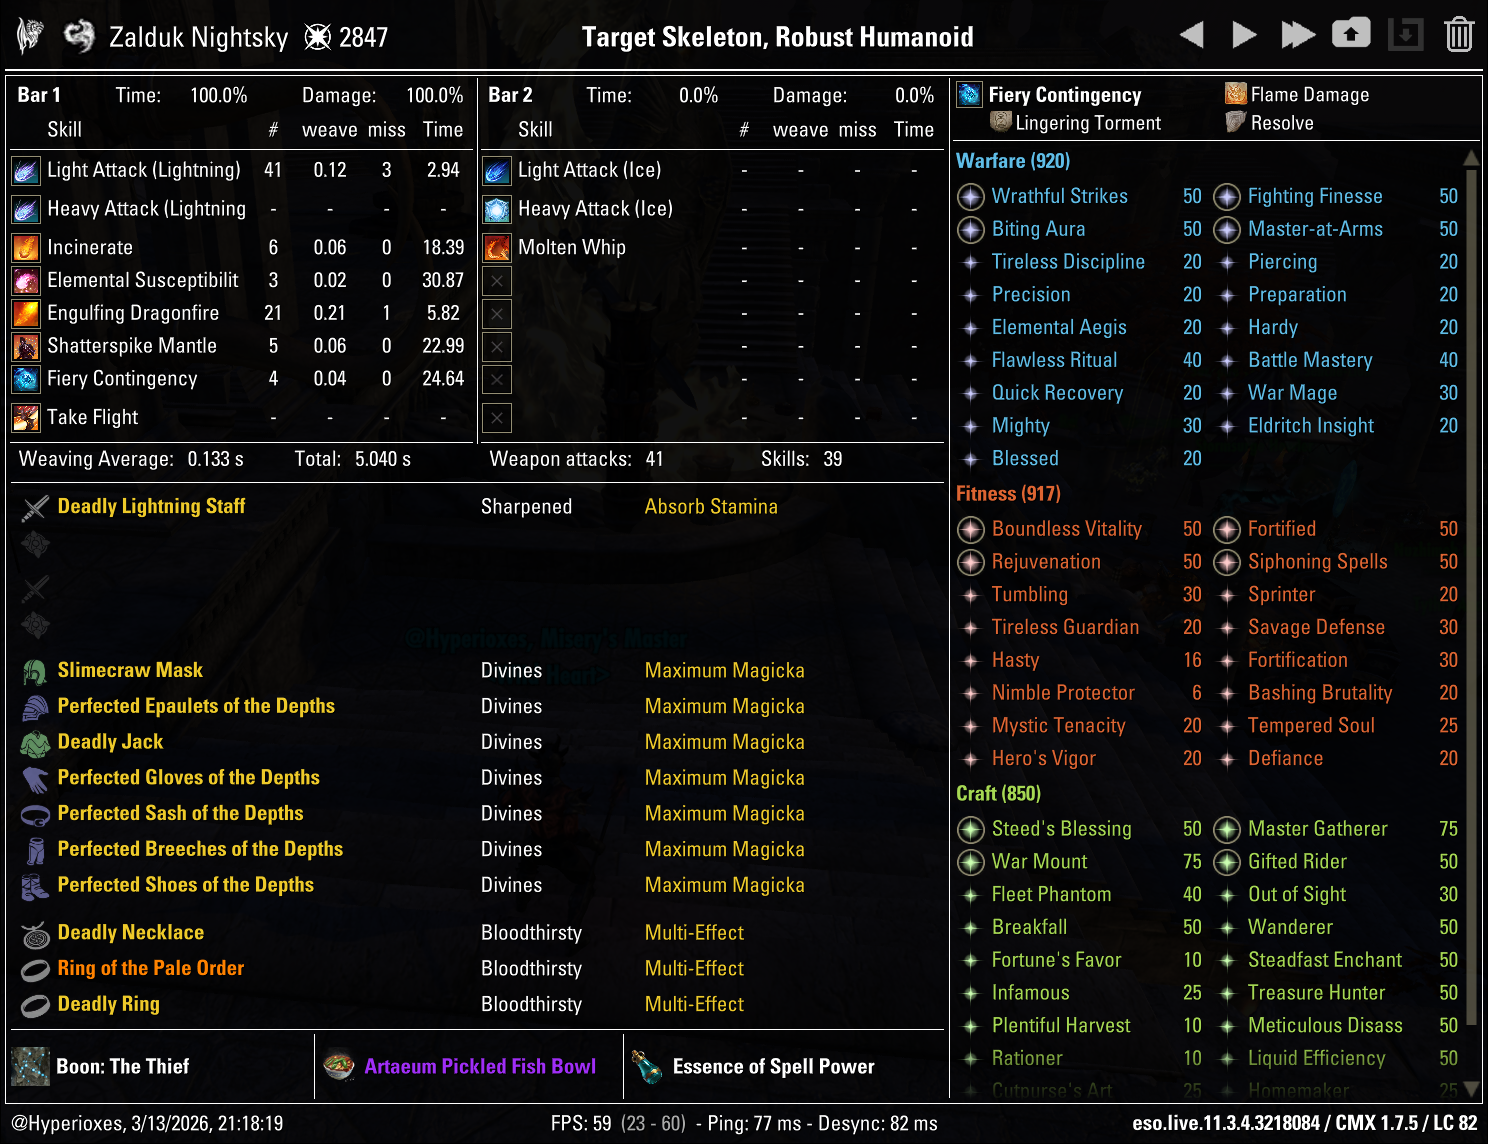
Parses
All parses are recorded on the 6 million Target Dummy

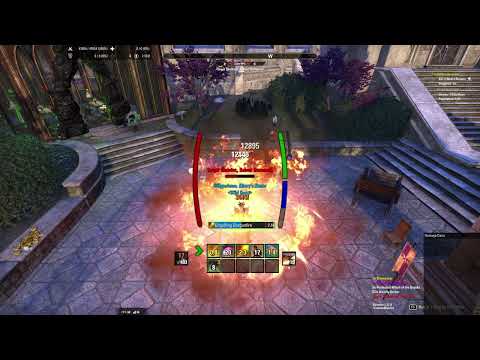

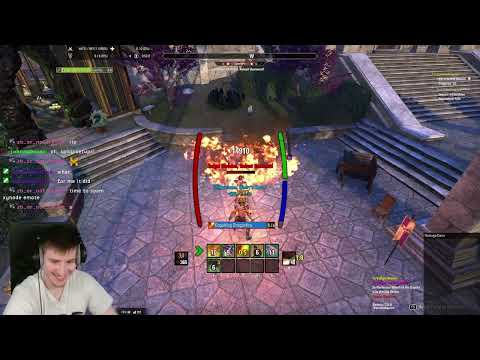
Gameplay
Fashion

| Slot | Style | Dyes |
|---|---|---|
| Head |
Legate's Black
Legate's Black
|
|
| Shoulders |
Legate's Black
|
|
| Chest |
Legate's Black
Legate's Black
Legate's Black
|
|
| Hands |
Legate's Black
Legate's Black
Legate's Black
|
|
| Belt |
|
|
| Legs |
Legate's Black
Legate's Black
Legate's Black
|
|
| Feet |
Legate's Black
Legate's Black
Legate's Black
|
|
| Frontbar Main Hand |
Empty
Legate's Black
Legate's Black
|
|
| Frontbar Off Hand |
Empty
Legate's Black
Legate's Black
|
|
| Slot | Collectible |
|---|---|
| Skin | |
| Personality |
FAQ
If you want a simpler build that doesn't require bar swapping. The one bar version still solos Veteran Hard Mode dungeons and is built around the same Engulfing Dragonfire gameplay. If you want more damage, check out the two bar Breath Dragonknight.
This build uses a Lightning Staff for Elemental Susceptibility (Major Breach). You can switch to an Inferno Staff with minimal loss, or an Ice Staff with a bit more loss. This guide also includes a Sword and Shield setup that parsed ≈7% less, using Pierce Armor for Major Breach instead. Any other weapon type would need Razor Caltrops for Major Breach, which would be a bigger DPS loss.
No, you don't need a different setup. Use the base skills and the Instanced gear setup from this guide for both Maelstrom Arena and Vateshran Hollows.
THANKS FOR READING

If you've enjoyed this guide and want to support me, you can do so through Patreon. Your support will help me produce more guides.